
Chevrolet Sonic Repair Manual: Engine Front Cover and Oil Pump Assemble
- Oil Pump Installation
-
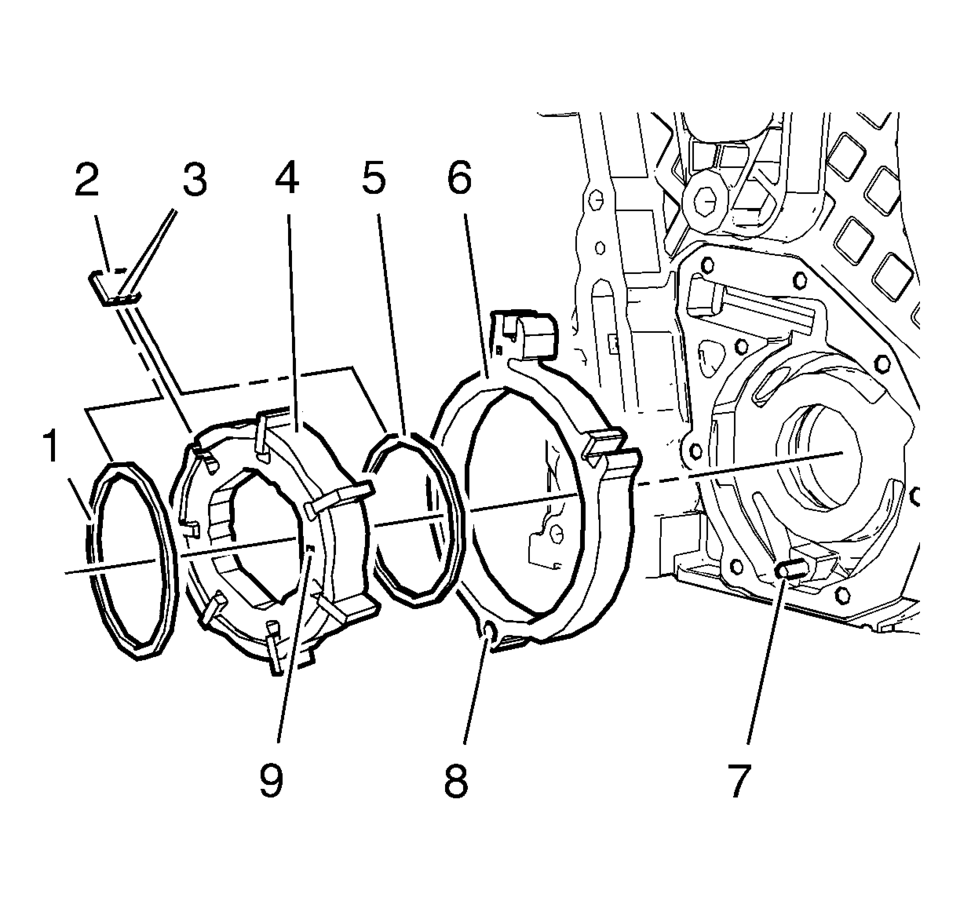
- Install the oil pump components in the following order:
- Install the oil pump slide (6).
- Install the inner oil pump vane ring (5).
- Install the oil pump vane rotor (4).
- Install the 6 oil pump vanes (2).
- Install the outer oil pump vane ring (1).
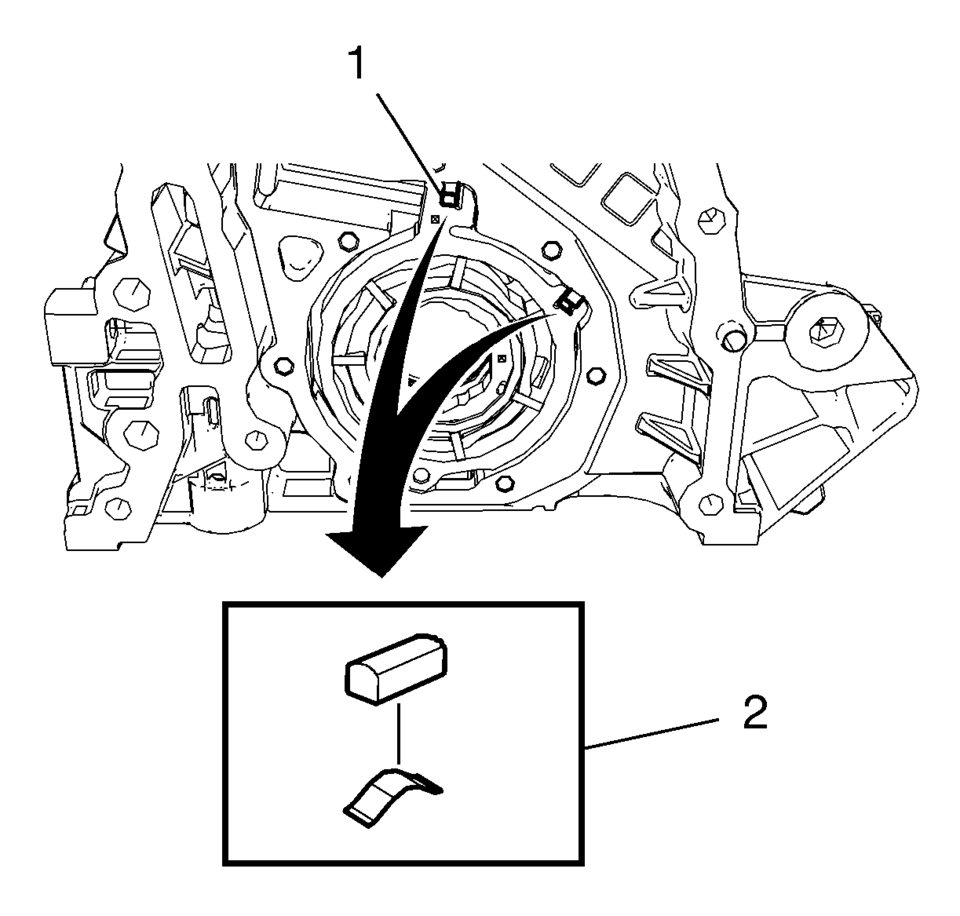
- Install the 2 oil pump slide seals and the 2 oil pump slide seal springs (2) in the position as shown to the 2 grooves (1) of the oil pump slide.
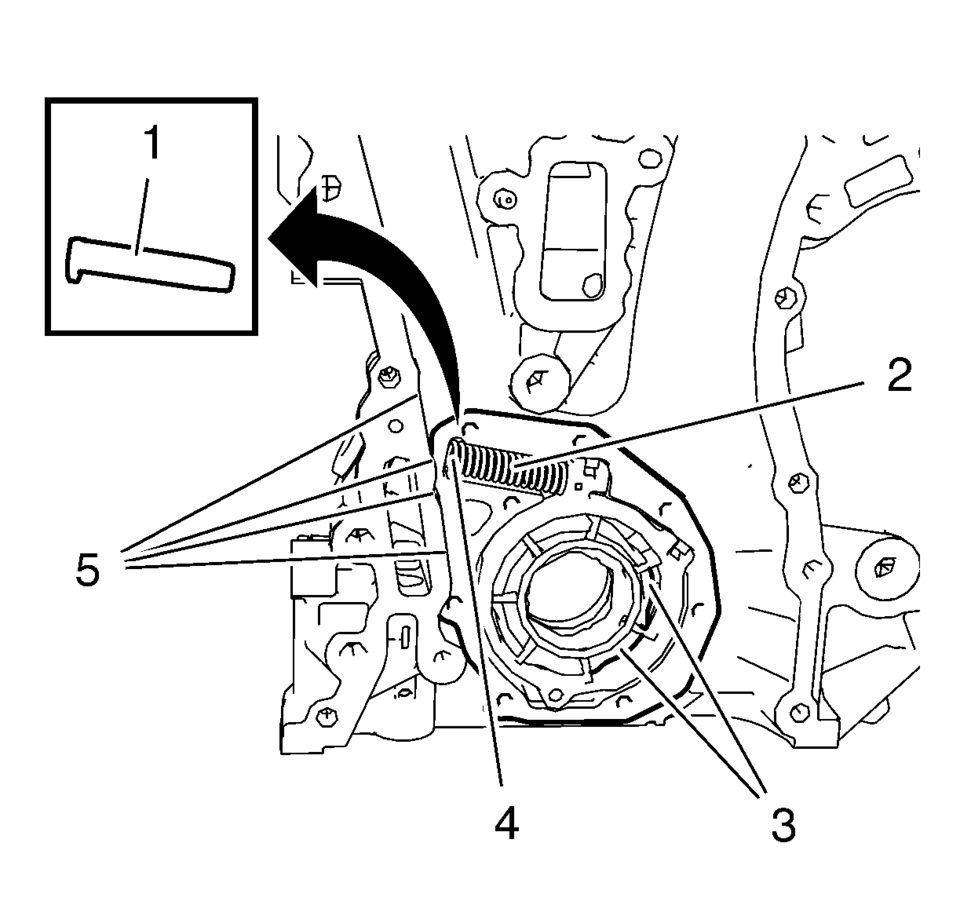
- Protect the engine front cover edge (5) with a suitable piece of plastic.
- Install the oil pump slide spring pin along with the oil pump slide spring (4). Use a screwdriver to compress the oil pump slide spring. The flat side of oil pump slide spring pin must face upwards.
- Measure the oil pump clearances to ensure a correct installation of the oil pump components. Refer to Engine Front Cover and Oil Pump Cleaning and Inspection.
- Lubricate the oil pump vanes, the oil pump vane rotor, the oil pump slide spring and the area (3) with engine oil.
- Inspect the oil pump slide spring mechanism for functionality.
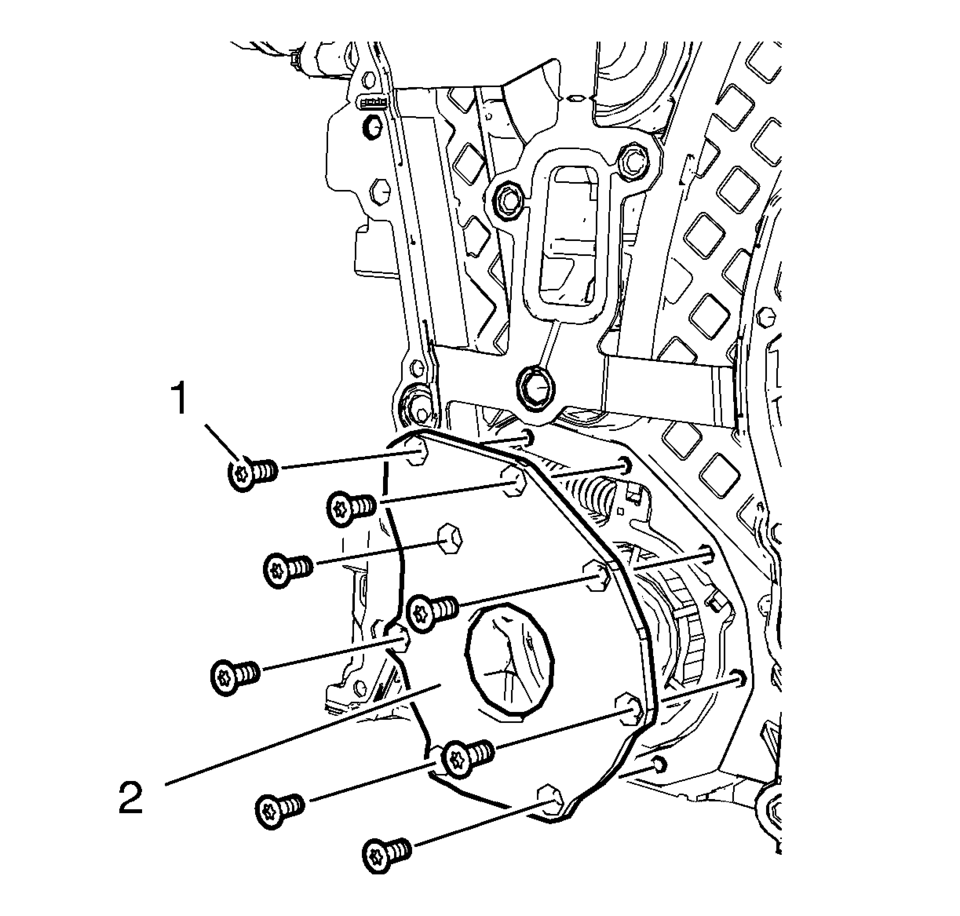
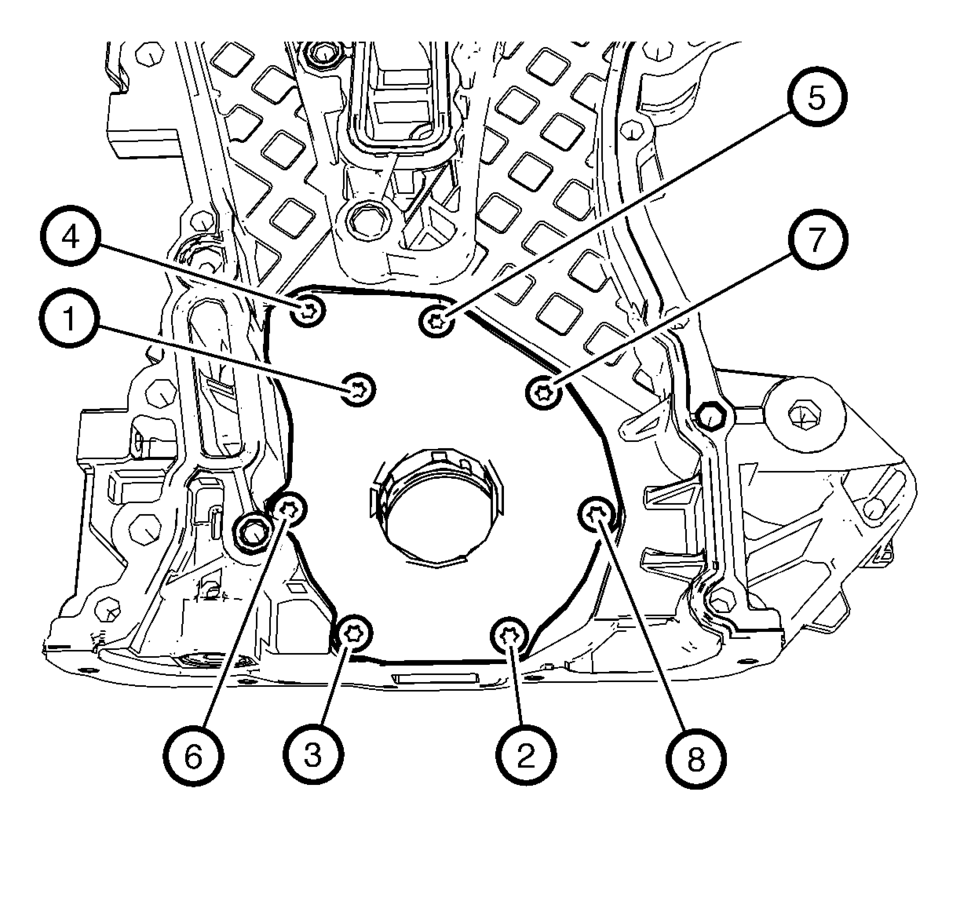
- Install the oil pump cover (2) and the 8 oil pump cover bolts (1).
- Tighten the oil pump cover bolts in a sequence as shown to 8 Y (71 lb in)
.
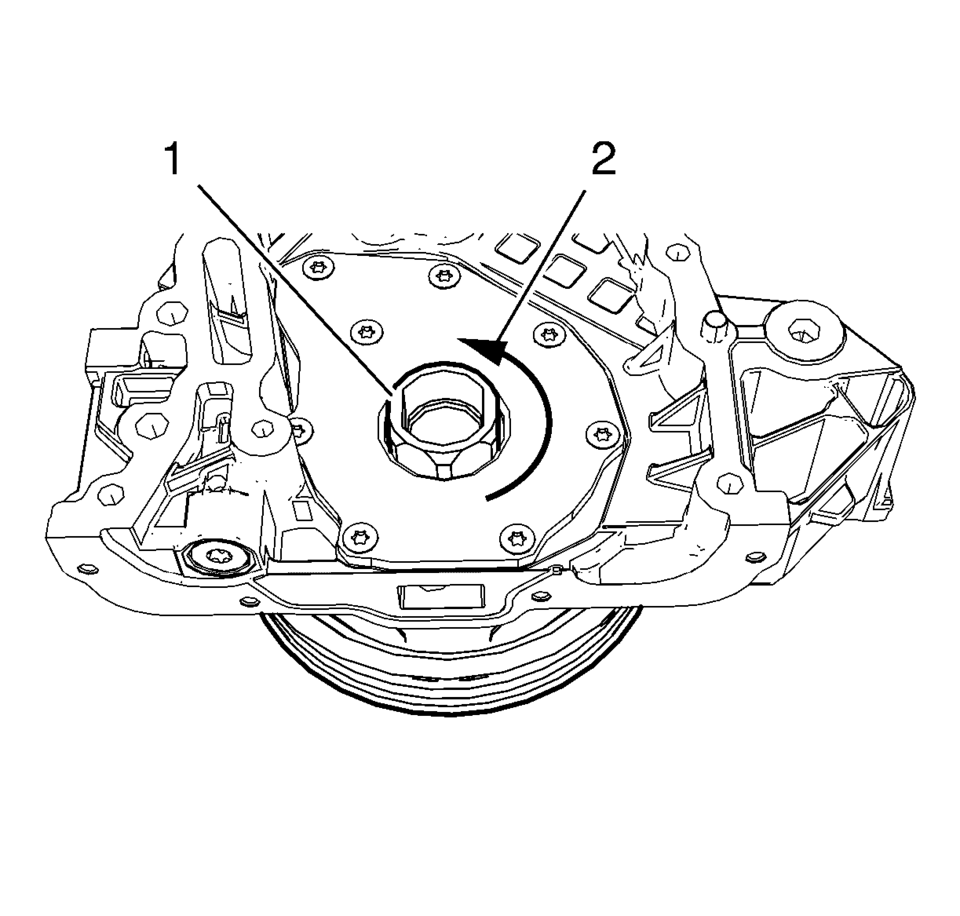
- Install the crankshaft balancer (1) and rotate in the direction shown (2) in order to inspect the function of the oil pump mechanism. The crankshaft balancer should rotate easily.
Note:
The oil pump slide spring and pin, as well as the slide seal and slide seal spring can be ordered as single parts. All other oil pump components can only be ordered as a replacement kit.
Note:
The bore (8) in the oil pump slide must fit smooth-running and without clearance to the oil pump slide pivot pin (7).
Note:
Mind the installation position of the oil pump vane rotor (4). The mark (9) must point to direction of the oil pump cover.
Note:
Mind the localized flats (3) on the oil pump vanes (2) caused by the oil pump vane rings. The localized flats must point to the oil pump vane rotor.
Note:
The length of the removed oil pump slide spring (2) should be 76.5 mm (3.0118 in) for suction engines and 61 mm (2.4016 in) for turbo engines.
Caution:
Refer to Fastener Caution.
- Engine Front Cover Assemble
-
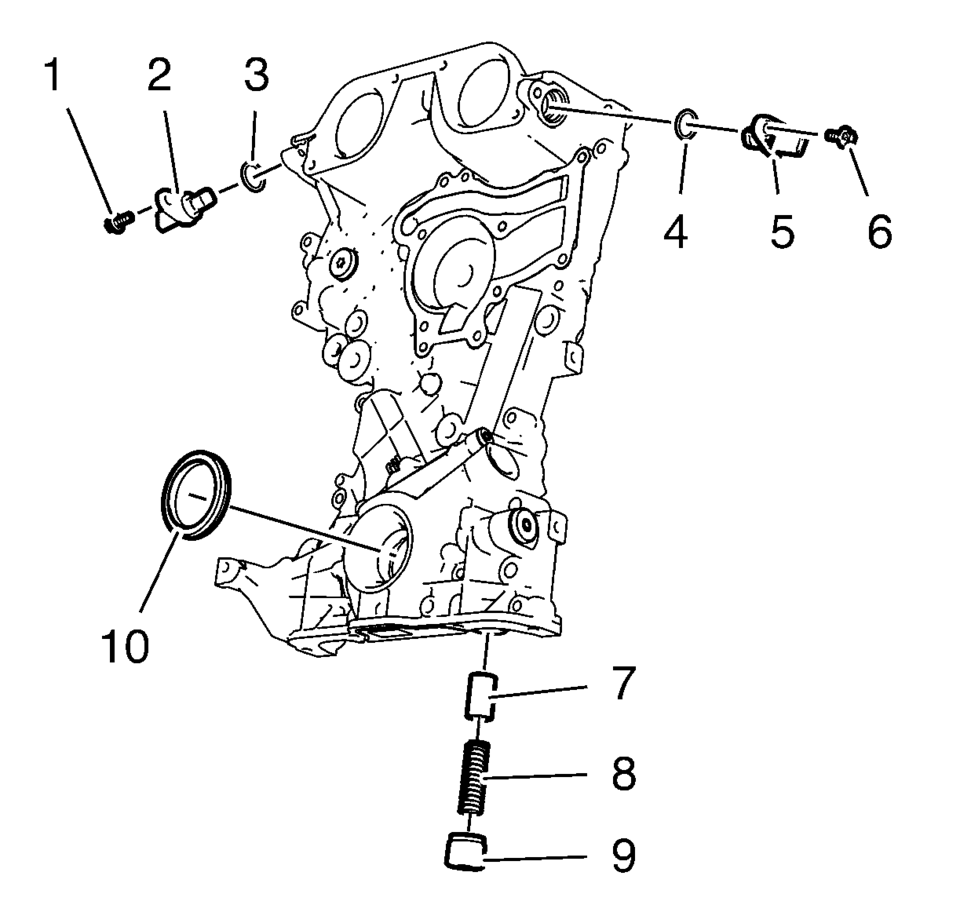
- Install the crankshaft front oil seal (10).
- Install the oil pressure relief valve (7), (8) and (9) and tighten to
50 Y (37 lb ft)
.
- Install the exhaust camshaft position sensor (5) and the seal ring (4).
- Install the exhaust camshaft sensor bolt (6) and tighten to 6 Y (53 lb in)
.
- Install the intake camshaft position sensor (2) and the seal ring (3).
- Install the intake camshaft sensor bolt (1) and tighten to 6 Y (53 lb in)
.
 Oil Pump
...
 Engine Front Cover and Oil Pump Cleaning and Inspection
Engine Front Cover Cleaning Procedure
Clean the engine front cover sealing surface.
Warning: Wear safety glasses when using compressed air in
order to prevent eye injury. ...
Other materials:
Using the Tire Sealant and Compressor Kit to Temporarily Seal and Inflate a
Punctured Tire
When using the tire sealant and compressor kit during cold temperatures, warm
the kit in a heated environment for five minutes. This will help to inflate the
tire faster.
If a tire goes flat, avoid further tire and wheel damage by driving slowly to
a level place. Turn on the hazard warning fl ...
Front Differential Carrier Installation (6T30)
Front Differential Carrier Installation
Callout
Component Name
1
Final Drive Sun Gear
2
Differential Carrier Assembly
...
Fuel Feed Pipe Replacement
Removal Procedure
.-
Remove the fuel feed pressure sensor. Refer to Fuel Pressure Sensor
Replacement - Fuel Feed Pipe.
Disconnect the fuel feed pipe (1). Refer to Plastic Collar Quick Connect
Fitting Service.
Remove the plastic retainer (1) ...

0.0049