
Chevrolet Sonic Repair Manual: Engine Coolant Thermostat Housing Installation
- Clean sealing surface.
- Install a NEW engine coolant thermostat housing seal.
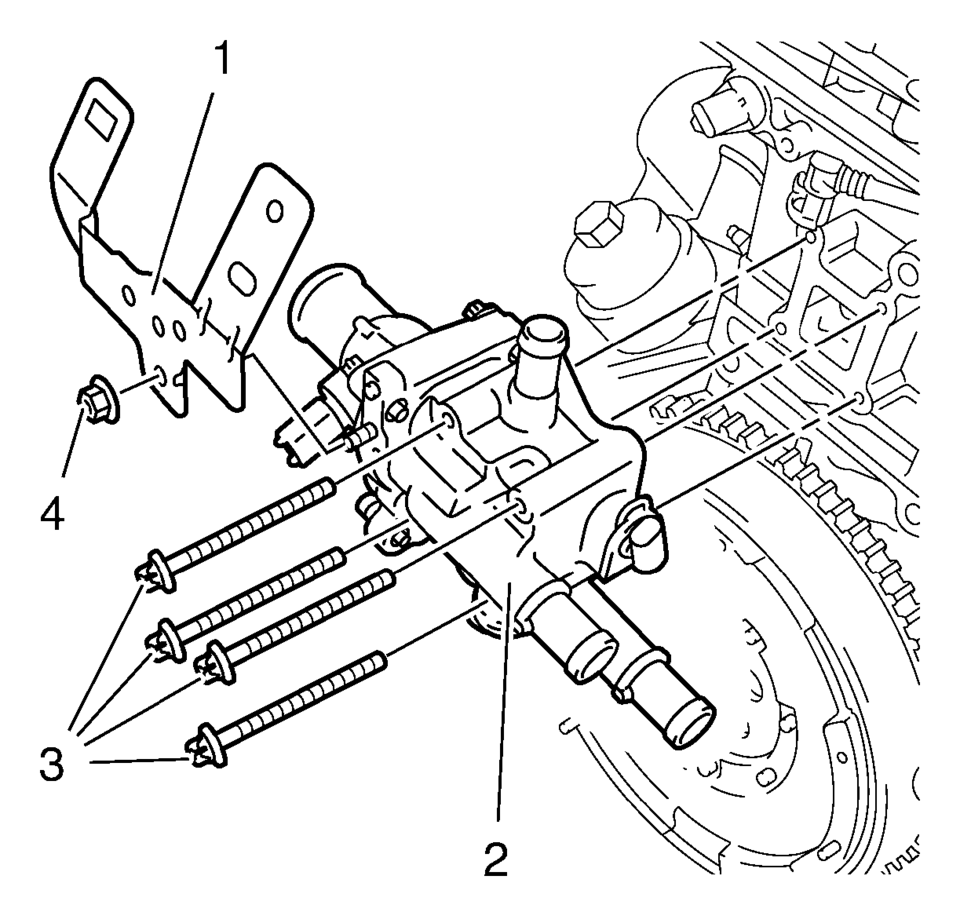
- Install the engine coolant thermostat housing (2).
- Install the 4 engine coolant thermostat housing bolts (3) and tighten to
2 Y (18 lb in)
.
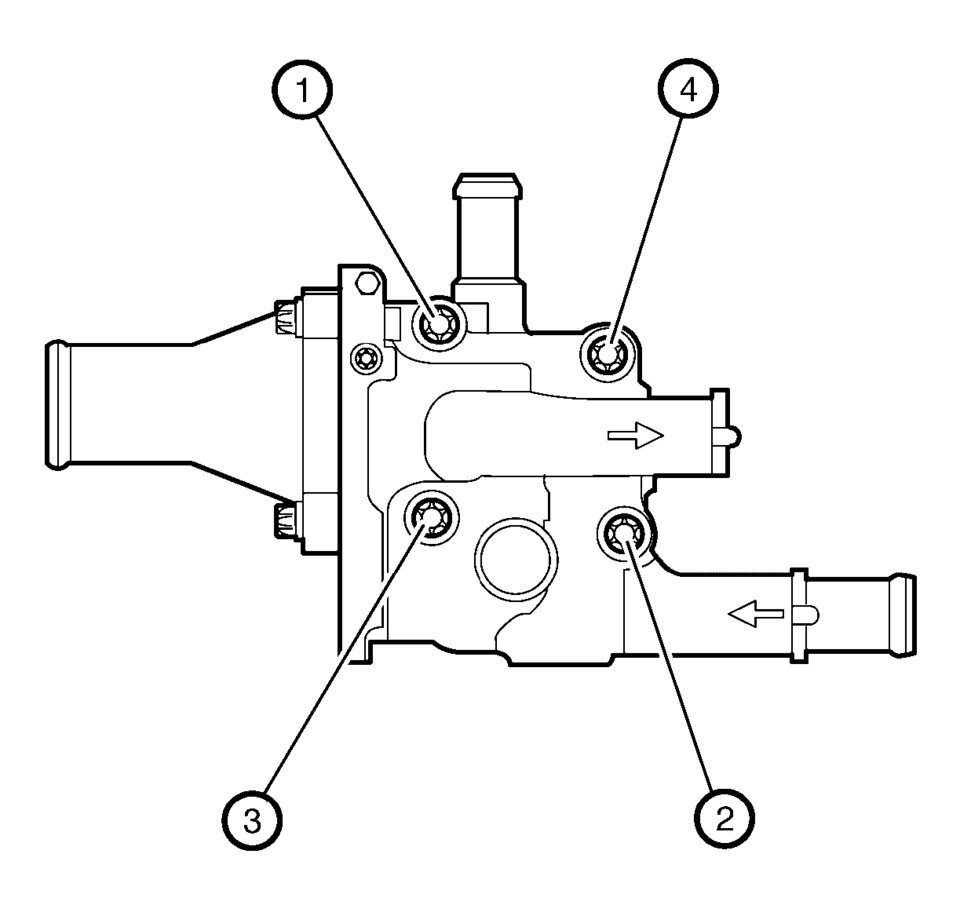
- Tighten the 4 engine coolant thermostat housing bolts to 8 Y (71 lb in)
in sequence (1?E?E?E).
- Install the engine coolant thermostat housing retainer (1).
- Install the engine coolant thermostat housing retainer nut (4) and tighten
to 6 Y (53 lb in)
.
Caution:
Refer to Engine Coolant Thermostat Housing Caution.
Caution:
Refer to Fastener Caution.
Note:
Screw in the 4 bolts until the engine coolant thermostat housing is in contact with the cylinder head.
Caution:
Following the proper fastener tightening sequence and torque is essential. Failure to do so may fracture the thermostat housing.
 Engine Coolant Thermostat Replacement (LUW)
Removal Procedure
Warning: Refer to Battery Disconnect Warning.
Disconnect the battery negative cable. Refer to Battery Negative Cable
Disconnection and Connection.
D ...
 Radiator
...
Other materials:
Engine Oil Change
When a %CHANGE message displays
in the DIC, have the engine oil and filter changed within the next 1 000 km/600
mi. If driven under the best conditions, the engine oil life system might not indicate
the need for vehicle service for more than a year. The engine oil and filter must
be changed ...
Steering Assist with HD map data (a feature of ProPILOT Assist 2.1)
In the Nissan Armada equipped with ProPILOT Assist 2.1, Steering Assist is enhanced
by HD map data, enabling more advanced driving support. When all required conditions
are met, the system indicator turns blue, signaling that enhanced functionality
is active.
In this advanced mode, the Nissan ...
Basic information
WARNING
Incorrect use of the Nissan Armada AEB with Pedestrian Detection system can
lead to serious injury or fatal accidents.
The Nissan Armada AEB system is designed as an additional safety feature
and does not replace attentive and responsible driving. The driver must always
remain a ...

0.0059