Chevrolet Sonic Repair Manual: Evaporative Emission Canister Replacement (Steel Tank)
- Removal Procedure
-
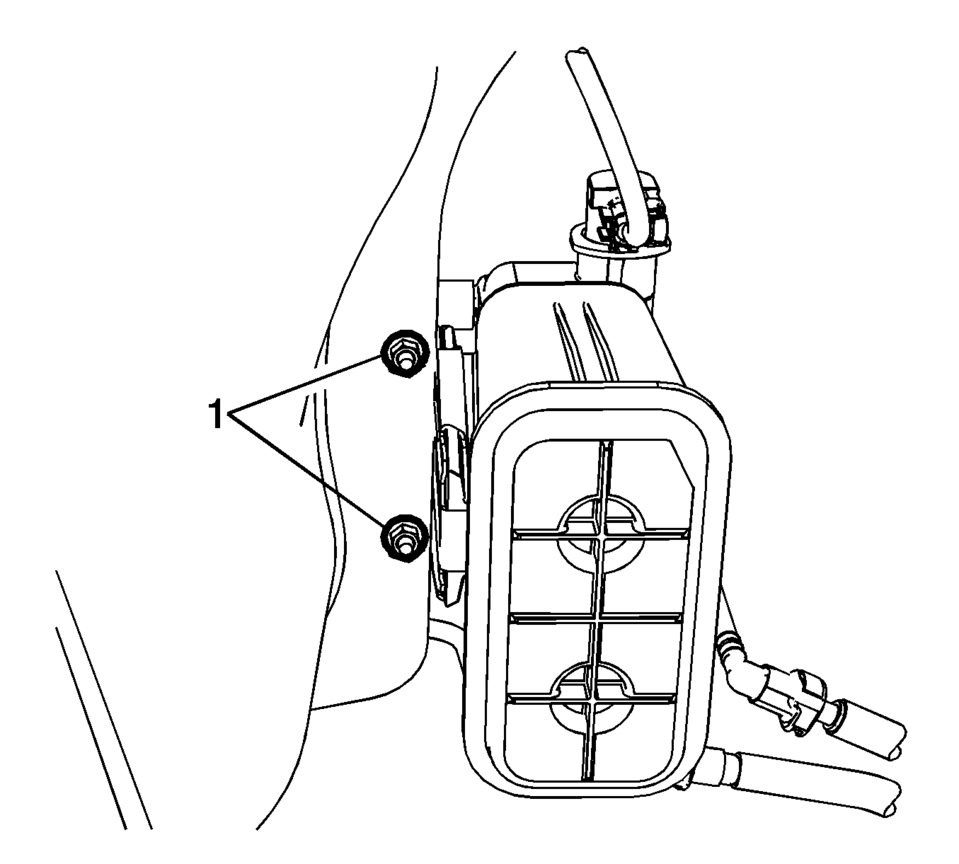
- Remove the evaporative emission canister bracket fasteners (1).
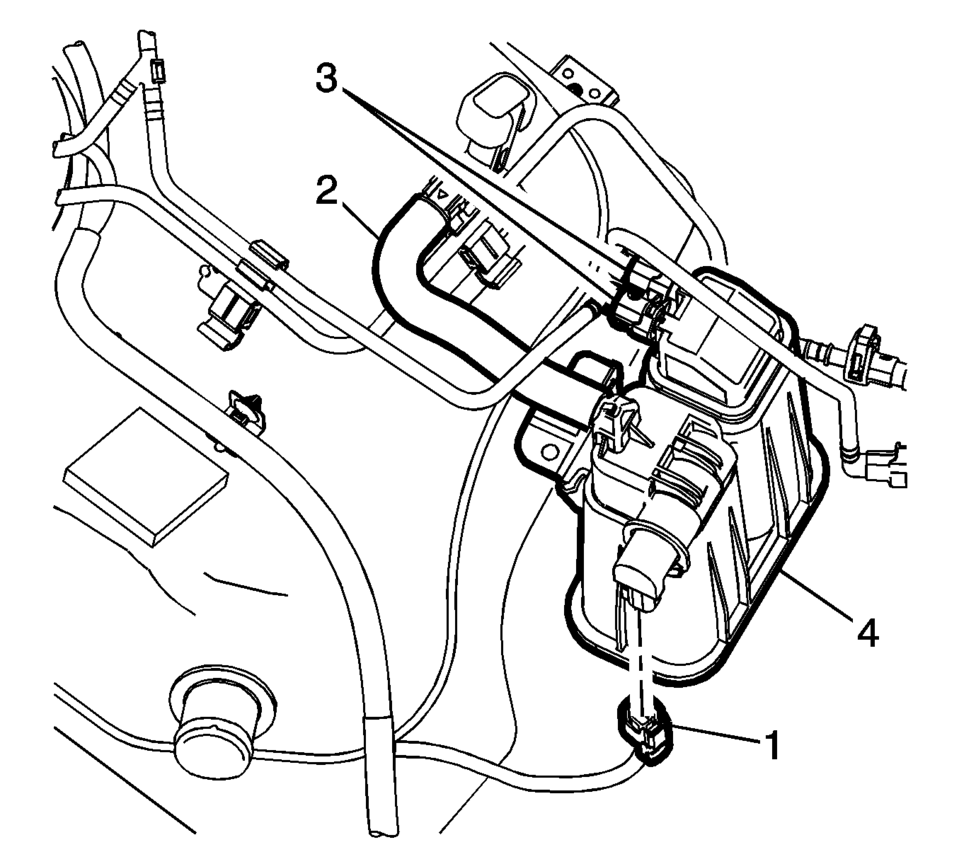
- Disconnect the purge solenoid valve electrical connector (1).
- Disconnect the evaporative emission canister vent hose (2).
- Disconnect the evaporative emission canister pipes (3). Refer to Plastic Collar Quick Connect Fitting Service
- Remove the evaporative emission canister (4).
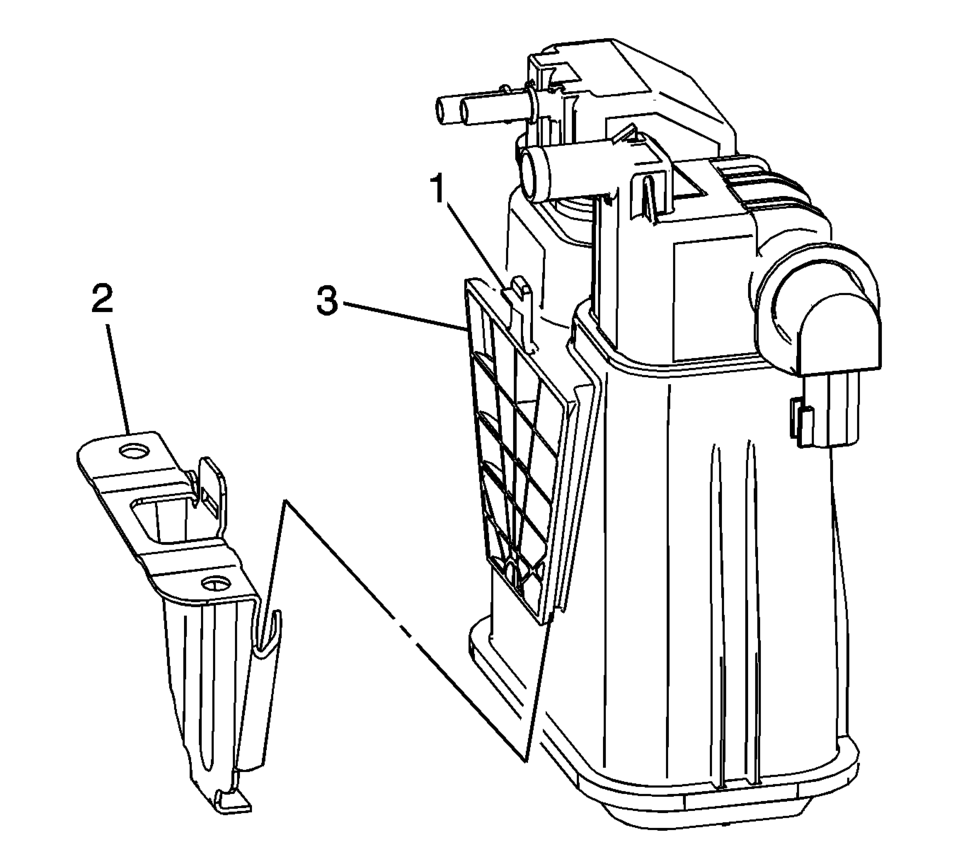
- Release the retaining tab (1) and remove the evaporative emission canister (2).
- Installation Procedure
-
- Slide the evaporative emission canister (3) into the evaporative emission canister bracket (2) until the retaining tab (1) snaps into position.
- Install the evaporative emission canister (4) into position.
- Connect the evaporative emission canister pipes (3). Refer to Plastic Collar Quick Connect Fitting Service
- Connect the evaporative emission canister vent hose (2).
- Connect the purge solenoid valve electrical connector (1).
- Install the evaporative emission canister bracket fasteners (1) and
tighten to 10 Y (89 lb in)
.
 Evaporative Emission Canister Replacement
Removal Procedure
Raise and support the vehicle. Refer to Lifting and Jacking the Vehicle.
Remove the EVAP canister cover fasteners (1) and cover (2).
Warn ...
 Evaporative Emission Canister Purge Solenoid Valve Replacement
Evaporative Emission Canister Purge Solenoid Valve Replacement
Callout
Component Name
1
Purge Pipe Fittings (Qty: 2)
...
Other materials:
Taillamps, Turn Signal, Stoplamps, and Back-Up Lamps
Sedan Taillamp Shown, Hatchback Taillamp Similar
1. Back-up Lamp
2. Turn Signal Lamp
3. Stop Lamp/Taillamp
4. Sidemarker Lamp
To replace one of these bulbs:
1. Open the trunk.
2. Remove the two screws, which secure the taillamp assembly.
3. Remove the taillamp assembly by pulling it stra ...
Front Floor Console Cover Replacement (Automatic Transmission)
Front Floor Console Cover Replacement
Callout
Component Name
1
Front Floor Console Cover Assembly
Procedures
Apply the parking brake.
Move the shifter from ?€?Park?€? to the ?€?Neutral?€? position.
...
Lubrication Description
Oil is applied under pressure to the crankshaft (8), connecting rods (5), camshaft
adjuster (1), camshaft bearing surfaces (3) and valve tappets (4). All other moving
parts are lubricated by gravity flow or splash. Oil enters the rotor type oil pump (10)
...

0.0071