Chevrolet Sonic Repair Manual: Fuel Tank Filler Pipe Replacement
- Removal Procedure
-
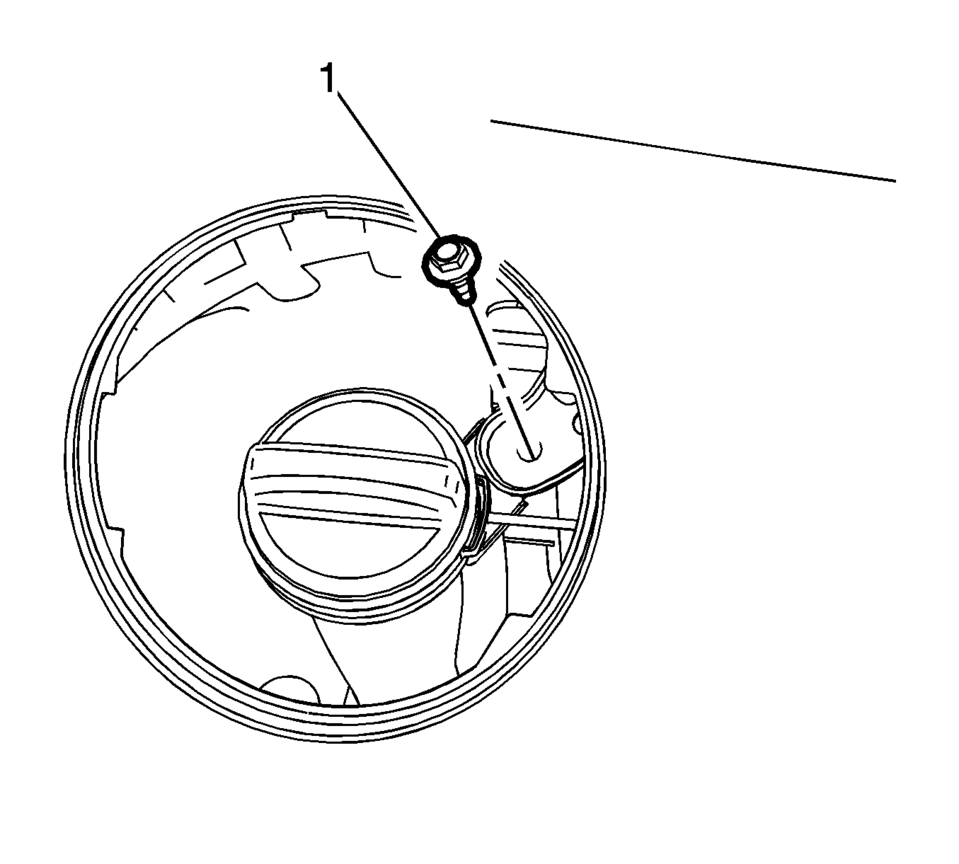
- Remove the bracket fastener (1).
- Lift and support the vehicle. Refer to Lifting and Jacking the Vehicle.
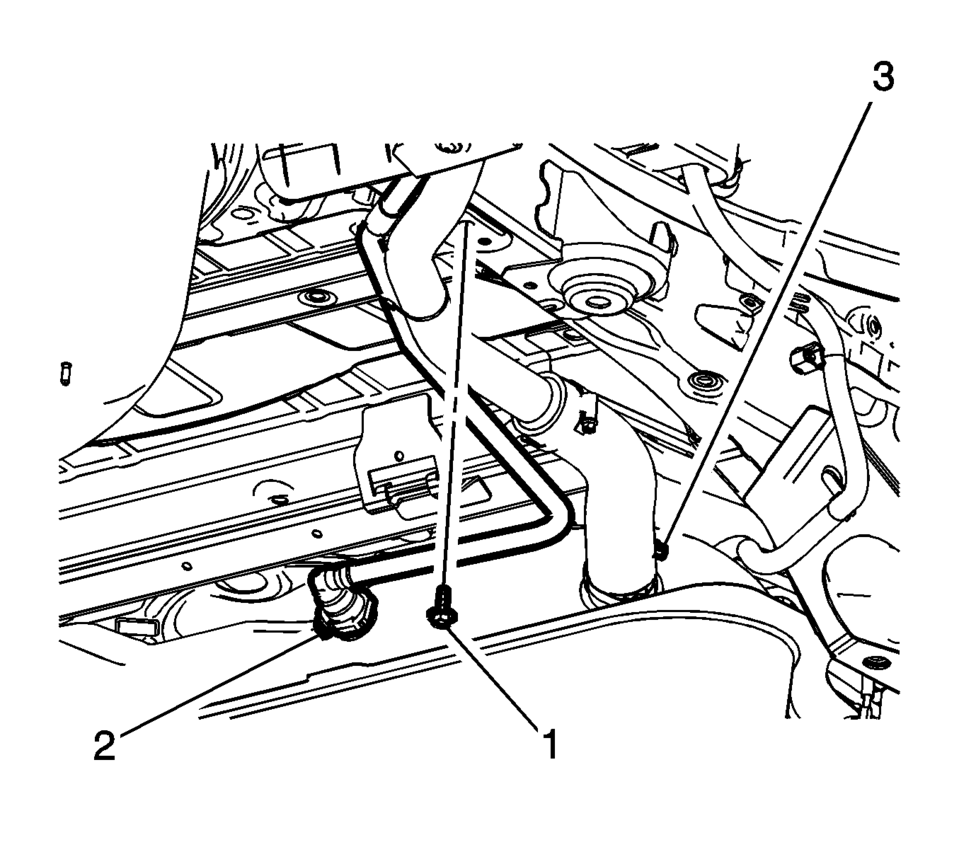
- Remove the fuel tank filler pipe bracket fastener (1).
- Disconnect the vent hose (2). Refer to Plastic Collar Quick Connect Fitting Service.
- Loosen the filler pipe hose clamp (3).
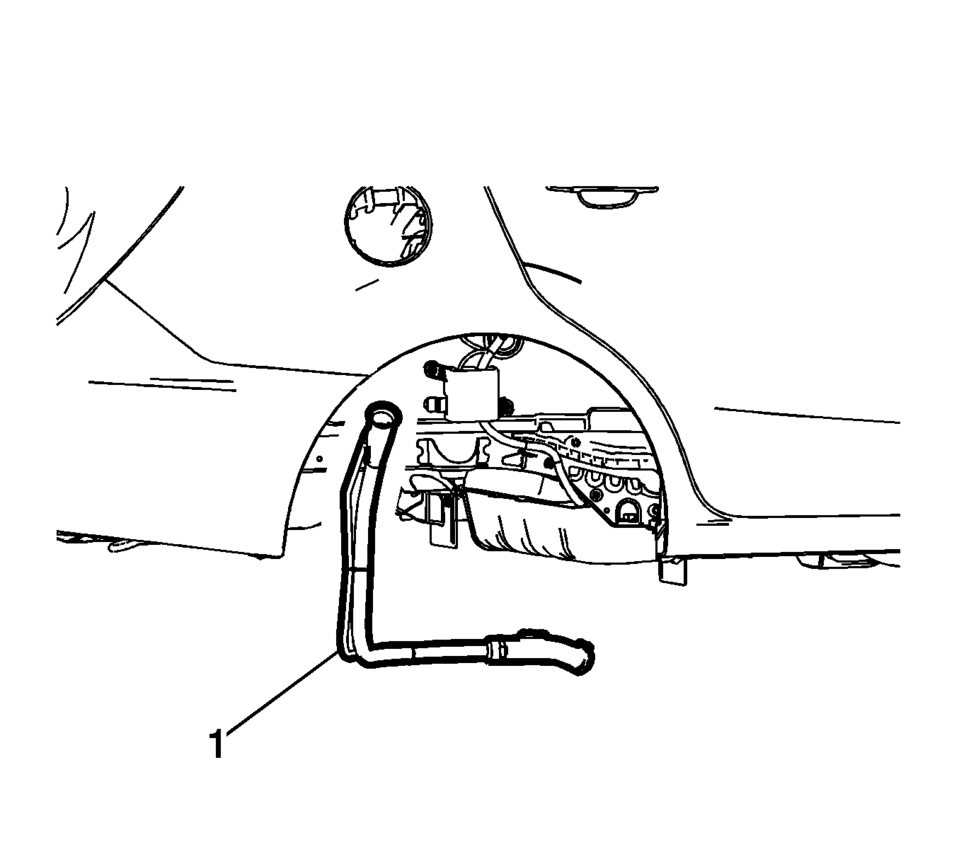
- Remove the fuel tank filler pipe (1).
- Installation Procedure
-
- Install the fuel tank filler pipe (1).
- Tighten hose clamp (3) to 4 Y(35 lb in)
.
- Connect the vent hose (2). Refer to Plastic Collar Quick Connect Fitting Service.
- Tighten the filler pipe bracket fastener (1) to 9 Y(89 lb in)
.
- Install the bracket fastener (1) and tighten to 9 Y(89 lb in).
Caution:
Refer to Fastener Caution.
 Fuel System Description
Fuel System Overview
The fuel system is an electronic returnless on-demand design. A returnless
fuel system reduces the internal temperature of the fuel tank by not returning
hot fuel f ...
 Fuel Tank Filler Pipe Replacement (Steel Tank)
Removal Procedure
Remove the fuel filler door housing. Refer to Fuel Tank Filler Door
Latch Housing Replacement.
Remove the bracket fastener (1).
Lift and ...
Other materials:
Automatic Door Locks
The vehicle is programmed so that when the doors are closed, the ignition is
on, and the shift lever is moved out of P (Park) for automatic transmissions, or
when the vehicle speed is above 13 km/h (8 mph) for manual transmissions, the doors
and the trunk/liftgate will lock.
To unlock the doo ...
Liftgate Trim Finish Panel Replacement (Hatchback)
Liftgate Trim Finish Panel Replacement
Callout
Component Name
1
Liftgate Trim Finish Panel Fastener
Caution: Refer to Fastener Caution.
2
Liftgate Trim Finish Panel Retainer (Qty: ...
Crankshaft and Bearing Removal
Identify all the connecting rod bearing caps (1).
Remove the 4 bolts.
Remove the connecting rod bearing caps 1 and 4 (1).
Turn the crankshaft through 180°.
Remove the 4 bolts.
Remove the connecting rod bearing caps 2 and 3 ( ...

0.0082