Chevrolet Sonic Repair Manual: Fuel Tank Filler Pipe Replacement (Steel Tank)
- Removal Procedure
-
- Remove the fuel filler door housing. Refer to Fuel Tank Filler Door Latch Housing Replacement.
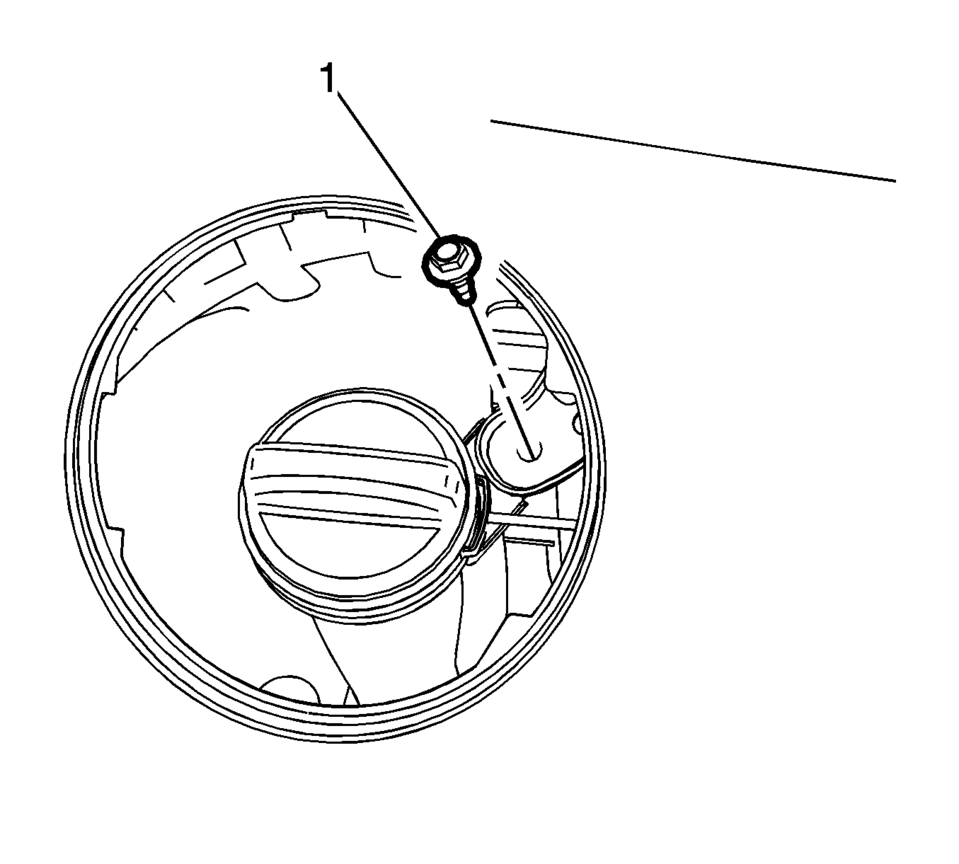
- Remove the bracket fastener (1).
- Lift and support the vehicle. Refer to Lifting and Jacking the Vehicle.
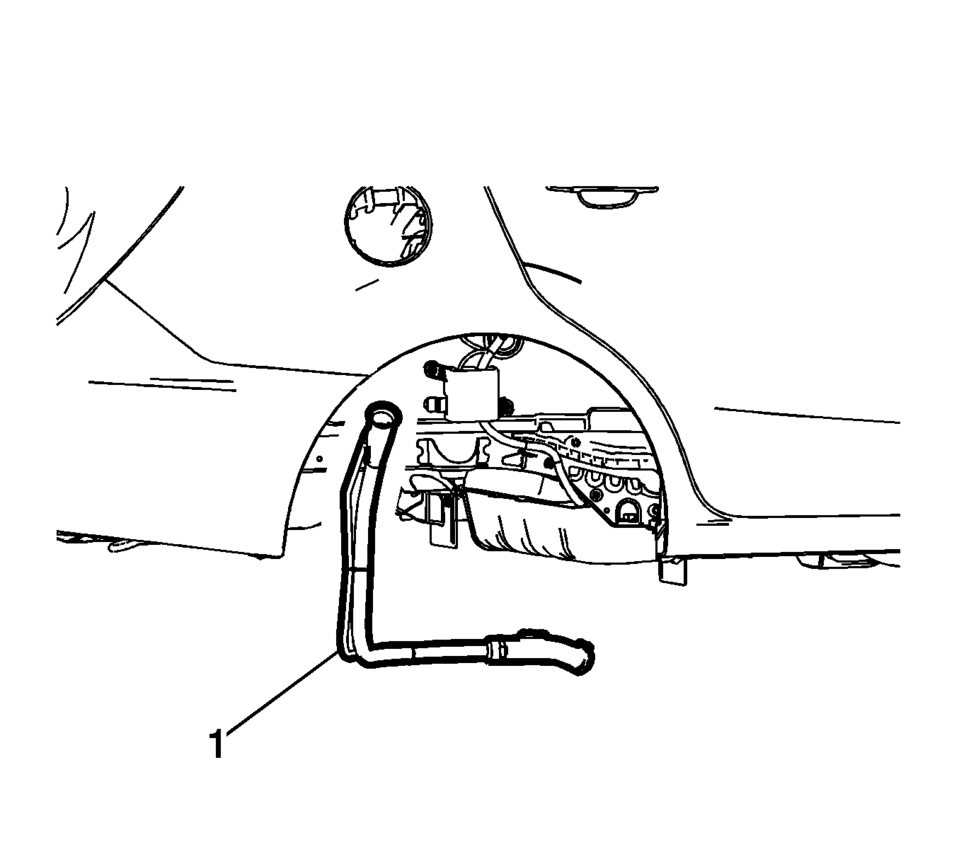
- Remove the fuel tank filler pipe bracket fastener (1).
- Remove the vent hose clamp (2) and vent hose.
- Loosen the filler pipe hose clamp (3).
- Remove the fuel tank filler pipe (1).

- Installation Procedure
-
- Install the fuel tank filler pipe (1).
- Tighten hose clamp (3) to 4 Y(35 lb in)
.
- Install the vent hose clamp (2) and vent hose.
- Tighten the filler pipe bracket fastener (1) to 9 Y(89 lb in)
.
- Install the bracket fastener (1) and tighten to 9 Y(89 lb in)
.
- Install the fuel filler door housing. Refer to Fuel Tank Filler Door Latch Housing Replacement.
Caution:
Refer to Fastener Caution.
 Fuel Tank Filler Pipe Replacement
Removal Procedure
Remove the bracket fastener (1).
Lift and support the vehicle. Refer to Lifting and Jacking the Vehicle.
Remove the fuel tank filler pipe ...
 Fuel Injector Replacement
Fuel Injector Replacement
Callout
Component Name
Preliminary Procedure
Disconnect battery negative cable. Refer to Battery Negative ...
Other materials:
Brake Drum Surface and Wear Inspection
Special Tools
CH-8001 Dial Indicator Set
For equivalent regional tools, refer to Special Tools.
Warning: Refer to Brake Dust Warning.
With the brake drum removed, clean the brake shoe lining contact surface
of the brake drum with denatured alcohol or an equivalent approved brak ...
Radiator Surge Tank Replacement
Radiator Surge Tank Replacement
Callout
Component Name
Preliminary Procedure
Drain the coolant. Refer to Cooling System Draining and Filling
Remove the engine coolant air bleed hose. Refer to Engine Coolant
Air Bleed ...
Go anywhere in comfort: The 2024 Subaru Outback Touring
My family's history with Outbacks runs deep, starting with our 2017 Premium model and continuing with our current 2022 Wilderness edition. These cars have been more than just modes of transportation; they've been reliable companions on our long journeys from Indianapolis to Dallas, providing comf ...

0.005