Chevrolet Sonic Repair Manual: Headlining Trim Panel Replacement (Sedan without Sunroof)
|
Callout |
Component Name |
|---|---|
|
Warning: Do not attempt to repair or alter the head impact energy-absorbing material glued to the headliner or to the garnish trims. If the material is damaged, replace the headliner and/or the garnish trim. Failure to do so could result in personal injury. Caution: If a vehicle is equipped with a head curtain inflator module ensure that the inflator module and tether are undamaged. If tether or curtain airbag are damaged in any way, they must be replaced. Caution: Use care when working around the head curtain inflator module. Sharp tools may puncture the curtain airbag. If the head curtain inflator module is damaged in any way, it must be replaced.
|
|
|
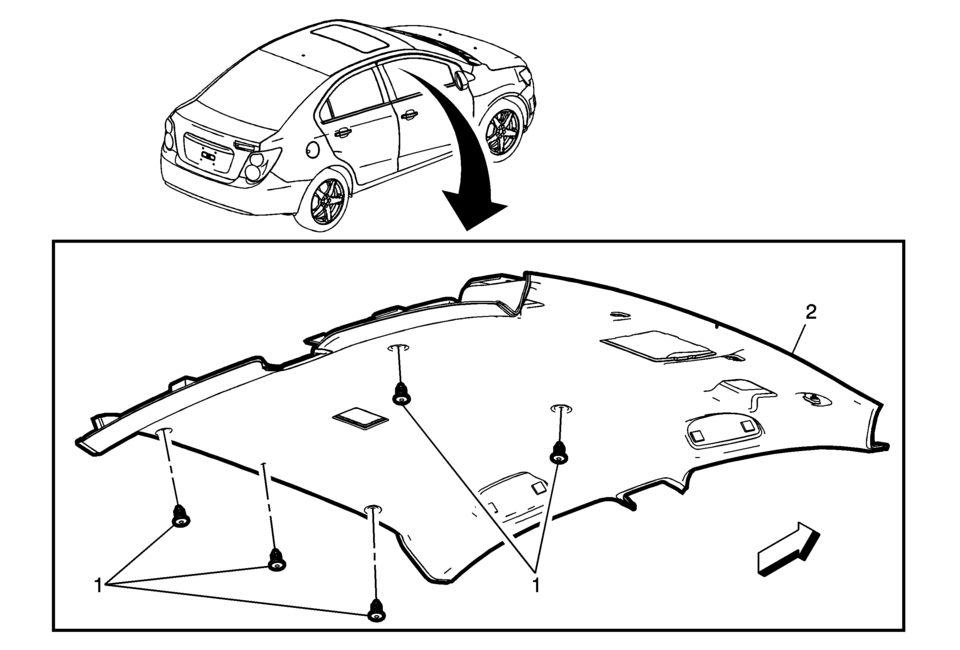
1 |
Headliner Trim Panel Retainer?€‰(Qty:?€‰5) |
|
2 |
Headliner Trim Panel Assembly Procedure
Disconnect the electrical connectors. Note: When installing a new headliner, tape any unused connector to the headliner with a high adhesive tape. |
 Headlining Trim Panel Replacement (Sedan with Sunroof)
Headlining Trim Panel Replacement
Callout
Component Name
Warning: Do not attempt to repair or alter the head impact
energ ...
 Windshield Header Courtesy Lamp Replacement
=i_ii.=========
Windshield Header Courtesy Lamp Replacement
Callout
Component Name
1
Windshield Header Courtesy Lamp
P ...
Other materials:
What Will You See after an Airbag Inflates?
After the frontal airbags and seat-mounted side impact airbags inflate, they
quickly deflate, so quickly that some people may not even realize an airbag inflated.
Roof-rail airbags may still be at least partially inflated for some time after they
inflate. Some components of the airbag module m ...
Rear Seat Shoulder Belt Guide Opening Bezel Replacement
Rear Seat Shoulder Belt Guide Opening Bezel Replacement
Callout
Component Name
1
Rear Seat Shoulder Belt Opening Bezel
Procedure
Push inward and upward from the front of the bezel to release from the
seat back ...
Transmission Assemble (Gen 2)
Special Tools
3-9506289 Universal Adapter
R-0007758 Holding Fixture
S-9407197 Differential Rotating Tool
S-9407198 Differential Bearing Race Wrench
For equivalent regional tools, refer to Special Tools.
Install the clutch and differential housing assembly (1)
onto ...

0.0062