Chevrolet Sonic Repair Manual: Heater and Air Conditioning Control Replacement
|
Callout |
Component Name |
|---|---|
Preliminary Procedures
|
|
|
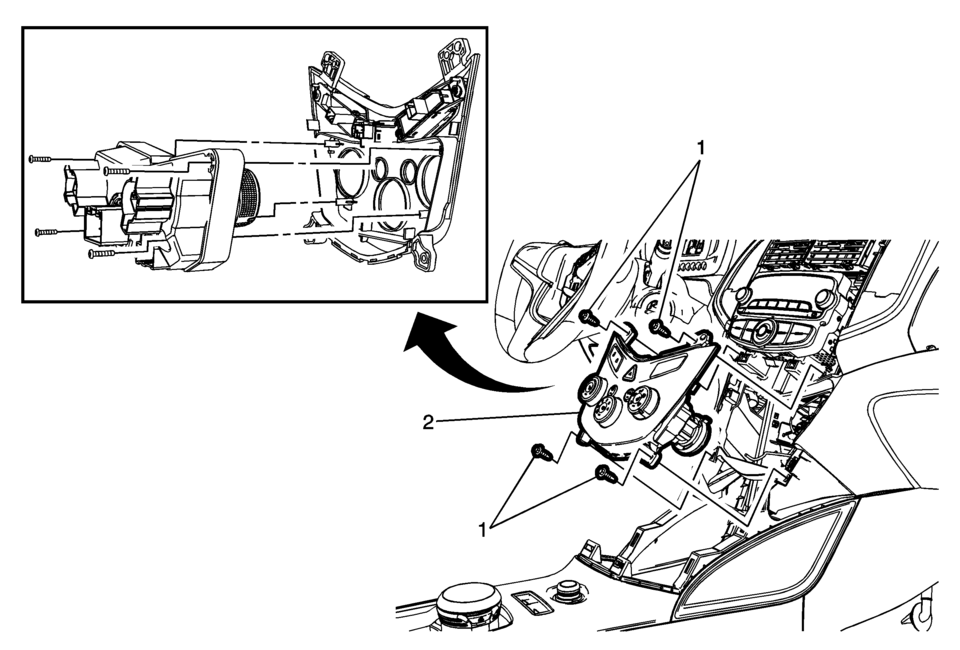
1 |
Heater and Air Conditioning Control Retainer (Qty: 4) Caution: Refer to Fastener Caution.
2.5 Y (22 lb in) |
|
2 |
Heater and Air Conditioning Control Procedure
|
 Front Seat Heater Control Module Replacement
Front Seat Heater Control Module Replacement
Callout
Component Name
1
Front Seat Heater Control Module Fastener (Qty: ...
 Mode Control Cable Replacement (LHD)
Mode Control Cable Replacement
Callout
Component Name
Preliminary Procedures
Remove the heater and air conditioning control.Refer t ...
Other materials:
Plastic Identification and Refinishing Systems
Plastic Identification and Refinishing Systems
Identifying Symbol?€“ Old Symbol in ( )s
Chemical Composition or Plastic Family Name
Typical Area(s) Where Part is Used
Examples of Common / Trade Names
Type of ...
Floor Rear Air Outlet Duct Replacement - Right Side
Floor Rear Air Outlet Duct Replacement - Right Side
Callout
Component Name
Preliminary Procedure
Remove the front floor carpet. Refer to Floor Panel Carpet Replacement.
1
Floor Rear Air Outlet Du ...
Parking Brake Adjustment (Drum Brake)
Note: The park brake cable adjusting nut is a nylon lock type. Use
ONLY HAND TOOLS whenever tightening or loosening the adjusting nut.
Apply and fully release the park brake several times. Verify that the park
brake lever releases completely.
Turn ON the ignition. Verify the red B ...

0.0057