
Chevrolet Sonic Repair Manual: Liftgate Strut Replacement
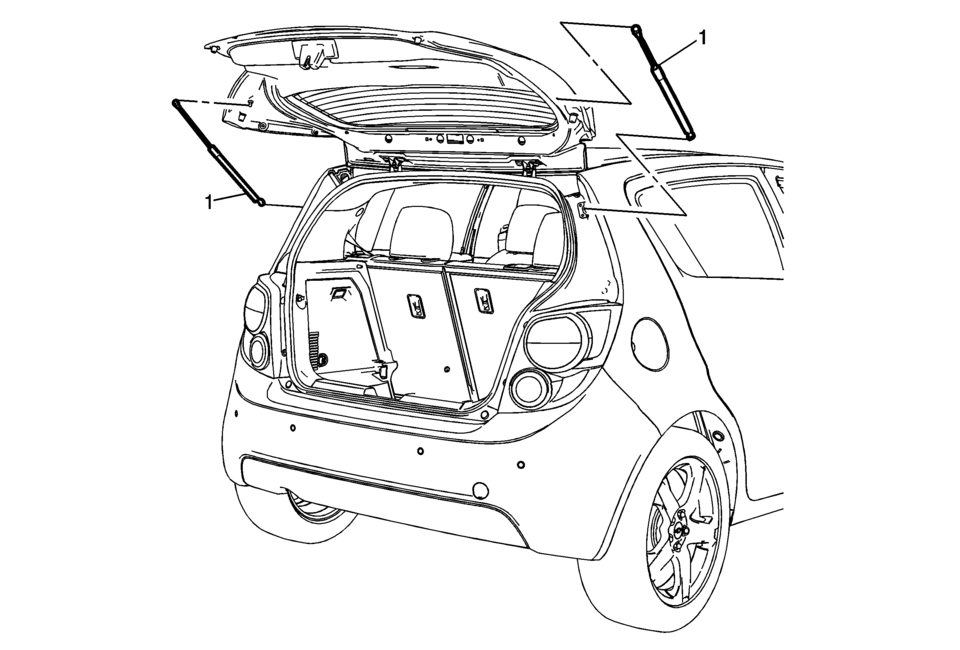
|
Callout |
Component Name |
|---|---|
|
1 |
Liftgate Strut Warning: When a lift gate hold open device is being removed or installed, provide alternate support to avoid the possibility of damage to the vehicle or personal injury. Caution: Apply pressure only at the end of the liftgate/hood assist rod that you are removing or attaching. Do NOT apply pressure to the middle of the rod because damage or bending will result.
|
 Steering Knuckle Replacement
Removal Procedure
Raise and support the vehicle. Refer to Lifting and Jacking the Vehicle.
Remove the tire and wheel assembly. Refer to Tire and Wheel Removal
and Installation. ...
 Strut Assembly Removal and Installation
Special Tools
CH 49375 Strut Rod Nut Socket
For equivalent regional tools, refer to Special Tools
Removal Procedure
Remove the air inlet grille panel. Refer to Air Inlet Grill ...
Other materials:
Window Lockout
This feature prevents the rear passenger windows from operating, except from
the driver position.
Press to disable the rear window
switches.
Press again to return to normal
window operation. ...
Safety Belt Use During Pregnancy
Safety belts work for everyone, including pregnant women. Like all occupants,
they are more likely to be seriously injured if they do not wear safety belts.
A pregnant woman should wear a lap-shoulder belt, and the lap portion should
be worn as low as possible, below the rounding, throughout ...
Rear Window Wiper Motor Replacement (Hatchback)
Rear Window Wiper Motor Replacement
Callout
Component Name
Preliminary Procedure
Open and support the liftgate assembly.
Remove the rear window wiper arm assembly. Refer to Rear Window
Wiper Arm Replacement.
Remove th ...

0.0067