Chevrolet Sonic Repair Manual: Rear Side Door Upper Front Auxiliary Weatherstrip Retainer Replacement
|
Callout |
Component Name |
|---|---|
|
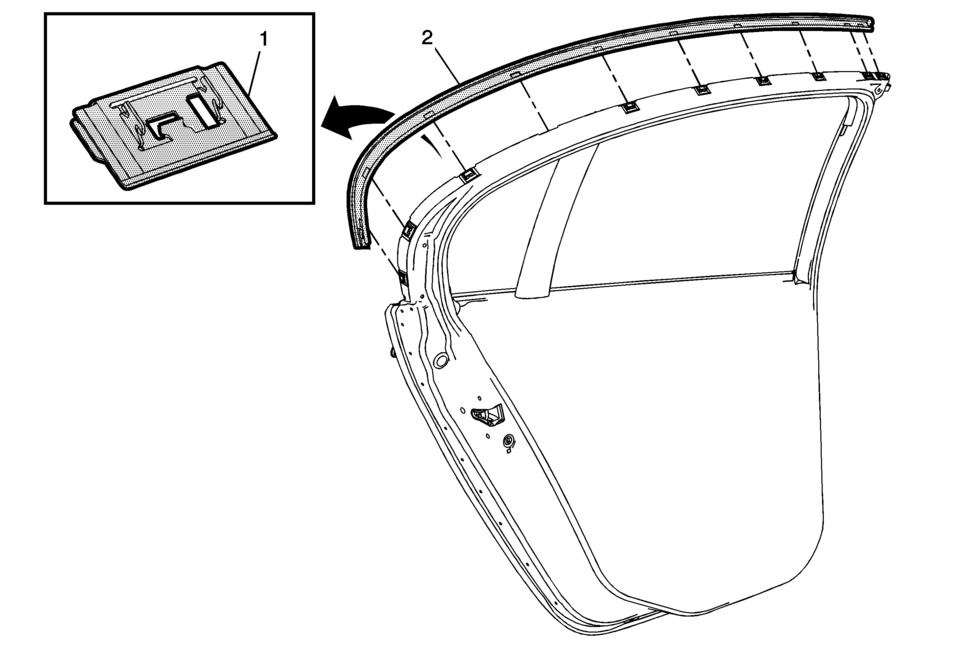
1 |
Front Side Door Upper Front Auxiliary Weatherstrip Retainer (Qty:?€‰10) Note: If the retainers are damaged when removing they must be replaced. |
|
2 |
Front Side Door Upper Front Auxiliary Weatherstrip Retainer Procedure
|
 Rear Compartment Lid Weatherstrip Replacement
Rear Compartment Lid Weatherstrip Replacement
Callout
Component Name
1
Rear Compartment Lid Weatherstrip
Procedure
...
 Rear Side Door Weatherstrip Replacement - Body Side
Rear Side Door Weatherstrip Replacement - Body Side
Callout
Component Name
Preliminary Procedures
Remove the upper center pillar tr ...
Other materials:
Remote Keyless Entry (RKE) System
The RKE transmitter may work up to 60m (195 ft) away from the vehicle.
The RKE transmitter can have one of the two symbols for the remote trunk release.
With Remote Start Shown
Press the key release button to extend the key blade. The key can be used for
the ignition and all locks.
Press ...
Relay Replacement (Attached to Wire Harness)
Removal Procedure
Locate the relay. Refer to the Master Electrical Component List to locate
the relay in the vehicle.
Remove any fasteners which hold the relay in place.
Remove any connector position assurance (CPA) devices or secondary locks.
Note: Use care w ...
Control Solenoid Valve and Transmission Control Module Assembly Installation
Control Solenoid Valve and Transmission Control Module Assembly Installation
Callout
Component Name
1
Control Solenoid Valve Assembly Filter Plate
Caution: Use care when removing or installing the filter plate
...

0.0054