Chevrolet Sonic Repair Manual: Transmission Mount Replacement - Left Side
- Removal Procedure
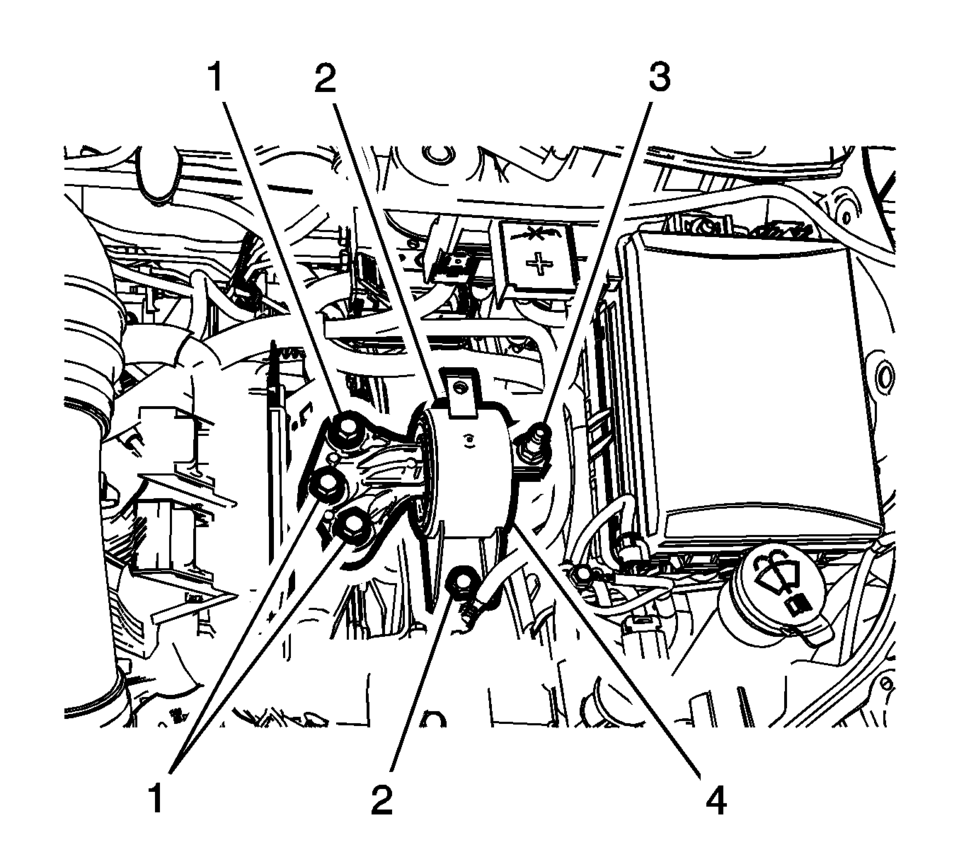
-
- Remove the battery tray. Refer to Battery Tray Replacement.
- Install the engine support fixture. Refer to Engine Support Fixture.
- Remove and DISCARD the left transmission mount to bracket bolts (1).
- Remove the left transmission mount to body bolts (2).
- Remove the left transmission mount to body nut (3).
- Remove the left transmission mount (4) from the vehicle.
- Installation Procedure
-
- Install the left transmission mount (4) to the vehicle.
- Install the left transmission mount to body bolts (2)
and tighten to 58 Y (43 lb ft)
.
- Install the left transmission mount to body nut (3)
and tighten to 58 Y (43 lb ft)
.
- Install the NEW left transmission mount to transmission
bolts (1) and tighten to 50 Y (37 lb ft)
plus 60?5 degrees
.
- Remove the engine support fixture. Refer to Engine Support Fixture.
- Install the battery tray. Refer to Battery Tray Replacement.
Caution:
Refer to Fastener Caution.
 Transmission Mount Bracket Replacement - Rear
Removal Procedure
Raise and support the vehicle. Refer to
Lifting and Jacking the Vehicle.
Remove the front suspension skid plate, if equipped.
Refer to Drivetrain and Front Su ...
Other materials:
Wheels and Trim—Aluminum or Chrome
Use a soft, clean cloth with mild soap and water to clean the wheels. After rinsing
thoroughly with clean water, dry with a soft, clean towel. A wax may then be applied.
Caution
Chrome wheels and other chrome trim may be damaged if the vehicle is not washed
after driving on roads that have bee ...
Driver Information Center (DIC)
The DIC displays information about your vehicle. It also displays warning messages
if a system problem is detected. See Vehicle Messages. All messages appear in the
DIC display in the instrument cluster.
DIC Operation and Displays
The DIC has different displays which can be accessed b ...
Front Floor Console Replacement
Front Floor Console Replacement
Callout
Component Name
Preliminary Procedures
Remove the right and left front floor console extensions. Refer
to Front Floor Console Extension Replacement - Right Side and Front
Floor Conso ...

0.0067