Chevrolet Sonic Repair Manual: Evaporative Emission Canister Replacement (Steel Tank)
- Removal Procedure
-
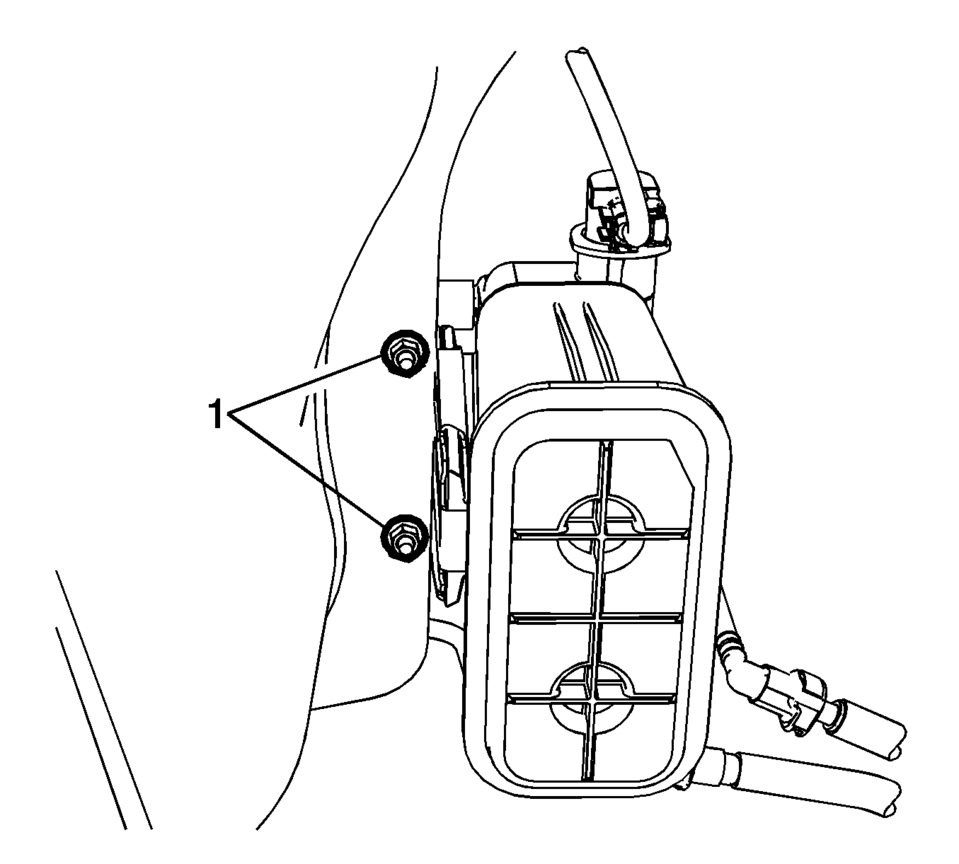
- Remove the evaporative emission canister bracket fasteners (1).
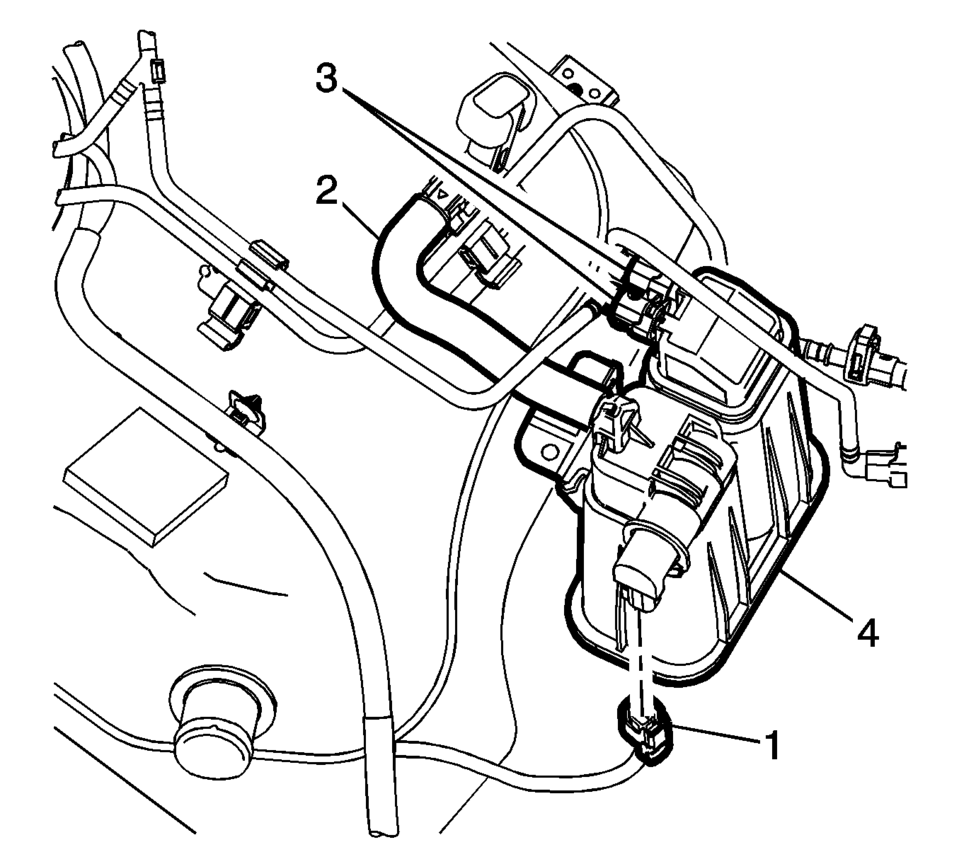
- Disconnect the purge solenoid valve electrical connector (1).
- Disconnect the evaporative emission canister vent hose (2).
- Disconnect the evaporative emission canister pipes (3). Refer to Plastic Collar Quick Connect Fitting Service
- Remove the evaporative emission canister (4).
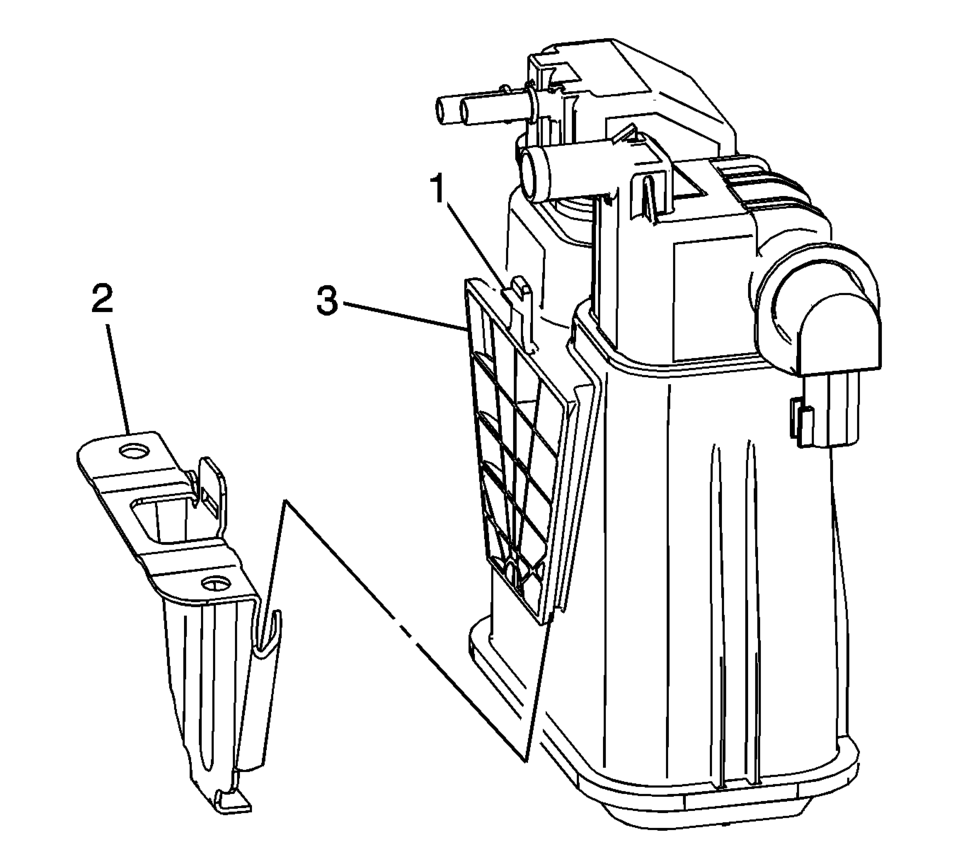
- Release the retaining tab (1) and remove the evaporative emission canister (2).
- Installation Procedure
-
- Slide the evaporative emission canister (3) into the evaporative emission canister bracket (2) until the retaining tab (1) snaps into position.
- Install the evaporative emission canister (4) into position.
- Connect the evaporative emission canister pipes (3). Refer to Plastic Collar Quick Connect Fitting Service
- Connect the evaporative emission canister vent hose (2).
- Connect the purge solenoid valve electrical connector (1).
- Install the evaporative emission canister bracket fasteners (1) and
tighten to 10 Y (89 lb in)
.
 Evaporative Emission Canister Replacement
Removal Procedure
Raise and support the vehicle. Refer to Lifting and Jacking the Vehicle.
Remove the EVAP canister cover fasteners (1) and cover (2).
Warn ...
 Evaporative Emission Canister Purge Solenoid Valve Replacement
Evaporative Emission Canister Purge Solenoid Valve Replacement
Callout
Component Name
1
Purge Pipe Fittings (Qty: 2)
...
Other materials:
Safety Belt Pretensioners
This vehicle has safety belt pretensioners for front outboard occupants. Although
the safety belt pretensioners cannot be seen, they are part of the safety belt assembly.
They can help tighten the safety belts during the early stages of a moderate to
severe frontal, near frontal, or rear crash ...
Output Speed Sensor Replacement
Output Speed Sensor Replacement
Callout
Component Name
Preliminary Procedure
Remove the control valve body. Refer to Control Valve Body Replacement.
1
Output Speed Sensor Bolt M6 x 18 ...
Transmission Fluid Pump, Front Differential Carrier Baffle, and Front Differential
Ring Gear Removal (6T30)
Transmission Fluid Pump, Front Differential Carrier Baffle, and Front
Differential Ring Gear Removal
Callout
Component Name
1
Front Differential Carrier Baffle Bolts M6 x 25 (Qty: 2)
...

0.0115