Chevrolet Sonic Repair Manual: Roof Outer Panel Replacement (5HB)
- Removal Procedure
-
- Disable the SIR system. Refer to SIR Disabling and Enabling.
- Disconnect the negative battery cable. Refer to Battery Negative Cable Disconnection and Connection.
- Remove all related panels and components.
- Visually inspect the damage. Repair as much of the damage as possible.
- Remove the sealers and anti-corrosion materials from the repair area, as necessary. Refer to Anti-Corrosion Treatment and Repair.
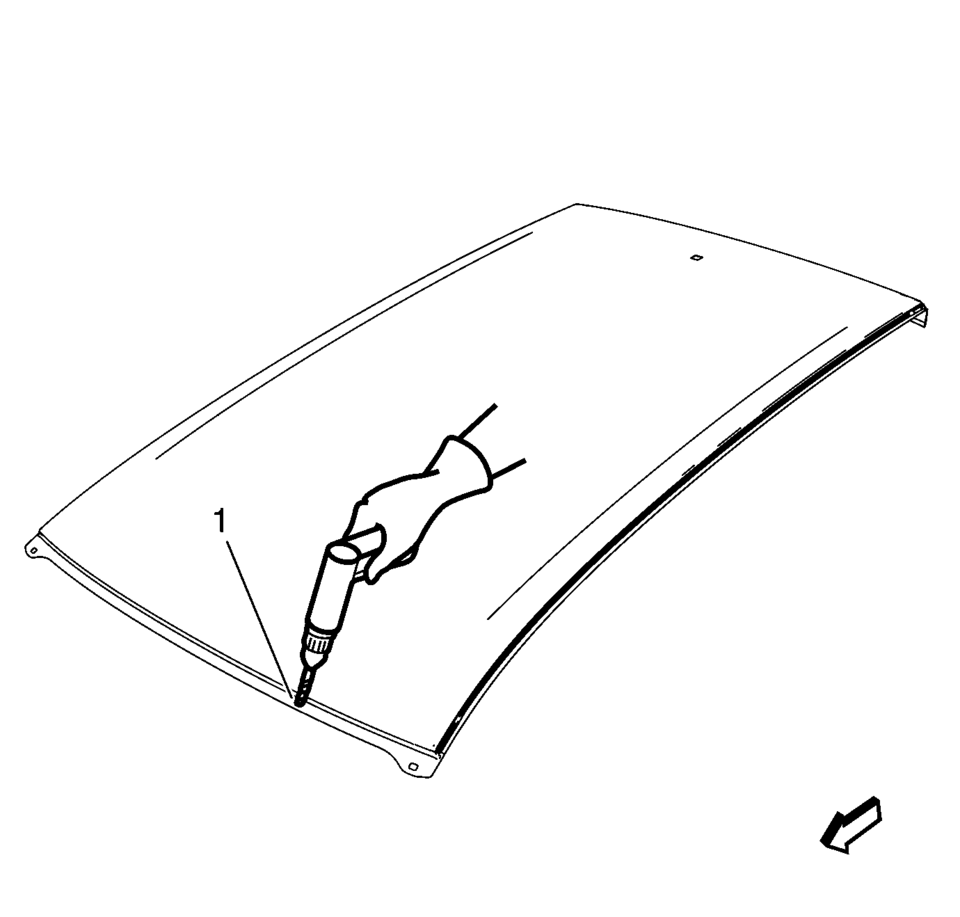
- Locate and mark all factory welds.
- Drill all factory welds (1). Note the number and location of welds for installation of the service assembly.
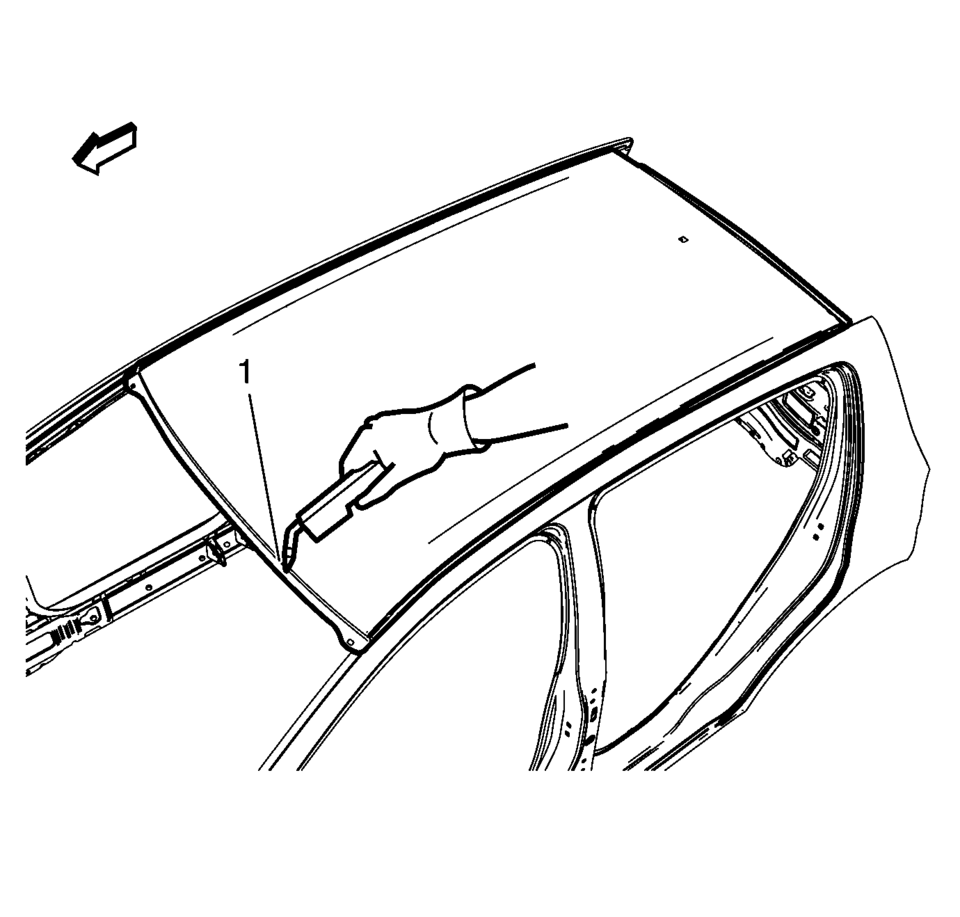
- Cut the adhesive with an appropriate tool.
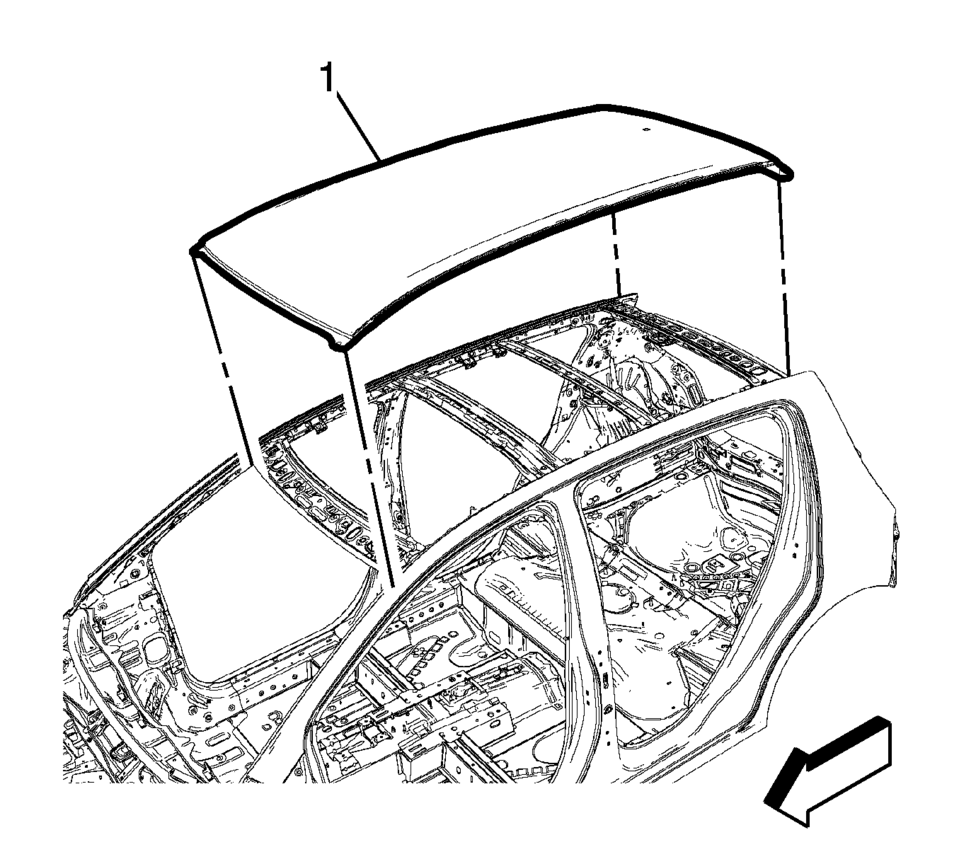
- Remove the damaged roof panel?‚ā¨‚Äį(1).
Warning:
Refer to Approved Equipment for Collision Repair Warning.

- Installation Procedure
-
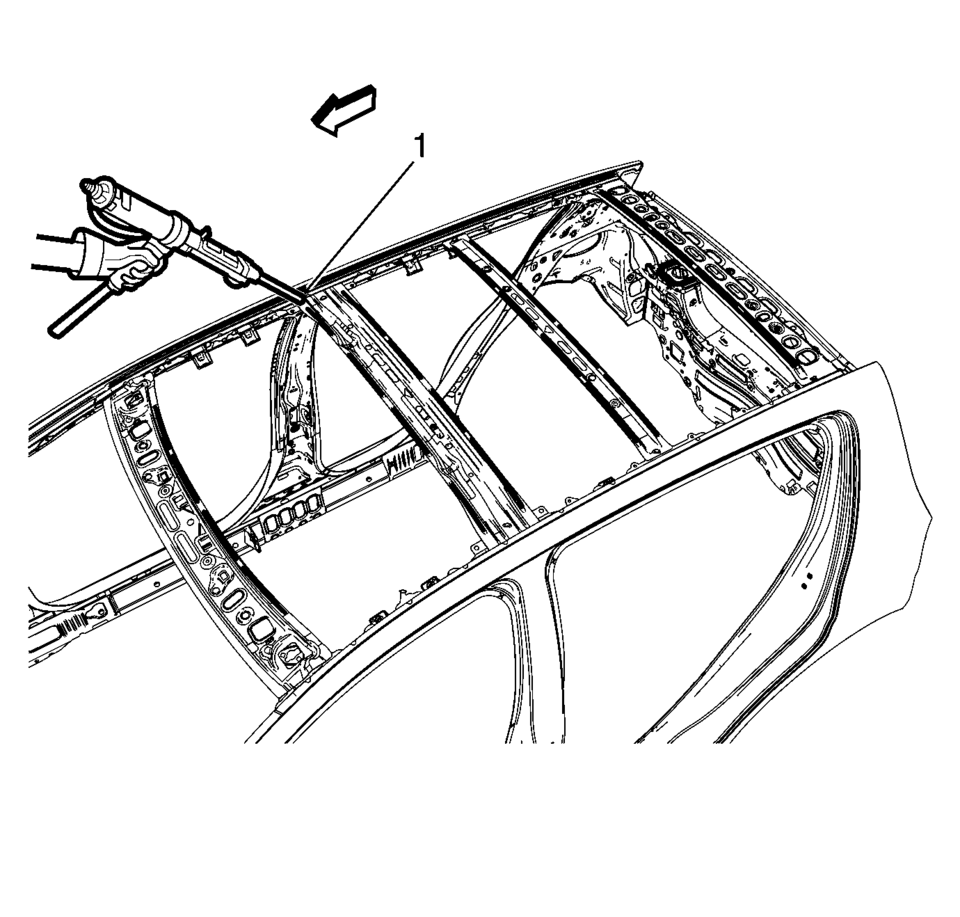
- Drill 8?‚ā¨‚Äįmm (5/16?‚ā¨‚Äįin)
holes for plug welding along the edges of the service panel as noted from the original panel (1).
- Clean and prepare the attaching surfaces for welding.
- Apply one-part windshield urethane adhesive as noted from the original panel (1).
- Position the roof panel?‚ā¨‚Äį(1) on the vehicle.
- Verify the fit of the panel.
- Clamp the panel into position.
- Plug weld accordingly (1).
- Apply the sealers and anti-corrosion materials to the repair area, as necessary. Refer to Anti-Corrosion Treatment and Repair.
- Paint the repaired area. Refer to Basecoat/Clearcoat Paint Systems.
- Install all related panels and components.
- Connect the negative battery cable. Refer to Battery Negative Cable Disconnection and Connection.
- Enable the SIR system. Refer to SIR Disabling and Enabling.
- Drill 8?‚ā¨‚Äįmm (5/16?‚ā¨‚Äįin)
 Roof Outer Panel Replacement (4NB)
Removal Procedure
Warning: Refer to Approved Equipment for Collision Repair
Warning.
Disable the SIR system. Refer to SIR Disabling and Enabling.
Disconnect the nega ...
 Roof Rail Front Assist Handle Replacement
Roof Rail Front Assist Handle Replacement
Callout
Component Name
1
Roof Rail Front Assist Handle Fastener (Qty:?‚ā¨‚Äį2) ...
Other materials:
Door Lock and Ignition Lock Folding and Non-Folding Key Cutting
High Security keys are available from the service parts system.
Obtain the key code from the security card or from the GM Dealer World, Parts,
Key Code Look Up system.
If you have the key code and access to a Triax-E., BD Laser or other code key
cutting machine from the GM Dealer Equipment C ...
Headlamp Housing Bracket Replacement
Headlamp Housing Bracket Replacement
Callout
Component Name
Preliminary Procedure
Remove the front bumper fascia. Refer to Front Bumper Fascia Replacement.
1
Headlamp Housing Bracket Screw (Qty:? ...
Brake Pipe and Hose Inspection
Warning: Refer to Brake Fluid Irritant Warning.
Caution: Refer to Brake Fluid Effects on Paint and Electrical Components
Caution.
Visually inspect all of the brake pipes for the following conditions:
Kinks, incorrect routing, missing or damaged retainers
Leaking fittin ...

0.0069