
Chevrolet Sonic Repair Manual: Positive Crankcase Ventilation Pipe Removal
- Open the 2 positive crankcase ventilation pipe retainer clips (2) and (3).
- Remove the positive crankcase ventilation pipe from the intake manifold.
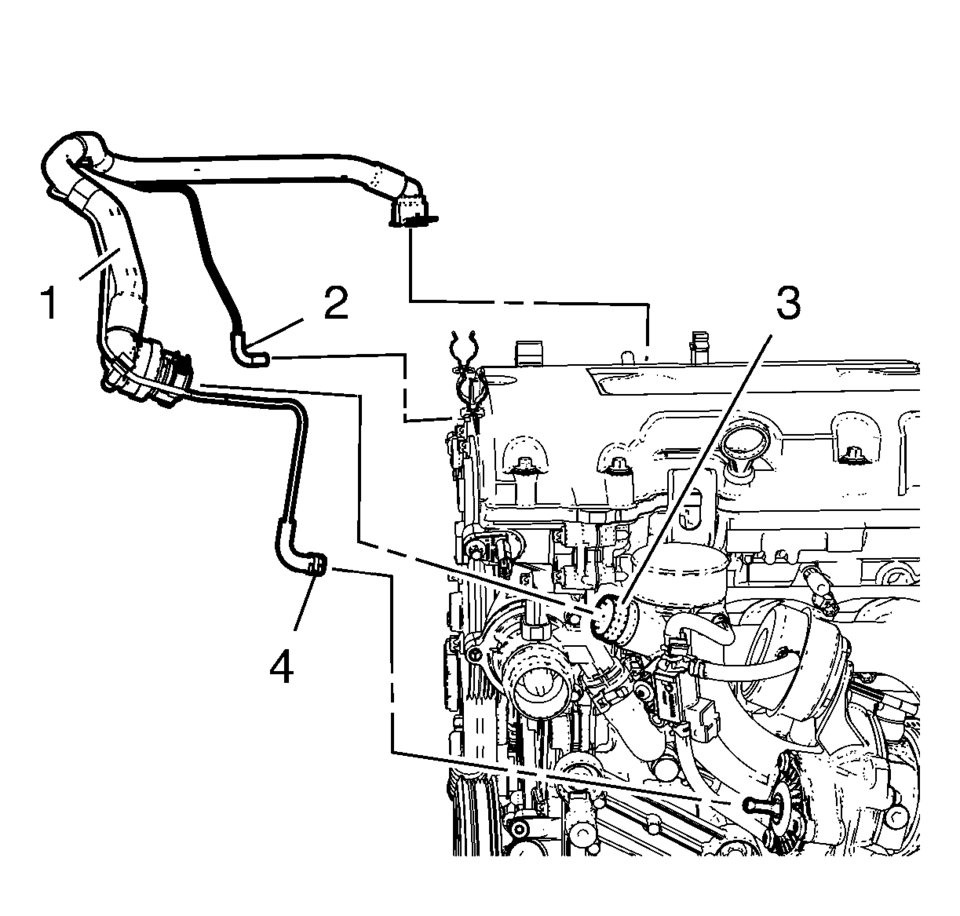
- Loosen the charger air bypass valve pipe clamp (4).
- Remove the charger air bypass valve pipe from turbocharger.
- Remove the charger air bypass valve pipe (2) from turbo charger waste regulator solenoid valve.
- Disconnect the positive crankcase ventilation pipe from turbocharger (3).
- Unclip and remove the positive crankcase ventilation pipe assembly (1) from the camshaft cover retainer clips.
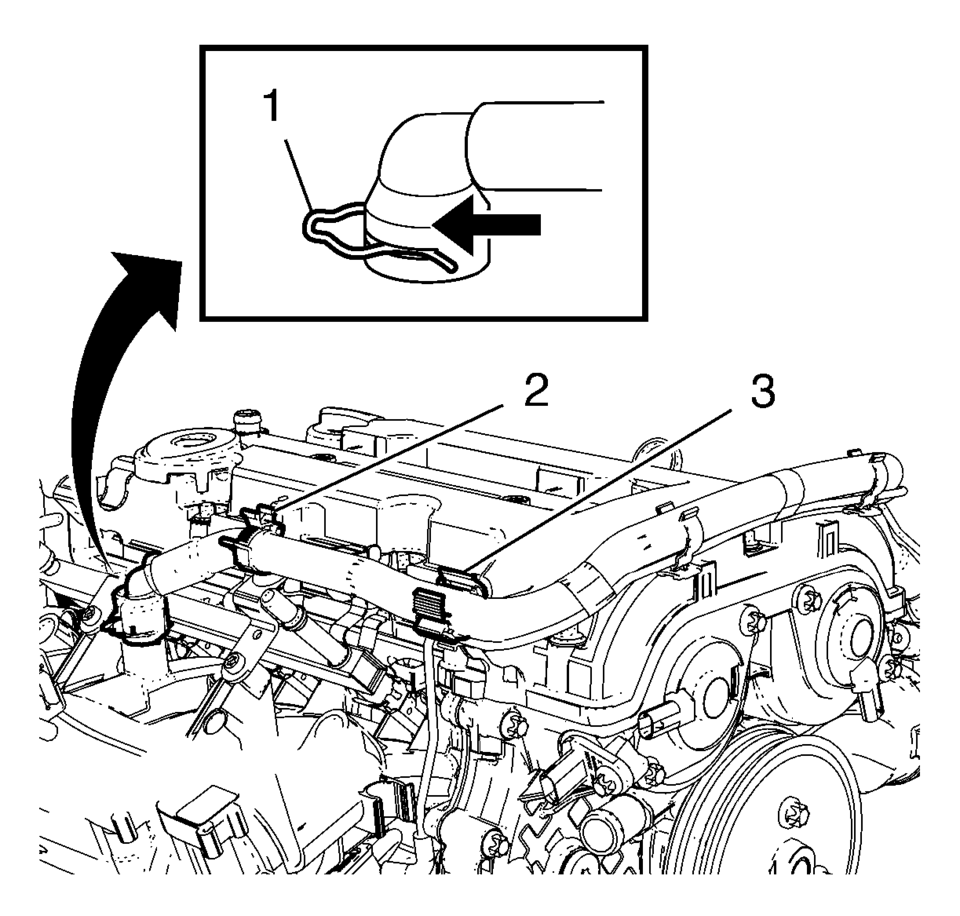
Note:
Move retainer clamp (1) in direction of the arrow.
 Positive Crankcase Ventilation Pipe Installation
Install the positive crankcase ventilation tube (2).
Connect the 2 positive crankcase ventilation tube connectors (1).
Clip in the ECM wiring harness guide (3) t ...
 Engine Block
...
Other materials:
Instrument Panel Illumination Control
This feature controls the brightness of the instrument panel controls and infotainment
display screen. The thumbwheel is to the left of the steering column on the instrument
panel.
(Instrument Panel Brightness): Move
the thumbwheel up or down and hold, to brighten or dim the instrument pane ...
Torque Lock (Automatic Transmission)
If you are parking on a hill and you do not shift the transmission into P (Park)
properly, the weight of the vehicle may put too much force on the parking pawl in
the transmission. You may find it difficult to pull the shift lever out of P (Park).
This is called “torque lock.� To prevent t ...
Headlining Trim Panel Replacement (Hatchback with Sunroof)
Headlining Trim Panel Replacement
Callout
Component Name
Warning: Do not attempt to repair or alter the head impact
energy-absorbing material glued to the headliner or to the garnish trims.
If the material is damaged ...

0.0056