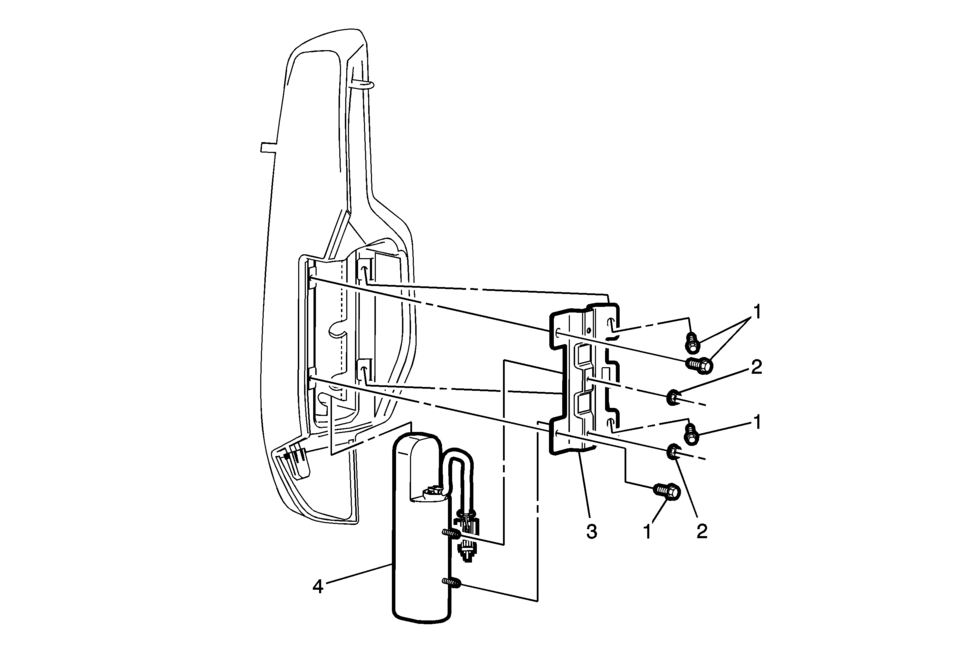
Chevrolet Sonic Repair Manual: Rear Seat Outboard Seat Back Airbag Replacement
|
Callout |
Component Name |
|---|---|
|
Warning: Following the deployment of a rear seat side air bag, inspect the following parts for damage. Replace these parts if necessary:
Failure to do so may cause future personal injury.
|
|
|
1 |
Rear Seat Side Inflatable Restraint Module Bracket Bolt (Qty:?€‰4) Caution: Refer to Fastener Caution.
3.5?€‰Y (31?€‰lb?€‰in) |
|
2 |
Rear Seat Side Inflatable Restraint Module Nut (Qty:?€‰2) Caution: Refer to Fastener Caution.
3.5?€‰Y (31?€‰lb?€‰in) |
|
3 |
Rear Seat Side Inflatable Restraint Module Bracket |
|
4 |
Rear Seat Side Inflatable Restraint Module Procedure
|
 Pretensioner Handling and Scrapping
Scrapping Procedure
During the course of a vehicles useful life, certain situations may arise
which will necessitate the disposal of a live (undeployed) pretensioner. The
following info ...
 Repairs and Inspections Required After a Collision
Accident With or Without Air Bag Deployment ?€“ Component Inspections
Warning: Proper operation of the Supplemental Inflatable Restraint
(SIR) sensing system requires that any r ...
Other materials:
Safety Belts
This section of the manual describes how to use safety belts properly. It also
describes some things not to do with safety belts.
Warning
Do not let anyone ride where a safety belt cannot be worn properly. In a crash,
if you or your passenger(s) are not wearing safety belts, injuries can be mu ...
Aluminum Wheel Refinishing
Finish Damage Evaluation Procedure
Note:
If the wheels are chrome-plated, do not re-plate or refinish
the wheels.
If the wheels are polished aluminum, do not refinish the wheels
in the dealer environment. Utilize a refinisher that meets manufacturer
...
Charge Air Bypass Regulator Solenoid Valve Replacement
Charge Air Bypass Regulator Solenoid Valve Replacement
Callout
Component Name
1
Charge Air Bypass Regulator Solenoid Valve Hose (Qty: 3)
Procedure
Disconnect the electrical connector.
...

0.0071