Chevrolet Sonic Repair Manual: Rear Side Door Window Regulator Motor Replacement
|
Callout |
Component Name |
|---|---|
|
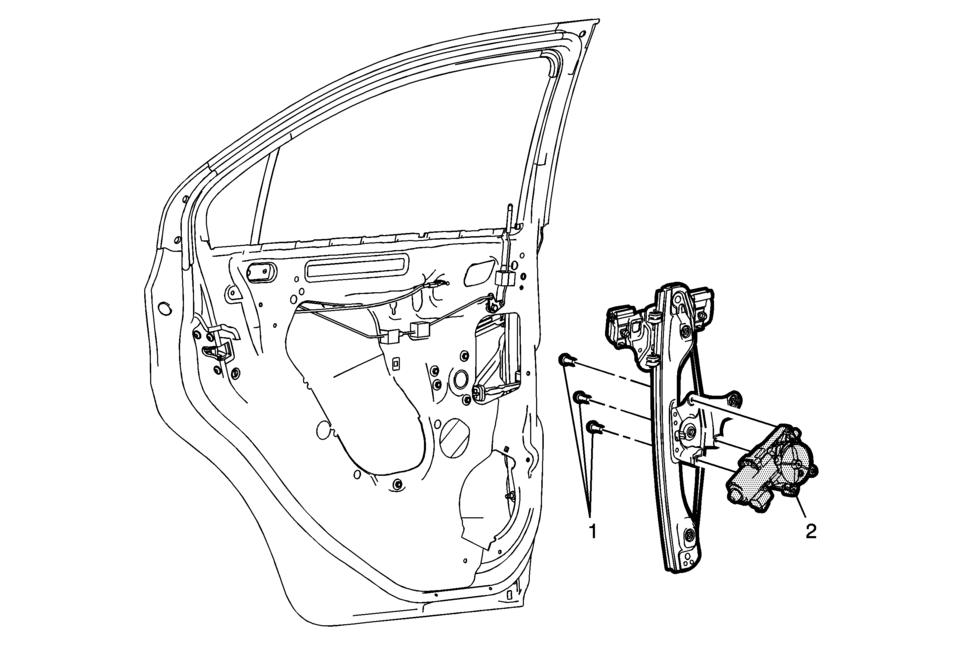
Warning: Refer to Glass and Sheet Metal Handling Warning. Preliminary Procedure
Remove the rear side door window regulator. Refer to Rear Side Door Window Regulator Replacement. |
|
|
1 |
Rear Side Door Window Regulator Motor Screw (Qty:?Ōé¼ŌĆ░3). Caution: Refer to Fastener Caution.
5?Ōé¼ŌĆ░Y?Ōé¼ŌĆ░(44?Ōé¼ŌĆ░lb?Ōé¼ŌĆ░in) |
|
2 |
Rear Side Door Window Regulator Motor Procedure
Inspect the door window for proper operation before installing the door trim panel. |
 Rear Side Door Window Regulator Handle Replacement
Rear Side Door Window Regulator Handle Replacement
Callout
Component Name
1
Rear Side Door Window Regulator Handle Clip
...
 Rear Side Door Window Regulator Replacement (Hatchback)
Rear Side Door Window Regulator Replacement
Callout
Component Name
Warning: Refer to Glass and Sheet Metal Handling Warning.
...
Other materials:
Radio Front Side Door Speaker Replacement
Radio Front Side Door Speaker Replacement
Callout
Component Name
Preliminary Procedure
Remove the front side door trim. Refer to Front
Side Door Trim Replacement.
1
Radio Front Side Door Speaker ...
Front Side Door Window Weatherstrip Replacement
Front Side Door Window Weatherstrip Replacement
Callout
Component Name
Preliminary Procedures
Remove front side door trim panel. Refer to Front Side Door Trim
Replacement.
Remove the outside rearview mirror. Refer to Outs ...
Garage mode system
The Nissan Armada liftgate height can be customized to suit specific environments,
such as garages with limited clearance.
1. Open the Nissan Armada liftgate fully.
2. Manually adjust the liftgate to the desired height and hold it in position.
3. Press and hold the liftgate close and lock switc ...

0.0048