Chevrolet Sonic Repair Manual: Rear Side Door Window Regulator Replacement (Sedan)
|
Callout |
Component Name |
|---|---|
|
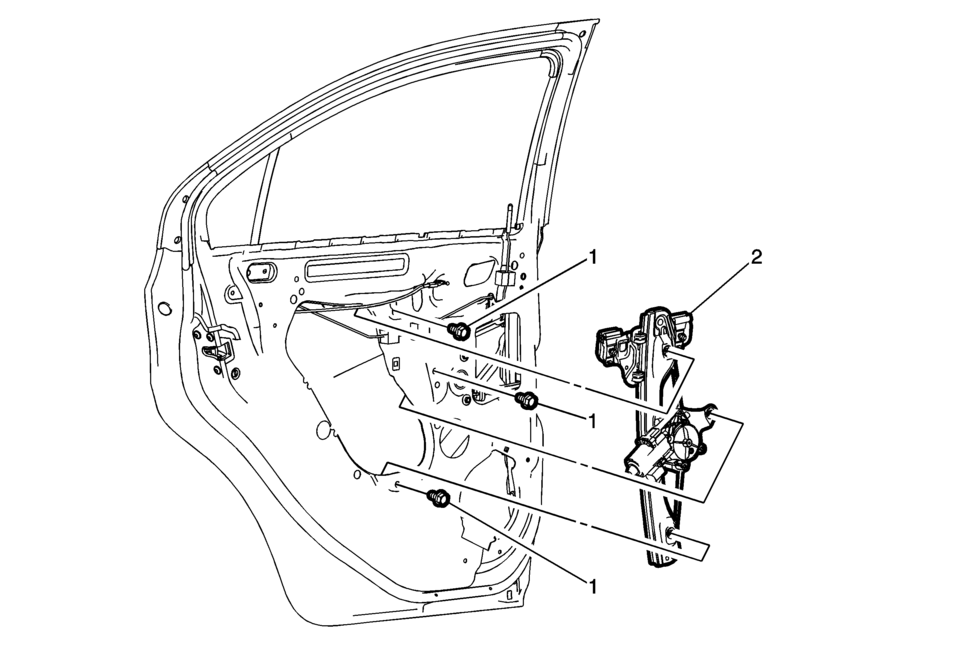
Warning: Refer to Glass and Sheet Metal Handling Warning. Preliminary Procedure
Remove the front side door window from the guide. Do Not remove the window from the vehicle, raise the window to the fully up position, tape in place. Refer to Rear Side Door Window Replacement. |
|
|
1 |
Rear Side Door Window Regulator Screw (Qty:?€‰3) Caution: Refer to Fastener Caution.
11?€‰Y?€‰(97?€‰lb?€‰in) |
|
2 |
Rear Side Door Window Regulator Procedure
|
 Rear Side Door Window Regulator Replacement (Hatchback)
Rear Side Door Window Regulator Replacement
Callout
Component Name
Warning: Refer to Glass and Sheet Metal Handling Warning.
...
 Windshield
...
Other materials:
Backup Lamp Bulb Replacement (Sedan)
Backup Lamp Bulb Replacement
Callout
Component Name
Preliminary Procedure
Remove the tail lamp assembly. Refer to Tail Lamp Replacement.
1
Back Up Lamp Bulb Socket
Procedure
Rotate the back u ...
Front Brake Rotor Replacement
Special Tools
CH-41013 Rotor Resurfacing Kit
CH-42450-A Wheel Hub Resurfacing Kit
For equivalent regional tools, refer to Special Tools.
Removal Procedure
Warning: Refer to Brake Dust Warning.
Raise and support the vehicle. Refer to Lifting and Jacking the Vehicle.
...
Radiator Mounting Stud Repair
Repair Procedure
Note: If the radiator is leaky, replace it. Refer to Radiator
Replacement.
Pressure test the cooling system. Refer to Cooling System Leak Testing.
Grind the fracture surface (1) with a proper tool.
Drill a hole in the cente ...

0.0055