Chevrolet Sonic Repair Manual: Roof Front Header Panel Replacement
- Removal Procedure
-
- Disable the SIR system. Refer to SIR Disabling and Enabling.
- Disconnect the negative battery cable. Refer to Battery Negative Cable Disconnection and Connection.
- Remove all related panels and components.
- Repair as much of the damage as possible to factory specifications. Refer to Dimensions - Body.
- Remove the sealers and anti-corrosion materials from the repair area. Refer to Anti-Corrosion Treatment and Repair.
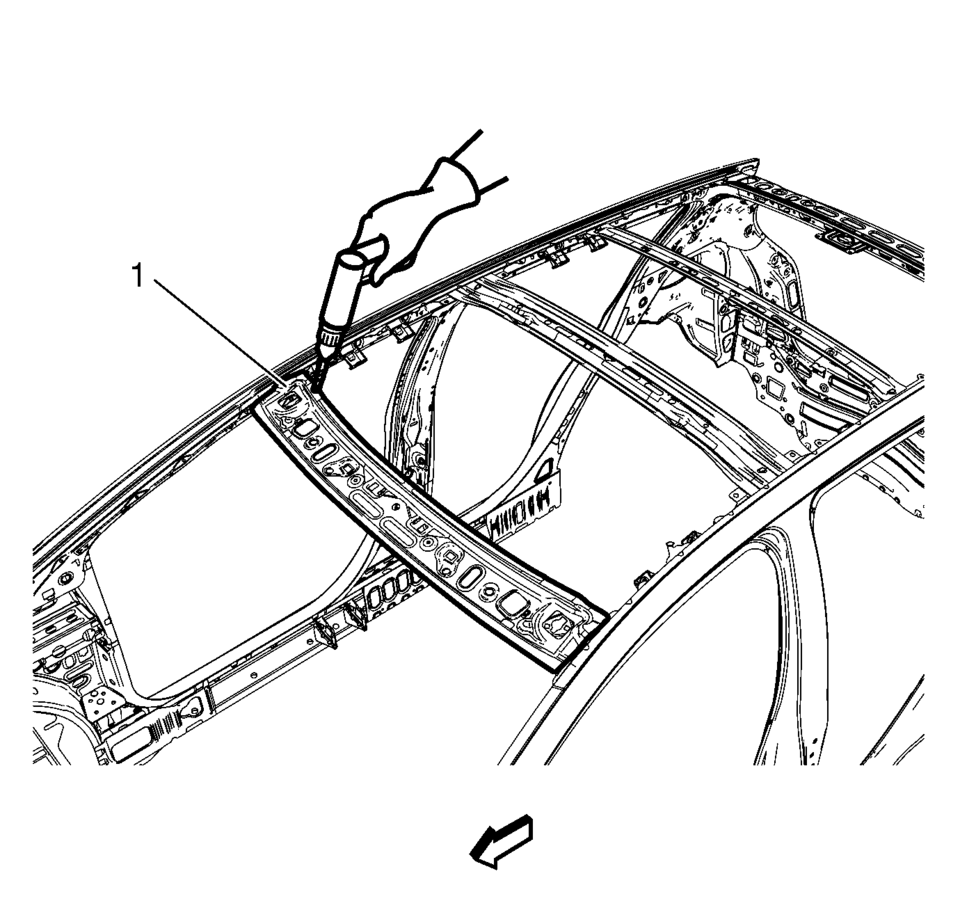
- Locate and mark all factory welds.
- Drill all factory welds (1). Note the number and location of welds for installation of the service assembly.
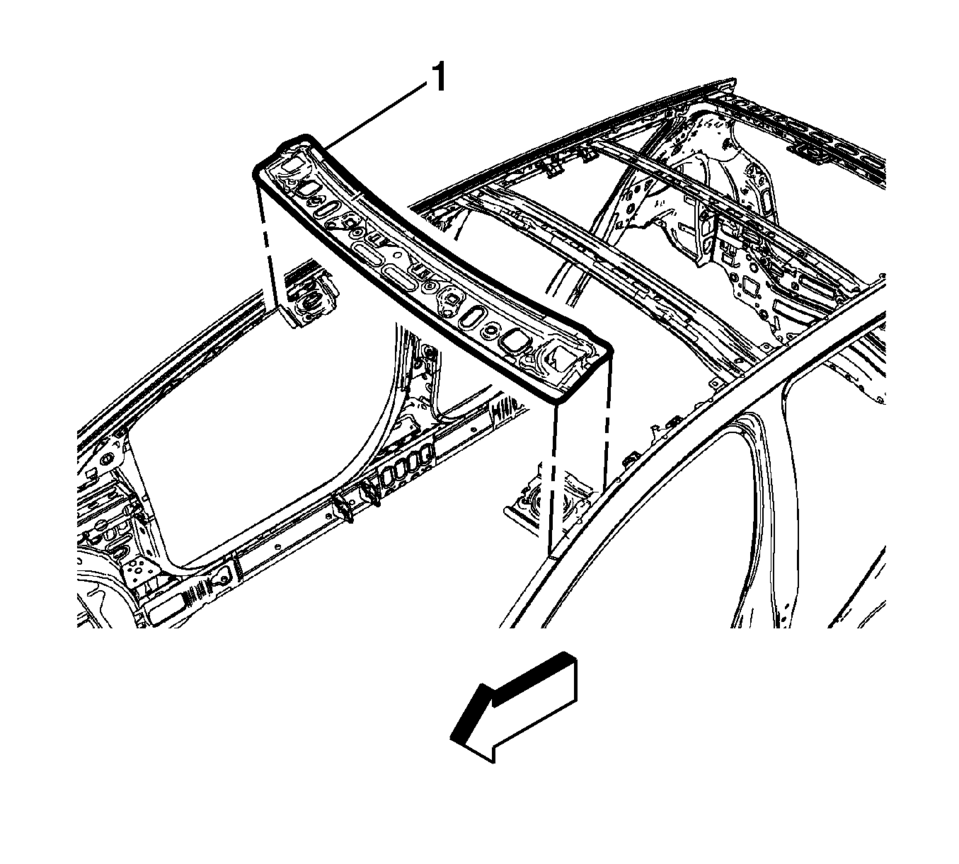
- Remove the damaged roof front header panel?€‰(1).
Warning:
Refer to Approved Equipment for Collision Repair Warning.
Note:
The roof front header panel is made of Ultra High Strength Steel and should be replaced only at factory joints. Repairing or sectioning of this part is not recommended. Refer to Ultra High Strength Steel.


- Installation Procedure
-
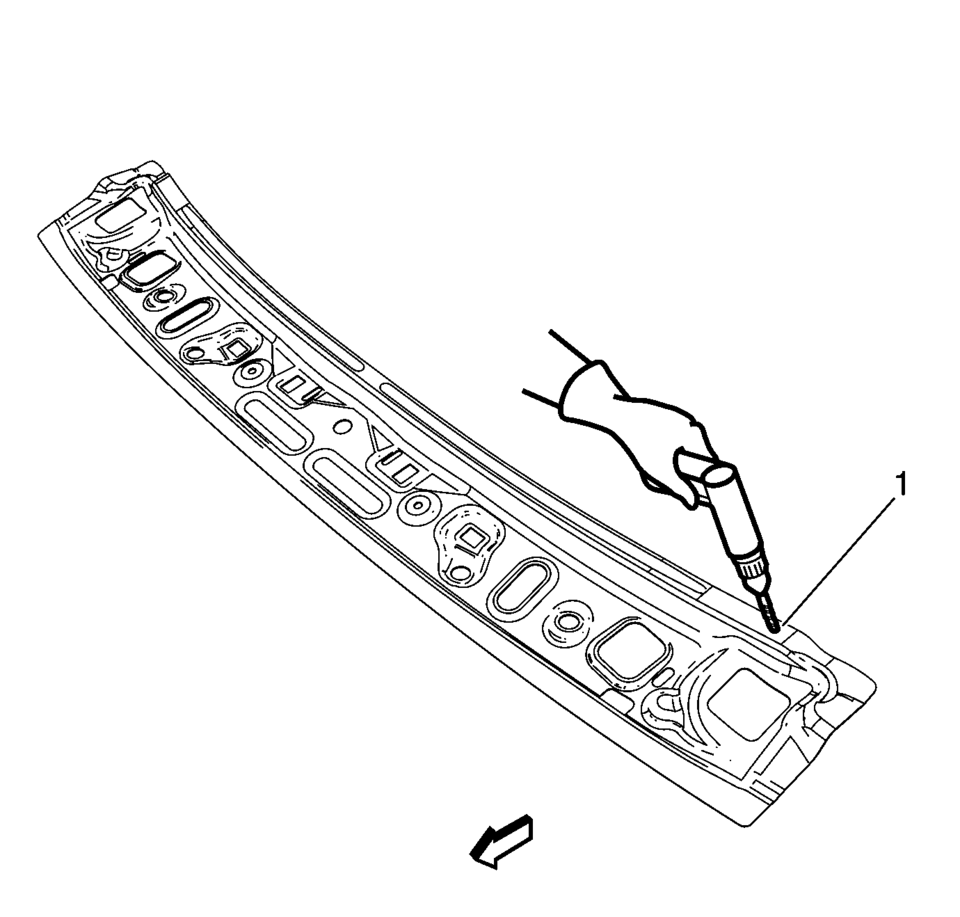
- Drill 8?€‰mm (5/16?€‰in)
holes for plug welding along the edges of the service panel as noted from the original panel (1).
- Clean and prepare the attaching surfaces for welding.
- Position the roof front header?€‰(1) panel on the vehicle.
- Verify the fit of the panel.
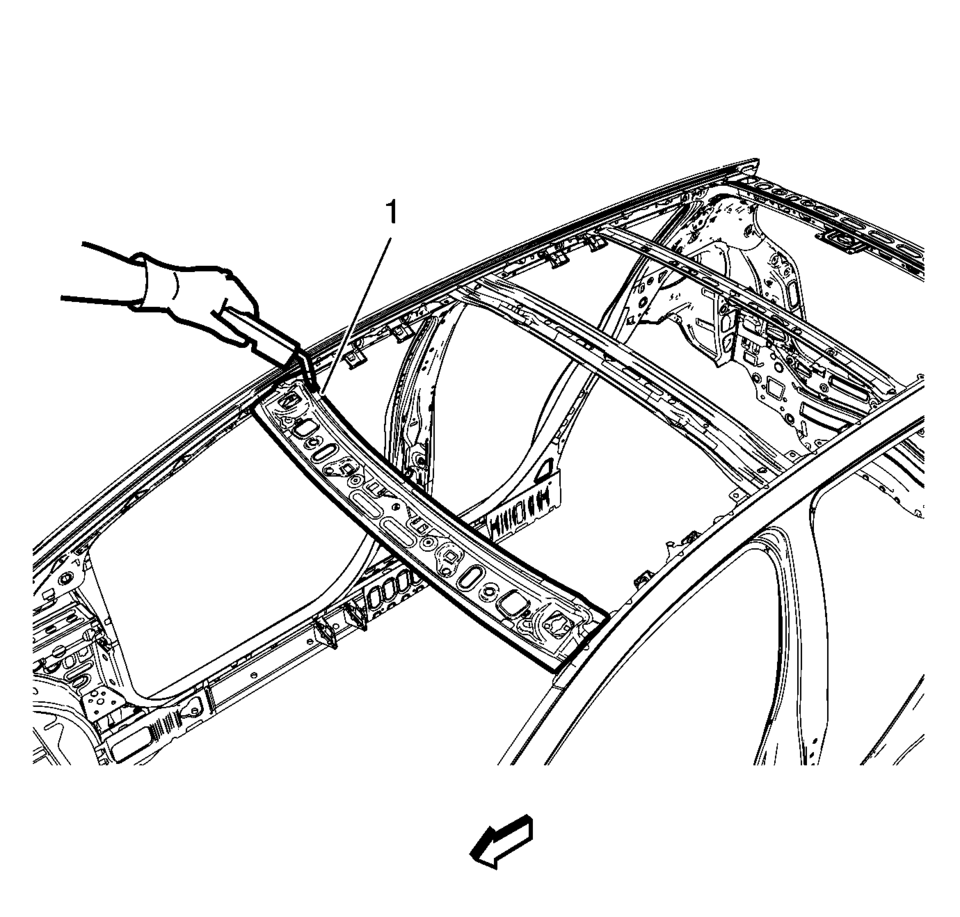
- Clamp the roof front header panel into position.
- Plug weld accordingly (1).
- Apply the sealers and anti-corrosion materials to the repair area, as necessary. Refer to Anti-Corrosion Treatment and Repair.
- Paint the repaired area. Refer to Basecoat/Clearcoat Paint Systems.
- Install all related panels and components.
- Connect the negative battery cable. Refer to Battery Negative Cable Disconnection and Connection.
- Enable the SIR system. Refer to SIR Disabling and Enabling.


- Drill 8?€‰mm (5/16?€‰in)
 Airbag Roof Side Rail Module Replacement - Rear
Airbag Roof Side Rail Module Replacement - Rear
Callout
Component Name
Warning: In order to prevent SIR deployment, personal i ...
 Roof Outer Panel Replacement (4NB)
Removal Procedure
Warning: Refer to Approved Equipment for Collision Repair
Warning.
Disable the SIR system. Refer to SIR Disabling and Enabling.
Disconnect the nega ...
Other materials:
Rear Seat Back Bolster Replacement
Rear Seat Back Bolster Replacement
Callout
Component Name
Preliminary Procedures
Disable the SIR system. Refer to SIR Disabling and Enabling
1
Rear Seat Back Cushion Bolster
Warning: Refer t ...
Crankshaft Balancer Installation
Special Tools
EN-470–B Angular Torque Wrench
EN-956?E Extension
EN-49979 Crankshaft Shock Mount Retainer
For equivalent regional tools, refer to Special Tools.
Note: The crankshaft balancer flange must fit to the hexagon of
the oil pump rotor (2) and to the two ...
Timing Belt Idler Pulley Installation
Special Tools
EN-45059 Angle Meter
For equivalent regional tools, refer to Special Tools.
Caution: Refer to Fastener Caution.
Caution: Refer to Torque-to-Yield Fastener Caution.
Re-cut the timing belt idler pulley thread.
Install the timing belt idler pulley̴ ...
0.0059
