Chevrolet Sonic Repair Manual: 3-5-Reverse and 4-5-6 Clutch Fluid Seal Ring Replacement (Gen 2)
|
Callout |
Component Name |
|---|---|
|
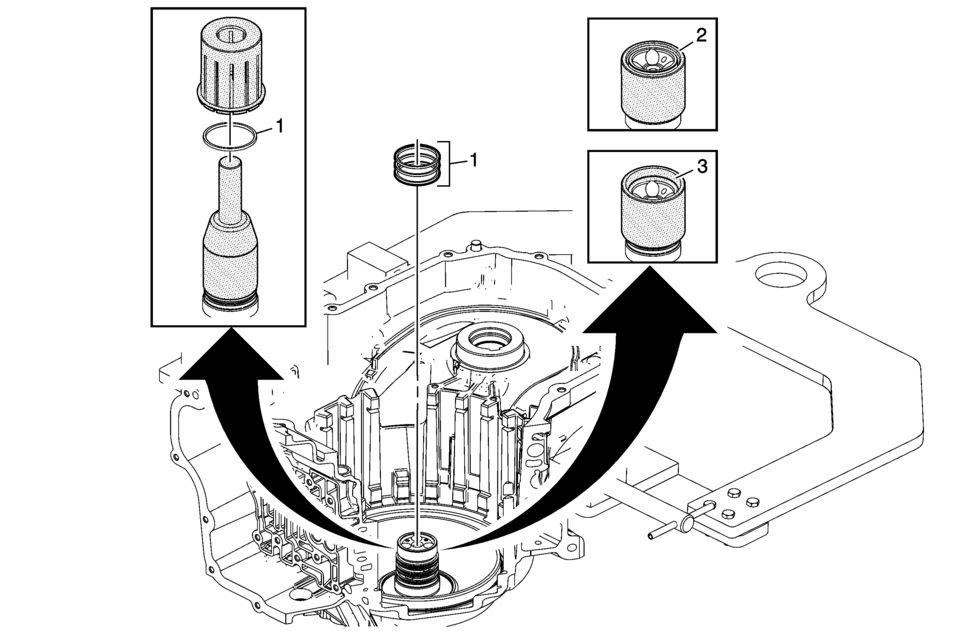
Special Tools
DT-46620 Seal Installer For equivalent regional tools, refer to Special Tools. |
|
|
1 |
3? Reverse and 4?? Clutch Fluid Seals (Qty: 3) Procedure
|
|
2 |
Small Chamfer Up Caution: Do not force the seal installer down over the seals as this will roll and damage the seals. The large chamfer is designed to fit over the over stretched seal. Use a hand to help shrink the seal if the seal installer is difficult to install over the seal rings. Procedure
Install DT-46620-1 which is part of DT-46620 seal installer with the large chamfer end down over the fluid seal rings and leave DT-46620-1 which is part of DT-46620 seal installer on the seals for at least 60 seconds. |
|
3 |
Large Chamfer Up Procedure
|
 3-5-Reverse and 4-5-6 Clutch Fluid Seal Ring Replacement (Gen 1)
3-5-Reverse and 4-5-6 Clutch Fluid Seal Ring Replacement
Callout
Component Name
Special Tools
DT-46620 Seal Installer
For e ...
 3-5-Reverse and 4-5-6 Clutch Housing Assemble (6T30/40/45/50 - Gen 2)
Table 1:
4?? Clutch Piston Installation
Table 2:
4?? Clutch Fluid Dam Installation
Table 3:
3? Reverse Clutch Plates Installation
Table 4:
Reluctor Wh ...
Other materials:
Passenger Sensing System
The vehicle has a passenger sensing system for the front outboard passenger position.
The passenger airbag status indicator will light on the instrument panel when the
vehicle is started.
United States
Canada
The words ON and OFF, or the symbol for on and off, will be visible during the
...
Front Floor Console Extension Replacement - Right Side
Front Floor Console Extension Replacement - Right Side
Callout
Component Name
1
Front Floor Console Extension
Procedure
Use a flat bladed plastic trim tool in order to release the retainers
securing the extens ...
Timing Belt Idler Pulley Installation
Special Tools
EN-45059 Angle Meter
For equivalent regional tools, refer to Special Tools.
Caution: Refer to Fastener Caution.
Caution: Refer to Torque-to-Yield Fastener Caution.
Re-cut the timing belt idler pulley thread.
Install the timing belt idler pulley̴ ...

0.0077