Chevrolet Sonic Repair Manual: 3-5-Reverse and 4-5-6 Clutch Fluid Seal Ring Replacement (Gen 1)
|
Callout |
Component Name |
|---|---|
|
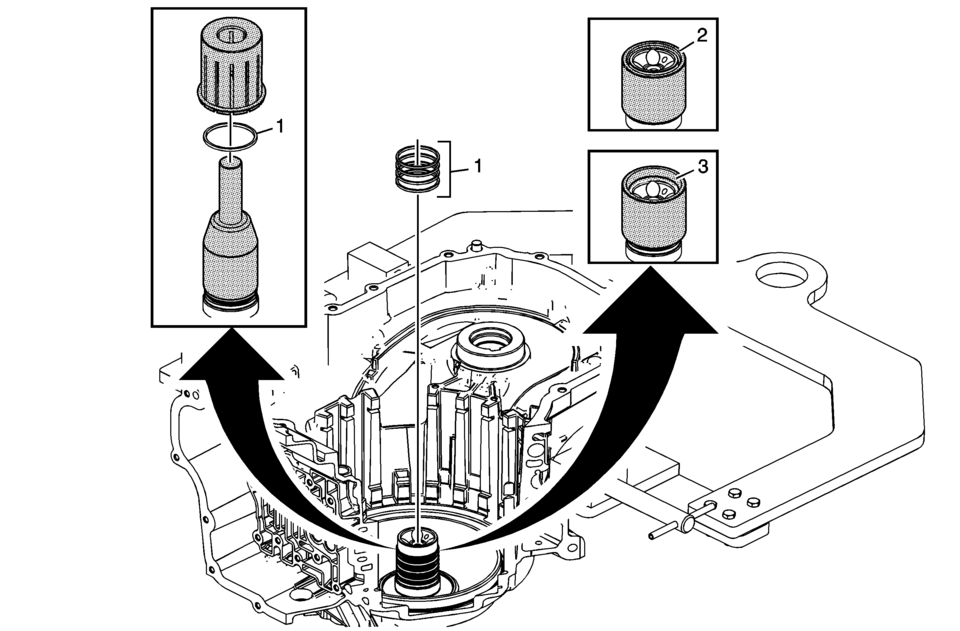
Special Tools
DT-46620 Seal Installer For equivalent regional tools, refer to Special Tools. |
|
|
1 |
3? Reverse and 4?? Clutch Fluid Seals (Qty: 4) Procedure
|
|
2 |
Small Chamfer Up Caution: Do not force the seal installer down over the seals as this will roll and damage the seals. The large chamfer is designed to fit over the over stretched seal. Use a hand to help shrink the seal if the seal installer is difficult to install over the seal rings. Procedure
Install DT-46620-1 which is part of DT-46620 seal installer with the large chamfer end down over the fluid seal rings and leave DT-46620-1 which is part of DT-46620 seal installer on the seals for at least 60 seconds. |
|
3 |
Large Chamfer Up Procedure
|
 2-6 Clutch Piston Removal
2-6 Clutch Piston Removal
Callout
Component Name
1
2? Clutch Spring Retainer
Special Tool
DT-28585 Snap Ring Remo ...
 3-5-Reverse and 4-5-6 Clutch Fluid Seal Ring Replacement (Gen 2)
3-5-Reverse and 4-5-6 Clutch Fluid Seal Ring Replacement
Callout
Component Name
Special Tools
DT-46620 Seal Installer
For e ...
Other materials:
Seat Adjustment
Manual Seats
Warning
You can lose control of the vehicle if you try to adjust a driver seat while
the vehicle is moving. Adjust the driver seat only when the vehicle is not moving.
To adjust a manual seat:
1. Pull the handle at the front of the seat.
2. Slide the seat to the desired positio ...
Driver or Passenger Seat Cushion Heater Replacement
Driver or Passenger Seat Cushion Heater Replacement
Callout
Component Name
Warning: Refer to SIR Warning.
Preliminary Procedures
Remove the driver or passenger seat. Refer to Driver or Passenger
Seat Removal a ...
Wheel Alignment - Steering Wheel Angle and/or Front Toe Adjustment
Ensure that the steering wheel is set in a straight ahead position.
Loosen the tie rod jam nut (1).
Adjust the toe to specification by turning the inner tie rod (2). Refer
to Wheel Alignment Specifications.
Caution: Refer to Fastener Caution.
Tighten the t ...

0.006