Chevrolet Sonic Repair Manual: Camshaft Timing Chain Installation
Special Tools
- EN-952 Fixing Pin
- EN-953-A Fixing Tool
- EN-955-10 Fixing Pin from EN-955 Kit
For equivalent regional tools, refer to Special Tools.
- The engine should be adjusted to TDC.
- The crankshaft should be locked with EN-952 fixing pin.
- The camshaft should be locked with EN-953-A fixing tool.
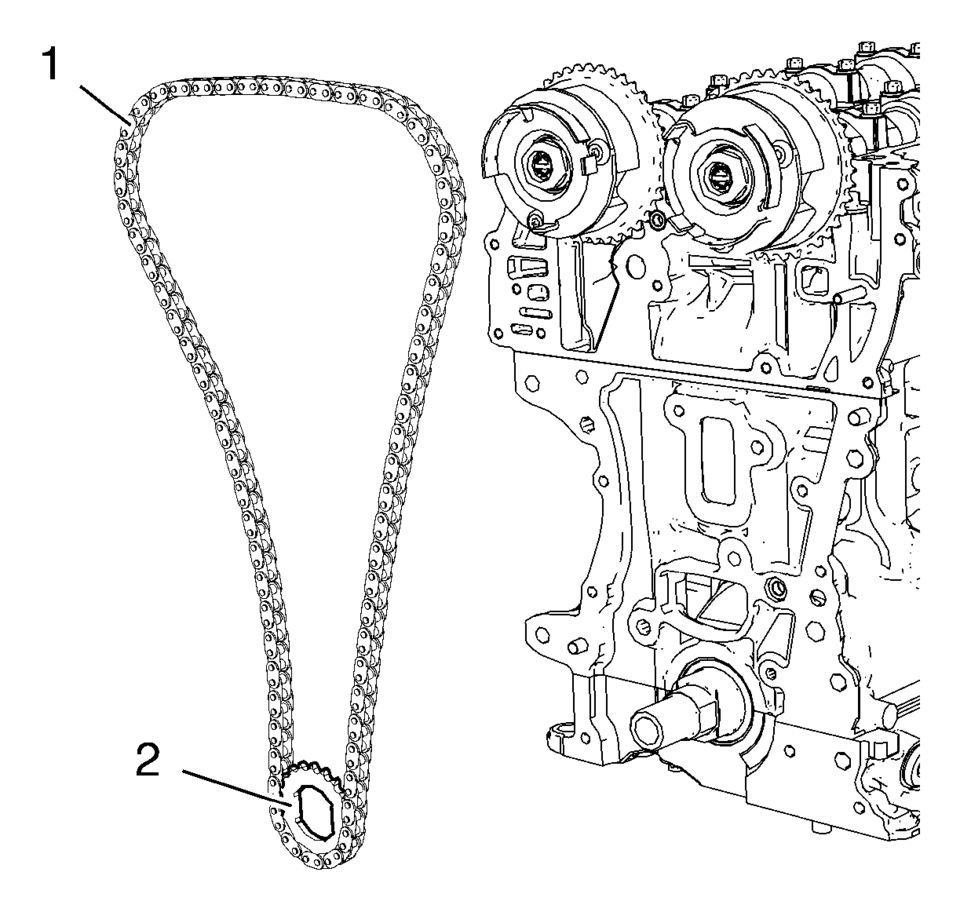
- Install the timing chain (1) along with the crankshaft sprocket (2).
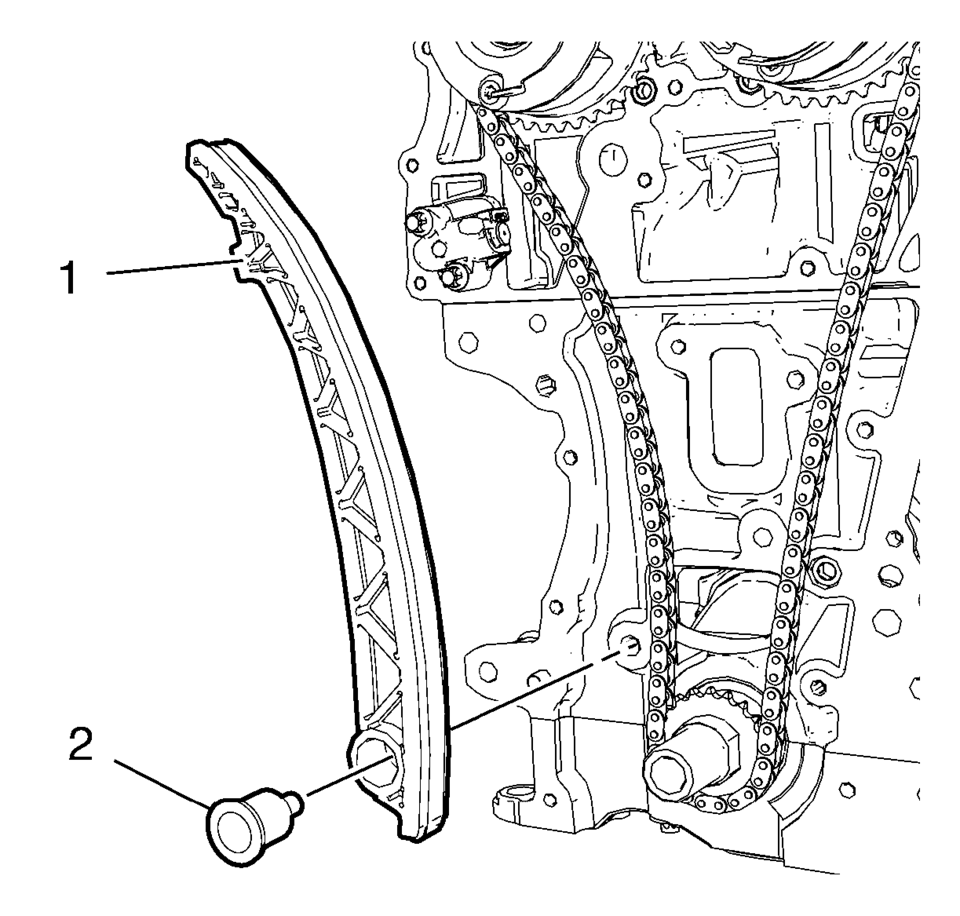
- Install the timing chain tensioner shoe (1).
- Install the timing chain tensioner shoe bolt (2) and tighten to 20 Y (15 lb ft)
.
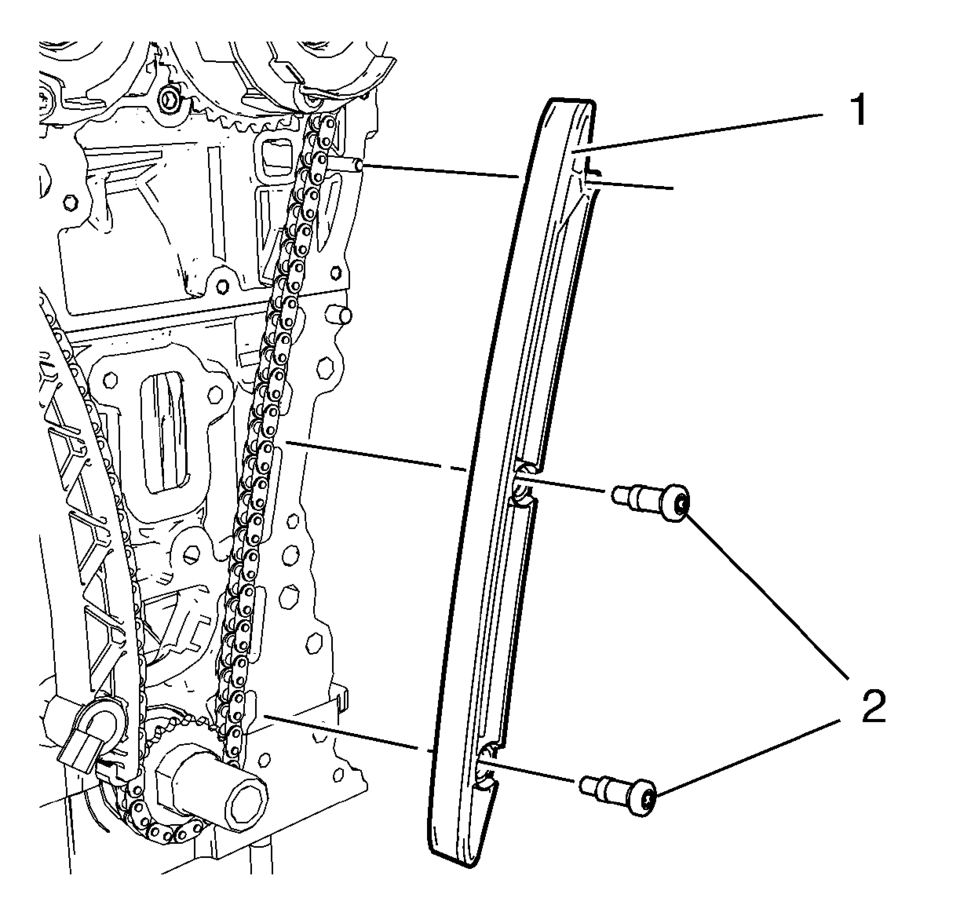
- Install the timing chain guide right side (1).
- Install the 2 timing chain guide right side bolts (2) and tighten to
8 Y (71 lb in)
.
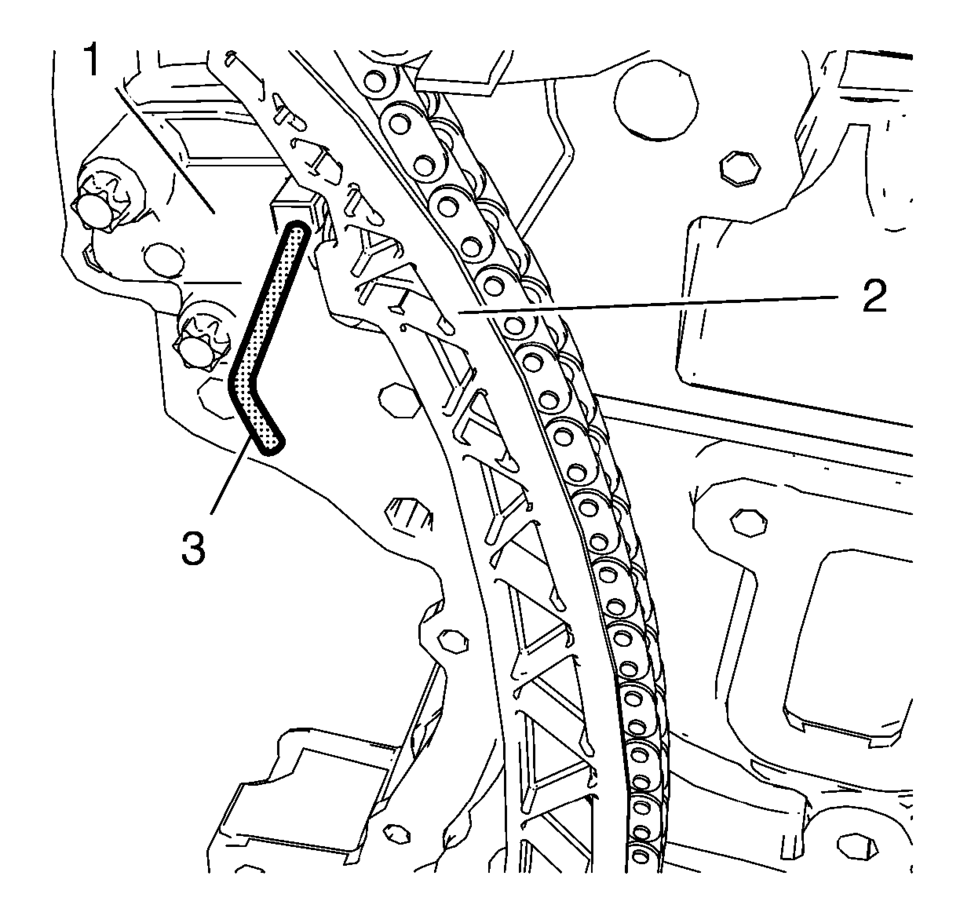
- Push the timing chain (2) in direction to the timing chain tensioner (1) and remove the EN-955-10 fixing pin (3).
Caution:
Refer to Fastener Caution.
The upper timing chain guide will be installed after the installation of the engine front cover and the fastening of the camshaft sprockets.
 Camshaft Timing Chain Inspection
Special Tools
EN-952 Fixing Pin
EN-953-A Fixing Tool
EN-49977-100 Transmitter Disc Fixation
For equivalent regional tools, refer to Special Tools.
Remove the ignition coil. Refer to I ...
 Camshaft Timing Chain Removal
Special Tools
EN-952 Fixing Pin
EN-953-A Fixing Tool
EN-955-10 Fixing Pin from EN-955 Kit
For equivalent regional tools, refer to Special Tools.
The engine should be adjusted to TDC.
...
Other materials:
Backup Lamp Bulb Replacement (Sedan)
Backup Lamp Bulb Replacement
Callout
Component Name
Preliminary Procedure
Remove the tail lamp assembly. Refer to Tail Lamp Replacement.
1
Back Up Lamp Bulb Socket
Procedure
Rotate the back u ...
Sunroof Window Replacement
Sunroof Window Replacement
Callout
Component Name
1
Sunroof Window Bolt?€‰(Qty:?€‰4)
Caution: Refer to Fastener Caution.
Tighten
5?€‰Y (44?€‰lb?€‰in)
2
...
Engine Flywheel Installation
Special Tools
EN-652 Flywheel Holder
EN-45059 Torque Angle Sensor Kit
For equivalent regional tools, refer to Special Tools.
Clean the thread in the crankshaft.
Install the crankshaft position reluctor ring (1).
Install the flywheel (2).
Install the EN-652 ...

0.0074