Chevrolet Sonic Repair Manual: Engine Block Cleaning and Inspection
Special Tools
EN-8087 Cylinder Gauge
For equivalent regional tools, refer to Special Tools.
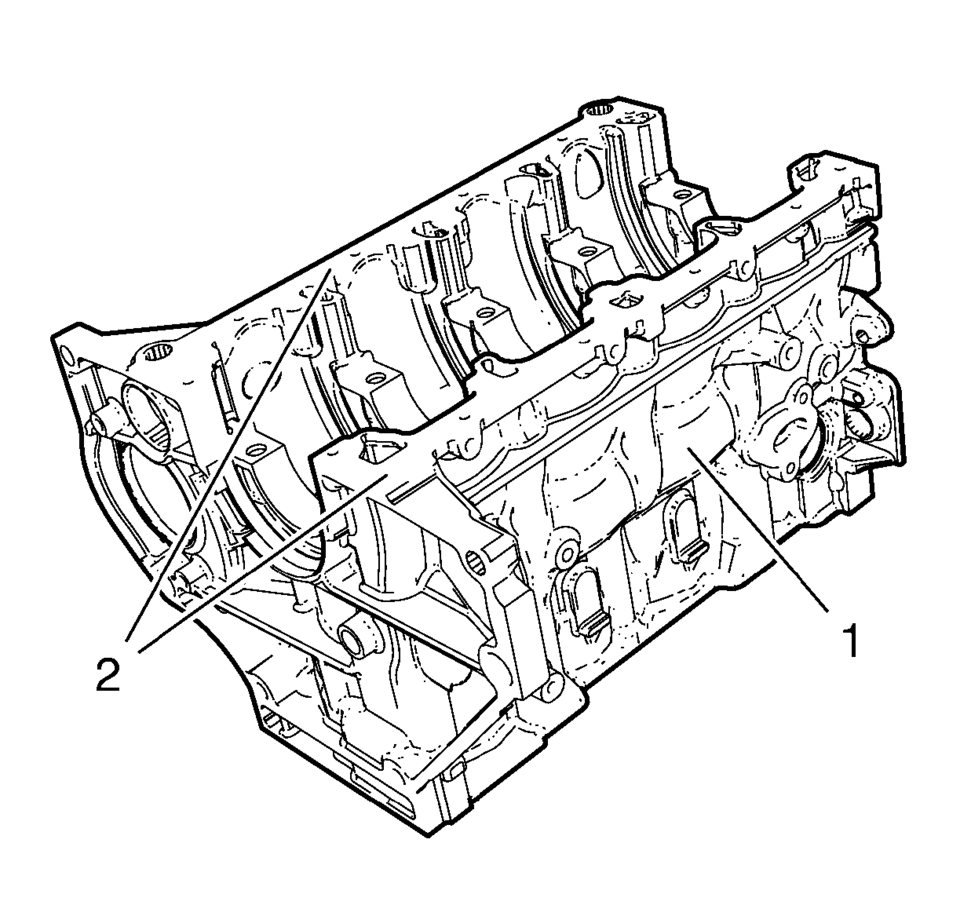
- Clean the sealing material from the gasket mating surfaces (2).
- Clean the engine block (1) and lower crankcase in a cleaning tank with solvent appropriate for aluminum. Refer to Adhesives, Fluids, Lubricants, and Sealers for the recommended solvent.
- Flush the engine block with clean water or steam.
- Clean the oil passages.
- Clean the blind holes.
- Spray the cylinder bores and the machined surfaces with engine oil.
- Inspect the threaded holes. Clean the threaded holes with a rifle brush. If necessary, drill out the holes and install thread inserts. Refer to Thread Inserts.
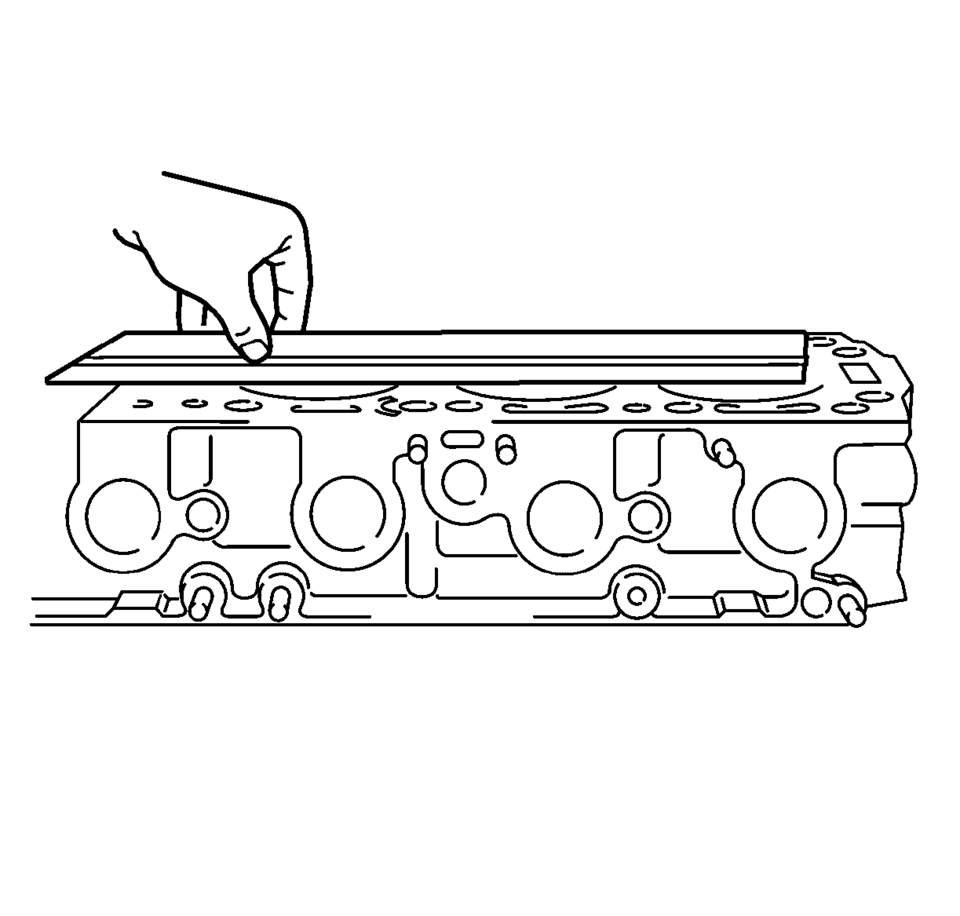
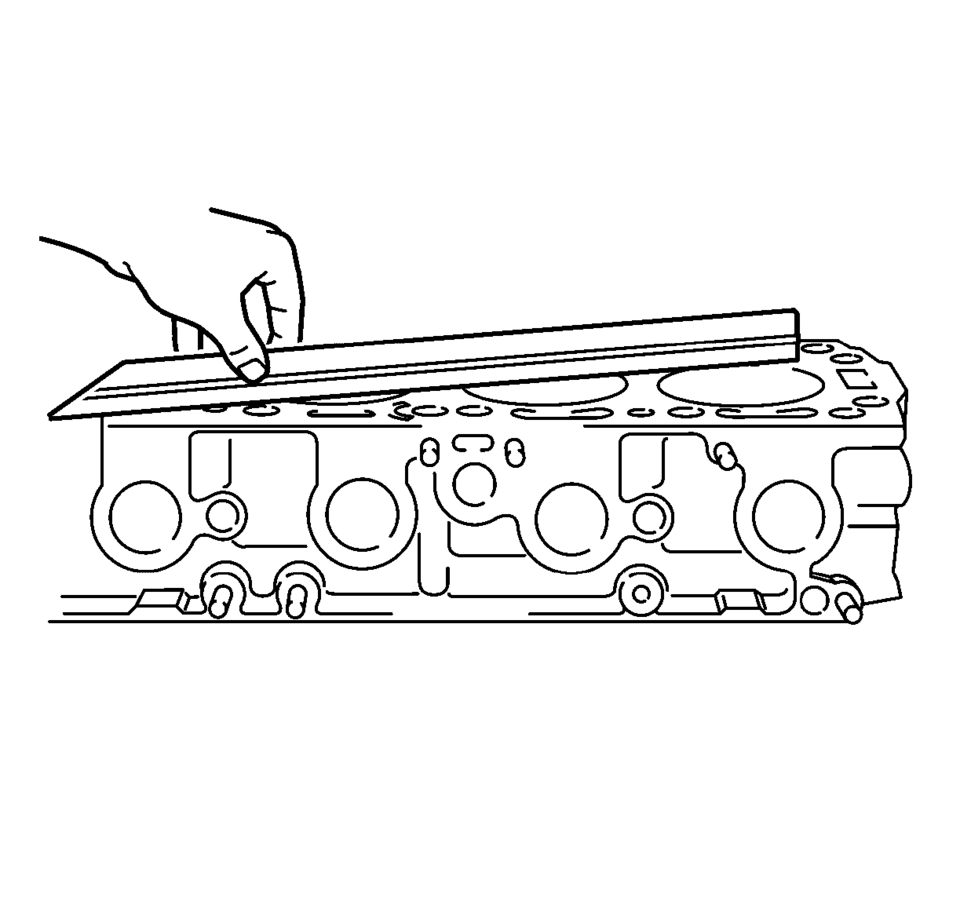
- Inspect the engine block for sag in length and width on the sealing surfaces.
- Inspect the engine block for distortion along the diagonals.
If the deck surface is out of specification, replace the block. Do not machine the block.
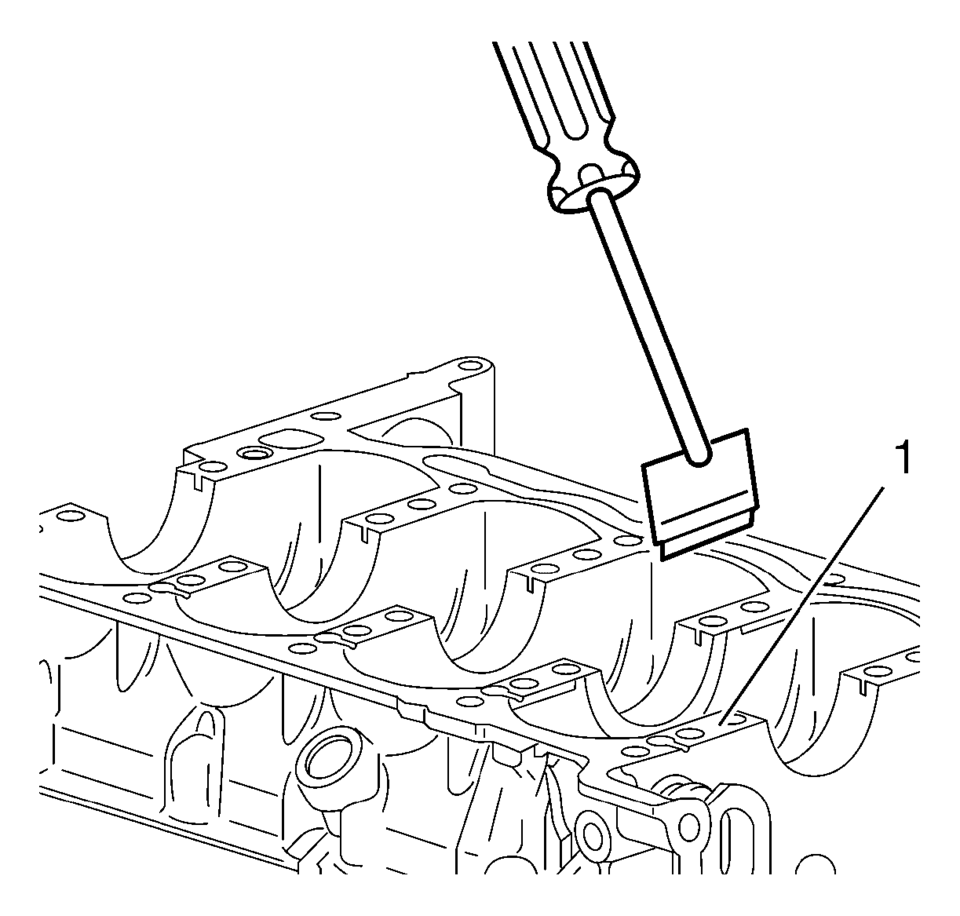
- Clean the sealing material from the gasket mating surfaces (1) on the lower crankcase oil pan side.
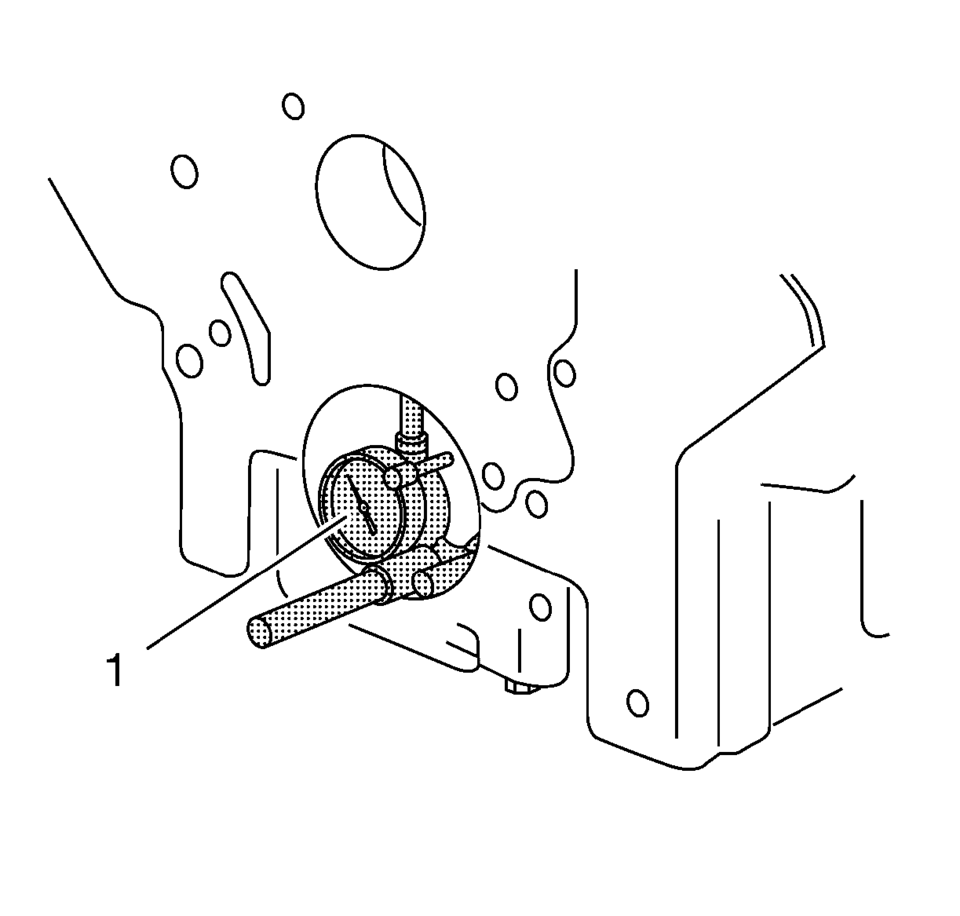
- Inspect the crankshaft main bearing bores. Use the EN-8087 gauge (1) to measure the bearing bore concentricity and alignment.
- Replace the engine block and bed plate if the crankshaft bearing bores are out of specification.
- Inspect the cylinder bores using the EN-8087 gauge (1). Inspect for the following items:
Note:
Do not attempt to machine the lower crankcase to engine block surfaces.

- Wear
- Taper
- Runout
- Ridging
 Engine Block Disassemble
Remove the cylinder head locating (1, 2).
Remove the oil pressure switch (1).
Remove the knock sensor bolt (2) and the knock sensor (1).
Clea ...
 Cylinder Block
...
Other materials:
Protecting Exterior Bright Metal Moldings
Caution
Failure to clean and protect the bright metal moldings can result in a hazy
white finish or pitting. This damage would not be covered by the vehicle warranty.
The bright metal moldings on the vehicle are aluminum. To prevent damage always
follow these cleaning instructions:
Be sure ...
Drivetrain and Front Suspension Frame Replacement
Special Tools
EN-45059 Angle Meter
For equivalent regional tools, refer to Special Tools.
Removal Procedure
Support the radiator and condenser from above using the upper brackets
on each side.
Raise the vehicle on a hoist. Refer to Lifting and Jacking the Vehicle.
Re ...
Air Conditioning (AC) Refrigerant Filter Replacement
Special Tools
GE 39400-A Halogen Leak Detector
For equivalent regional tools, refer to Special Tools.
Removal Procedure
Recover the refrigerant. Refer to Refrigerant Recovery and Recharging.
Remove the air conditioning condenser. Refer to Air Conditioning Condenser
Repl ...

0.0046