Chevrolet Sonic Repair Manual: Evaporative Emission System Hose/Pipe Replacement
Special Tools
- CH-807 Closure Plugs
- CH-6015 Closure Plugs
For equivalent regional tools, refer to Special Tools.
- Removal Procedure
-
Warning:
Refer to Gasoline/Gasoline Vapors Warning.
- Disconnect the battery negative cable. Refer to Battery Negative Cable Disconnection and Connection.
- Relief the fuel pressure. Refer to Fuel Pressure Relief.
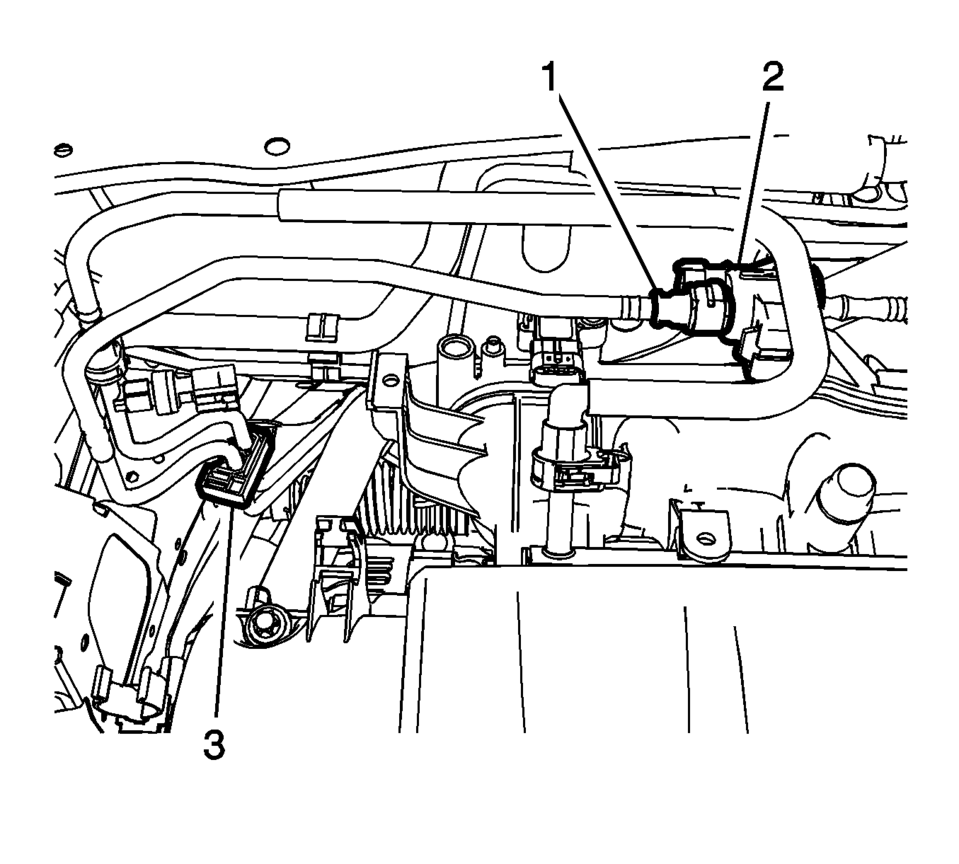
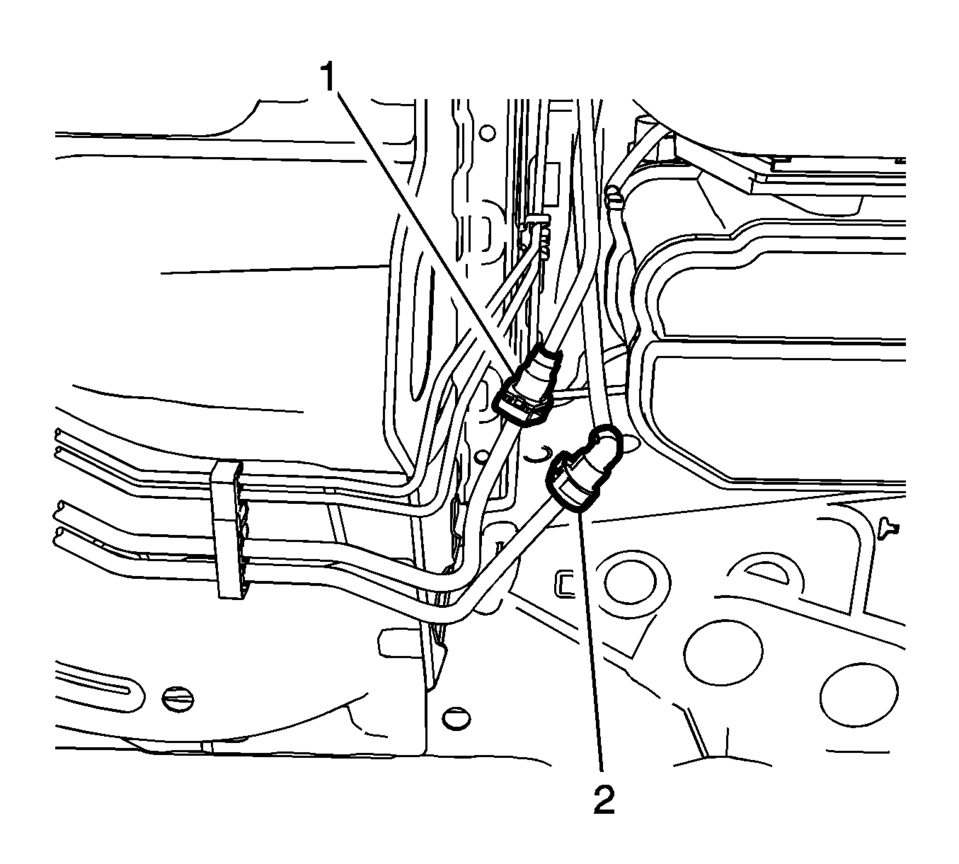
- Disconnect the evaporative emissions front pipe (1) from the evaporative emissions purge valve (2). Refer to Plastic Collar Quick Connect Fitting Service.
- Close the evaporative emissions pipe connections with the CH-807 plugs .
- Unclip the evaporative emissions pipe (1) from the retainer clip (3).
- Raise and support the vehicle. Refer to Lifting and Jacking the Vehicle.
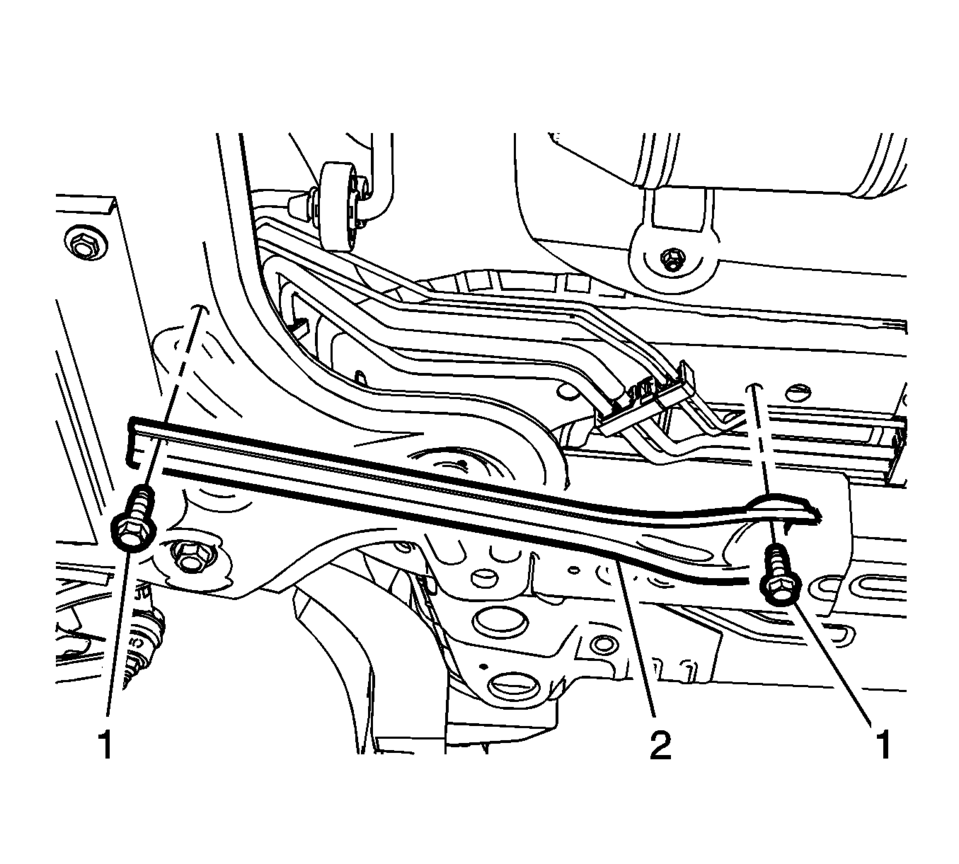
- Remove the frame reinforcement fasteners (1) and remove the frame reinforcement(2).
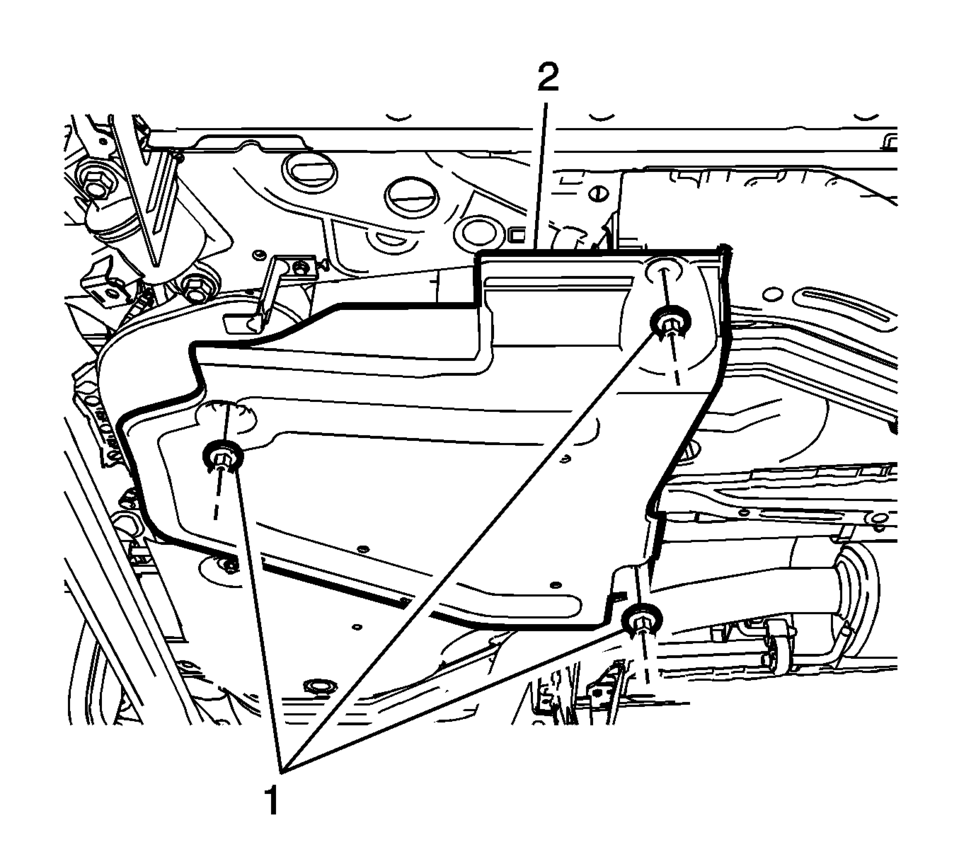
- Remove the EVAP canister cover fasteners (1) and cover (2).
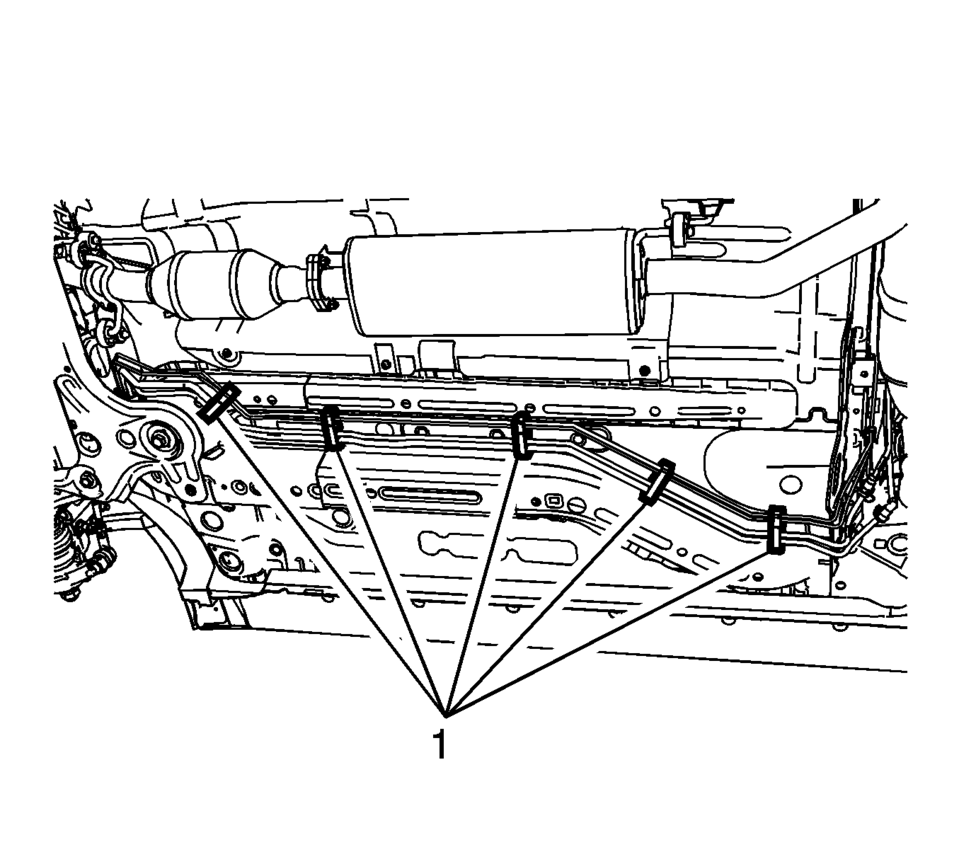
- Open the 5 fuel pipe clips (1).
- Disconnect the fuel tank evaporative emissions connector (2) from evaporative emissions pipe. Refer to Plastic Collar Quick Connect Fitting Service.
- Close the evaporative emissions pipe and evaporative emissions fuel tank feed pipe with the CH-6015 plugs .
- Remove the evaporative emissions pipe.
- Installation Procedure
-
- Remove the CH-6015 plugs from evaporative emissions fuel tank pipe and evaporative emissions pipe.
- Install the evaporative emissions pipe and secure with the rear fuel pipe clip.
- Connect the fuel tank feed pipe connector (2) to the evaporative emissions pipe. Refer to Plastic Collar Quick Connect Fitting Service.
- Close the 5 fuel pipe clips (1).
- Install the EVAP canister cover (2) and tighten the EVAP canister cover
fasteners (1) to 9 Y (71 lb in)
.
- Install the frame reinforcement (2) and tighten the frame reinforcement
fasteners (1) to 60 Y (44 lb ft)
.
- Lower the vehicle.
- Clip the evaporative emissions pipe (2) into the retainer clip (3).
- Remove the CH-807 plugs from the evaporative emissions pipe connectors.
- Connect the front evaporative emissions pipe connector (1) to the evaporative emissions purge valve (2). Refer to Plastic Collar Quick Connect Fitting Service.
- Connect the battery negative cable. Refer to Battery Negative Cable Disconnection and Connection.
 Evaporative Emission Control System Description
Typical Evaporative Emission (EVAP) System Hose Routing Diagram
(1)
Evaporative Emissions (EVAP) Purge Solenoid Valve
(2)
EVAP Canister
...
 Evaporative Emission System Hose/Pipe Replacement
Removal Procedure
Disconnect the evaporative emission pipe (1). Refer to Plastic Collar
Quick Connect Fitting Service.
Remove the plastic retainer ...
Other materials:
Questions and Answers About Safety Belts
Q: Will I be trapped in the vehicle after a crash if I am wearing a safety belt?
A: You could be— whether you are wearing a safety belt or not. Your chance of being
conscious during and after a crash, so you can unbuckle and get out, is much greater
if you are belted.
Q: If my vehicle has ai ...
Liftgate Adjustment
Liftgate Adjustment
Callout
Component Name
1
Liftgate
Caution: Refer to Fastener Caution.
Procedure
Loosen the 4 liftgate hinge bolts to adjust the liftgate.
Adjust the liftgate in order to obtai ...
Camshaft Sprocket Replacement
Special Tools
EN-6340 Camshaft Adjuster Locking Tool
EN-6628–A Camshaft Locking Tool
EN-45059 Angle Meter
For equivalent regional tools, refer to Special Tools.
Removal Procedure
Open the hood.
Remove the air cleaner housing. Refer to Air Cleaner Assembly Replacement. ...

0.0052