Chevrolet Sonic Repair Manual: Front Side Door Window Rear Guide Replacement
|
Callout |
Component Name |
|---|---|
|
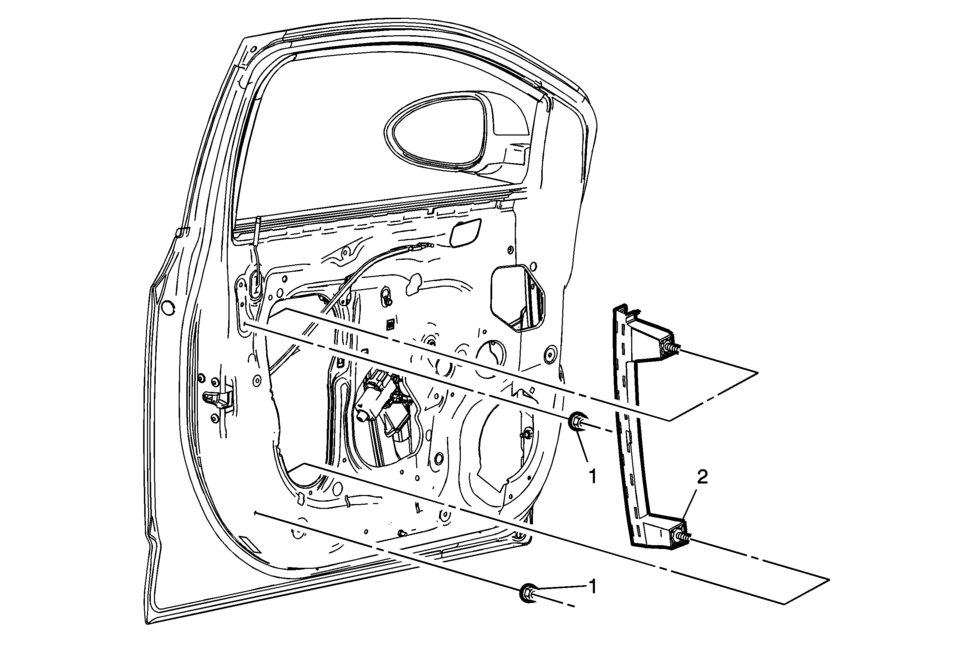
Preliminary Procedure
Remove the front side door trim panel. Refer to Front Side Door Trim Replacement. |
|
|
1 |
Front Side Door Window Rear Guide Nut (Qty?€‰:2) Caution: Refer to Fastener Caution.
11?€‰Y (97?€‰lb?€‰in) |
|
2 |
Front Side Door Window Rear Guide Tip: Inspect the window for proper operation before installing the trim panel. |
 Front Side Door Window Outer Sealing Strip Replacement
Front Side Door Window Outer Sealing Strip Replacement
Callout
Component Name
1
Front Side Door Window Outer Sealing Str ...
 Front Side Door Window Replacement
Front Side Door Window Replacement
Callout
Component Name
Warning: Refer to Glass and Sheet Metal Handling Warning.
...
Other materials:
Home Page (Radio with Touchscreen)
Touchscreen Buttons
Touchscreen buttons show on the screen when available. When a function is
unavailable, the button may gray out. When a function is selected, the button
may highlight.
Home Page Features
audiopicturemovietelephoneelsmartphonelinksettings03/06/2012
...
Floor Rear Air Outlet Duct Replacement - Right Side
Floor Rear Air Outlet Duct Replacement - Right Side
Callout
Component Name
Preliminary Procedure
Remove the front floor carpet. Refer to Floor Panel Carpet Replacement.
1
Floor Rear Air Outlet Du ...
Transmission Control Lever Boot Replacement
Transmission Control Lever Boot Replacement
Callout
Component Name
Preliminary Procedure
Remove the front floor console. Refer to Front
Floor Console Replacement.
1
Shift Control Lever Knob Cove ...

0.006