Chevrolet Sonic Repair Manual: Instrument Panel Lower Airbag Replacement - Driver Side
|
Callout |
Component Name |
|---|---|
|
Warning: Refer to SIR Inflator Module Handling and Storage Warning. Warning: Refer to SIR Warning.
|
|
|
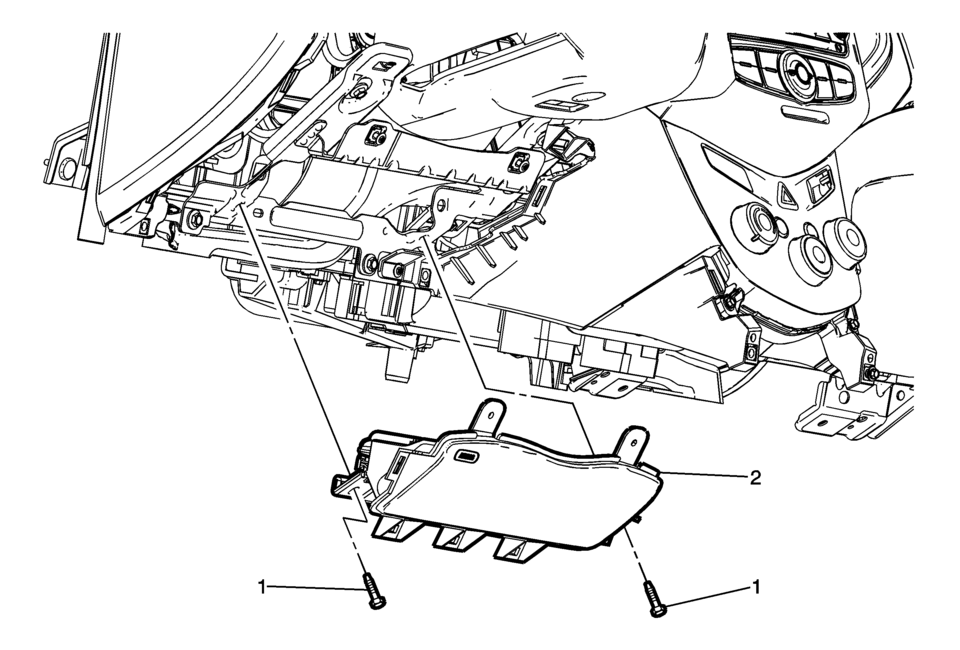
1 |
Instrument Panel Lower Airbag Fastener (Qty:?Ōé¼ŌĆ░2) Caution: Refer to Fastener Caution.
9?Ōé¼ŌĆ░Y?Ōé¼ŌĆ░(80?Ōé¼ŌĆ░lb?Ōé¼ŌĆ░in) |
|
2 |
Inflatable Restraint Instrument Panel Lower Module Assembly ?Ōé¼ŌĆ£ Driver Side Procedure
|
 Instrument Panel Airbag Arming Status Display Replacement
Instrument Panel Airbag Arming Status Display Replacement
Callout
Component Name
Preliminary Procedure
Remove the heater and ai ...
 Instrument Panel Lower Airbag Replacement - Passenger Side
Instrument Panel Lower Airbag Replacement - Passenger Side
Callout
Component Name
Warning: Refer to SIR Inflator Module Handli ...
Other materials:
Front Wheelhouse Liner Replacement (Front)
Front Wheelhouse Liner Replacement
Callout
Component Name
Preliminary Procedure
Remove the tire and wheel assembly. Refer to Tire and Wheel Removal and
Installation.
1
Front Wheelhouse Liner Scr ...
Fuel Tank Heat Shield Replacement
Removal Procedure
Support the fuel tank with a suitable jack.
Remove the fuel tank strap fasteners (1) and lower the fuel tank straps (2).
Remove the fuel tank heat shield fasteners (1) and remove the fuel tank
heat shield (2).
...
Timing Belt Removal
Special Tools
EN-6333 Locking Pin
EN-6340 Locking Tool
For equivalent regional tools, refer to Special Tools.
Note: The timing belt drive gear and oil pump housing must align.
Turn the crankshaft in the direction of engine rotation, by the crankshaft
balancer bolt ...

0.0056