Chevrolet Sonic Repair Manual: Instrument Panel Upper Trim Panel Replacement - Right Side
|
Callout |
Component Name |
|---|---|
Preliminary Procedure
|
|
|
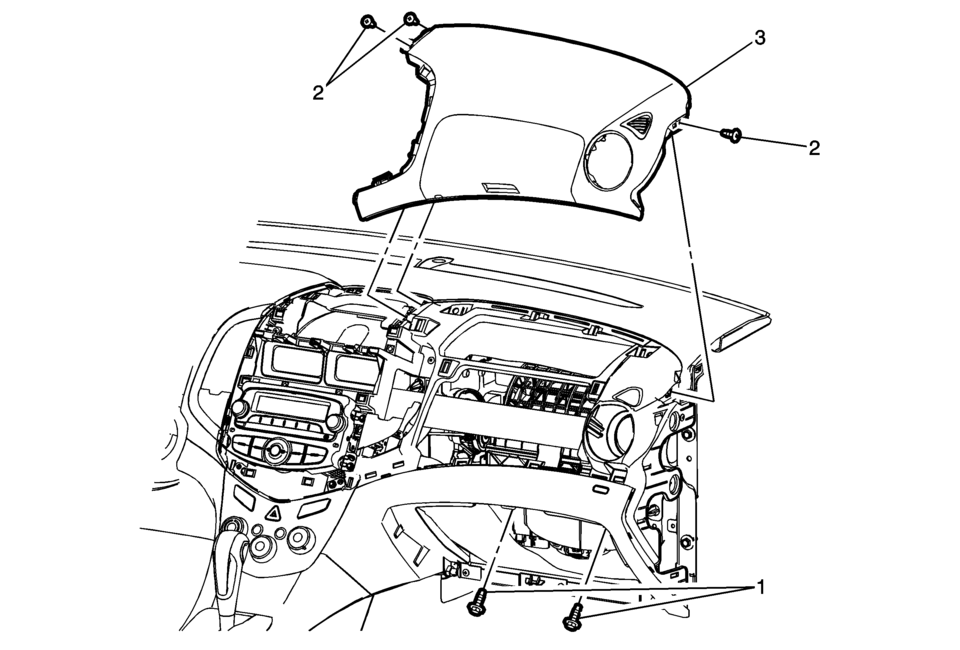
1 |
Instrument Panel Inflatable Restraint Module Fasteners (Qty:?€‰2) Caution: Refer to Fastener Caution.
10Y 89?€‰lb?€‰in |
|
2 |
Instrument Panel Upper Trim Panel Fastener (Qty:?€‰3) |
|
3 |
Instrument Panel Upper Trim Panel Procedures
|
 Instrument Panel Upper Trim Panel Replacement - Left Side
Instrument Panel Upper Trim Panel Replacement - Left Side
Callout
Component Name
Preliminary Procedure
Remove the instrument cluste ...
 Cup Holders
...
Other materials:
Rear Side Door Check Link Replacement
Rear Side Door Check Link Replacement
Callout
Component Name
Preliminary Procedures
Move the window to the full up position.
Remove the rear side door trim panel. Refer to Rear Side Door Trim
Replacement
...
Front Wheel Drive Shaft Seal Replacement - Case Side
Front Wheel Drive Shaft Seal Replacement - Case Side
Callout
Component Name
1
Front Wheel Drive Shaft Oil Seal
Special Tools
DT-23129 Universal Seal Remover
DT-47790 Seal Installer
GE-6125-1B Slide Hamme ...
Use of Room Temperature Vulcanizing (RTV) and Anaerobic Sealant
Pipe Joint Compound
Note: Three types of sealer are commonly used in engines. These
are RTV sealer, anaerobic gasket eliminator sealer, and pipe joint compound.
The correct sealer and amount must be used in the proper location to prevent
oil leaks. DO NOT interchange the 3&# ...

0.0065