Chevrolet Sonic Repair Manual: Manual Transmission Shift Lever and Selector Lever Cable Adjustment
- Remove the floor console. Refer to Front Floor Console Replacement.
- Lift upward and disengage (do not remove) both cable lock adjusters (1) to release the internal cable assembly, one for each side.
- Block the shift control housing, push the selector lever (2) backwards and push (arrow) the blocking device (1) towards the shift control housing.
- lock the position of the shift control lever by rotating the reverse lockout device with the following instructions:
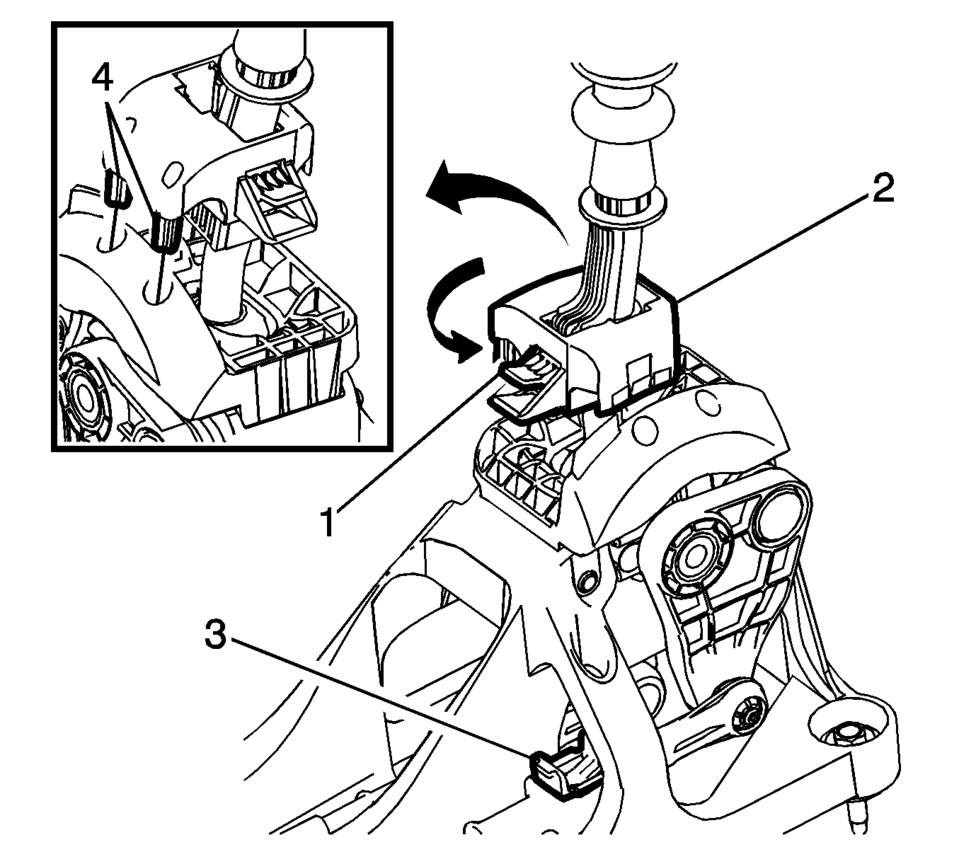
- Push down on tab (1) and pull up on device (2) to release from installed position.
- Rotate device 180 degrees so tab (1) is in the rear of the shift control assembly.
- Secure integral pins (4) in holes located on shifter base by pushing down device (2).
- Secure adjuster locks (3) by pushing down until locked. One for each cable.
- Reposition the reverse lockout device with the following instructions:
- Push down on tab (1) and pull up on device (2) to release from installed position.
- Rotate device (2) 180 degrees so tab (1) is in the front of the shift control assembly.
- Push downward on the reverse lockout device (2) until tab (1) snaps into detent.
- Unblock the shift control housing, push slightly the selector lever (2) backwards and pull (arrow) the blocking device away from the shift control housing.
- Install the floor console. Refer to Front Floor Console Replacement.
- Verify correct operation of the transmission control assembly.

Note:
The hole of the transmission gear control (2) must be aligned to the hole in the base so the pin (1) can pass thru both. The transmission gear control will be locked in the 1? neutral position.
Note:
During this procedure DO NOT touch or preload the fixed shift lever as this may cause mis-adjustment to the shift system.
Note:
When unblocking the blocking device (1) a defined snap noise should be audible, a snap effect should be felt.
 Manual Transmission Shift Lever Cable Adjustment
Special Tools
DT-527-A Adjuster or 5mm drill bit
For equivalent regional tools, refer to Special Tools.
Note: Not using the specified tools may lead to shift system mis-adjustment.
...
 Manual Transmission Shift Lever and Selector Lever Cable Replacement
Removal Procedure
Remove the battery tray. Refer to
Battery Tray Replacement.
\i
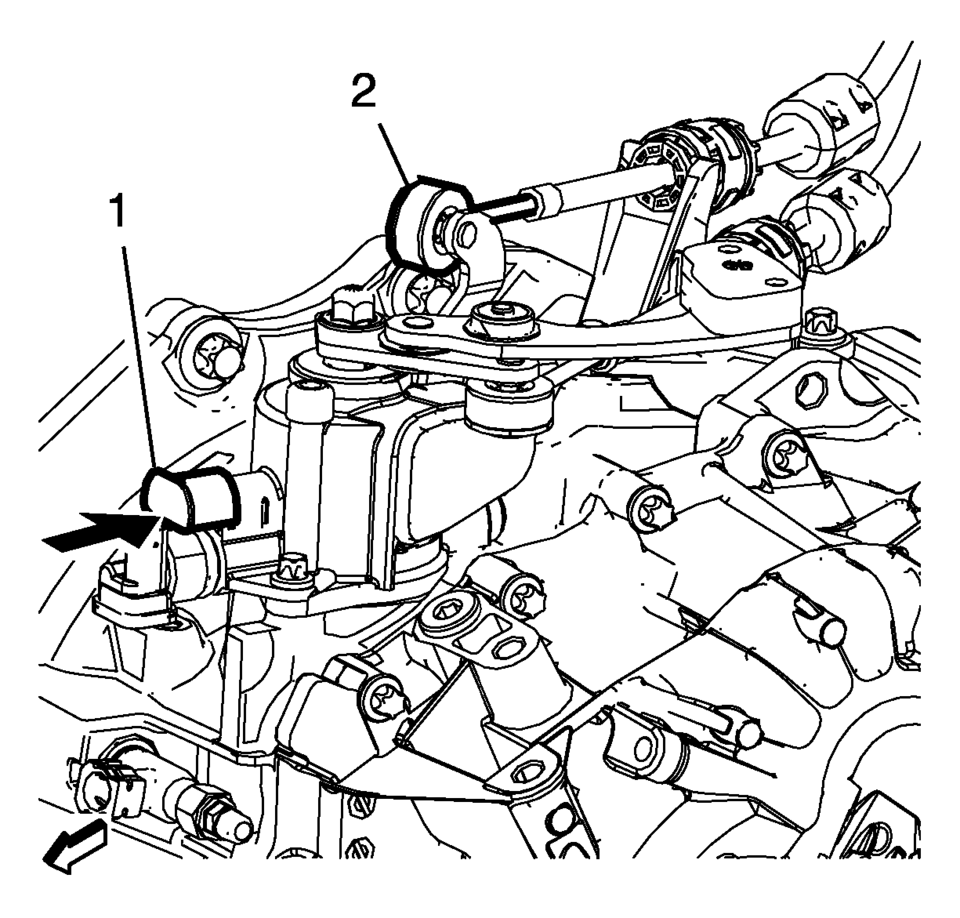
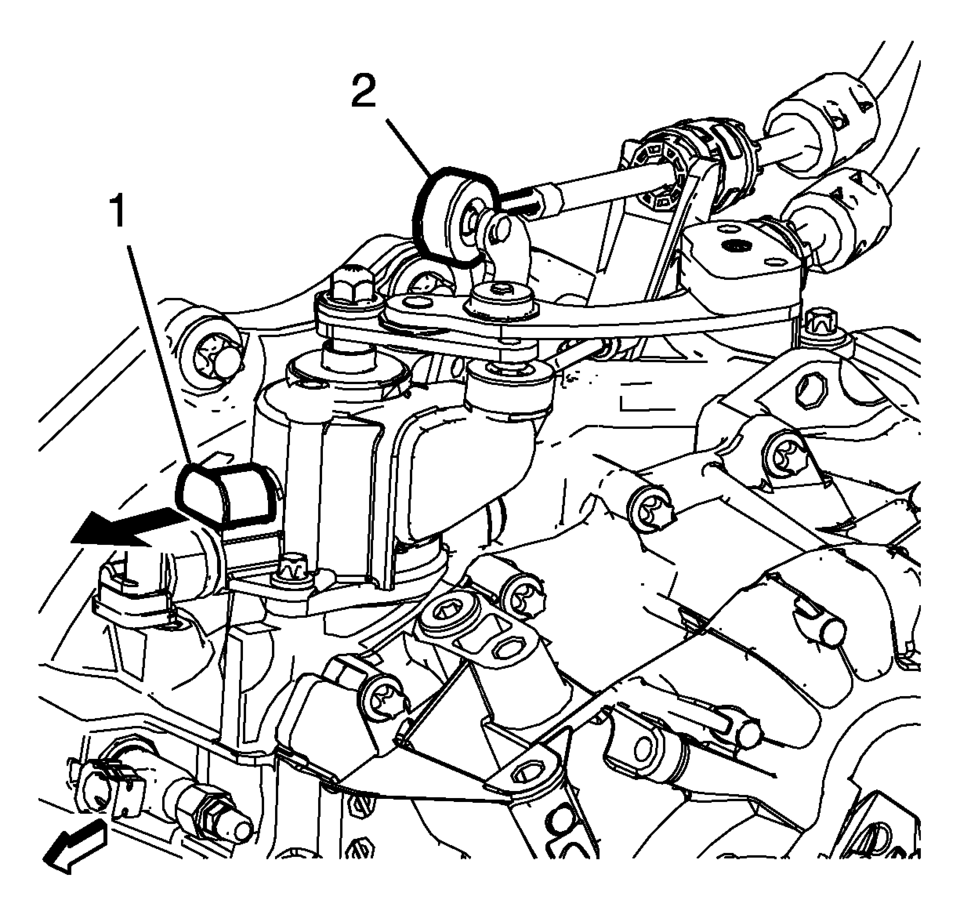
Disconnect the shift lever and selector cable ends (1)
from the transmission s ...
Other materials:
Communication Interface Module Replacement
Communication Interface Module Replacement
Callout
Component Name
Preliminary Procedure
Remove the instrument panel lower compartment.
Refer to Instrument Panel Lower Compartment
Replacement.
Remove the instrument pa ...
Special Tools
Illustration
Tool Number/ Description
EN-45059
J-45059
Angle Meter
...
Brake Pedal Position Sensor Calibration
Calibration Criteria
Note: Do not apply the brake pedal during the brake pedal position
sensor calibration procedure. Any movement of the brake pedal during this
procedure will cause the calibration procedure to fail. If this occurs,
the brake pedal position sensor calibrati ...

0.007