Chevrolet Sonic Repair Manual: Piston, Connecting Rod, and Bearing Installation
Special Tools
EN-470-B Angular Torque Wrench
For equivalent regional tools, refer to Special Tools.
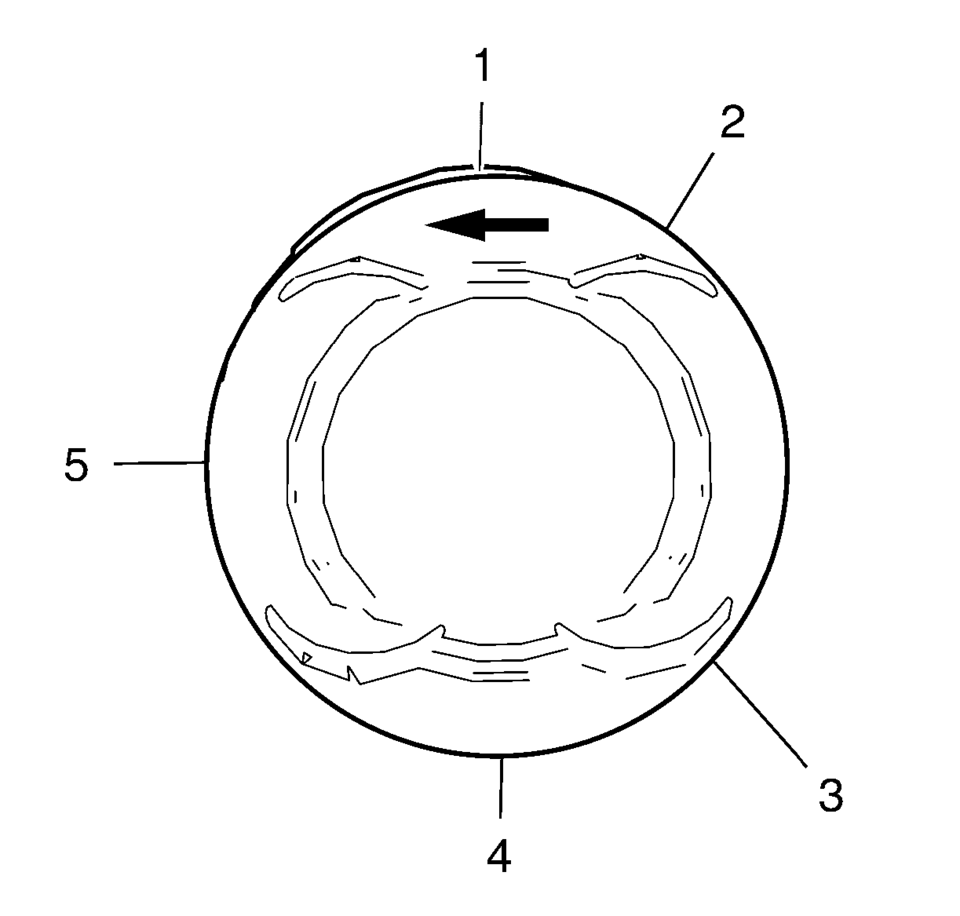
- Adjust the piston ring joints as follows:
- Upper compression ring (1).
- Lower compression ring (4).
- Oil rings (2) or (3).
- Oil ring spacer (5).
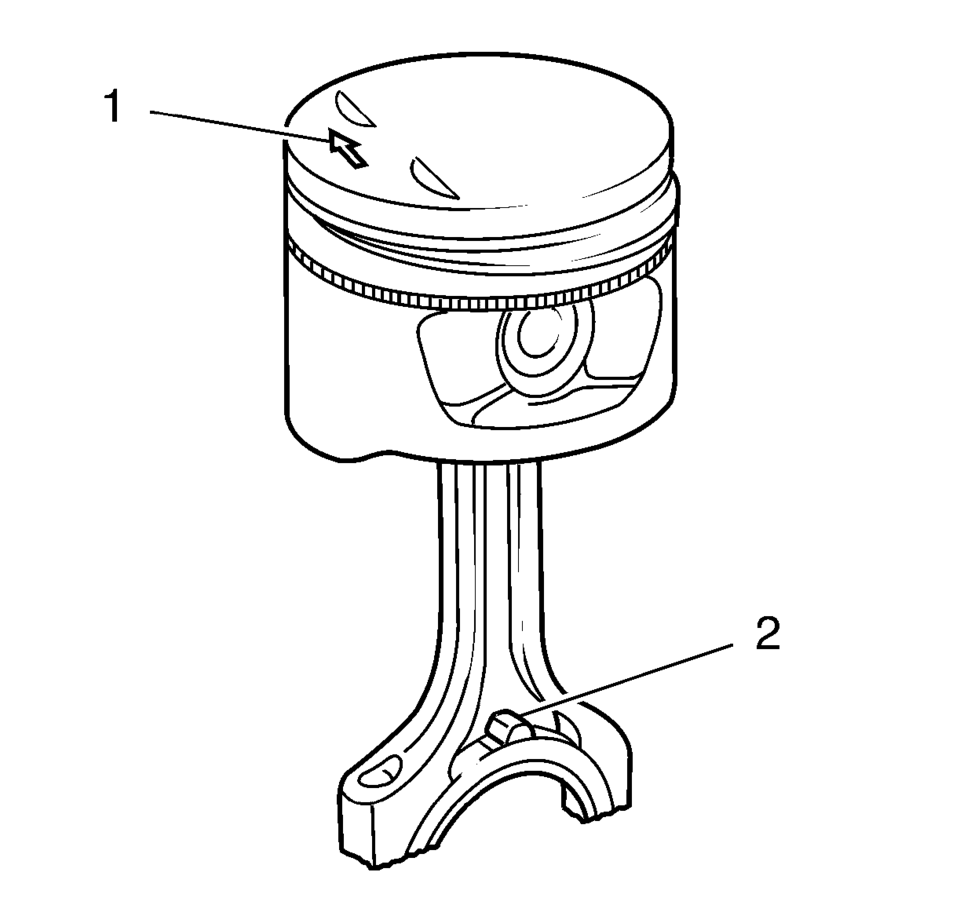
- The arrow (1) on the piston head must point to the timing side.
- The markings on the connecting rods (2) must point to the transmission side.
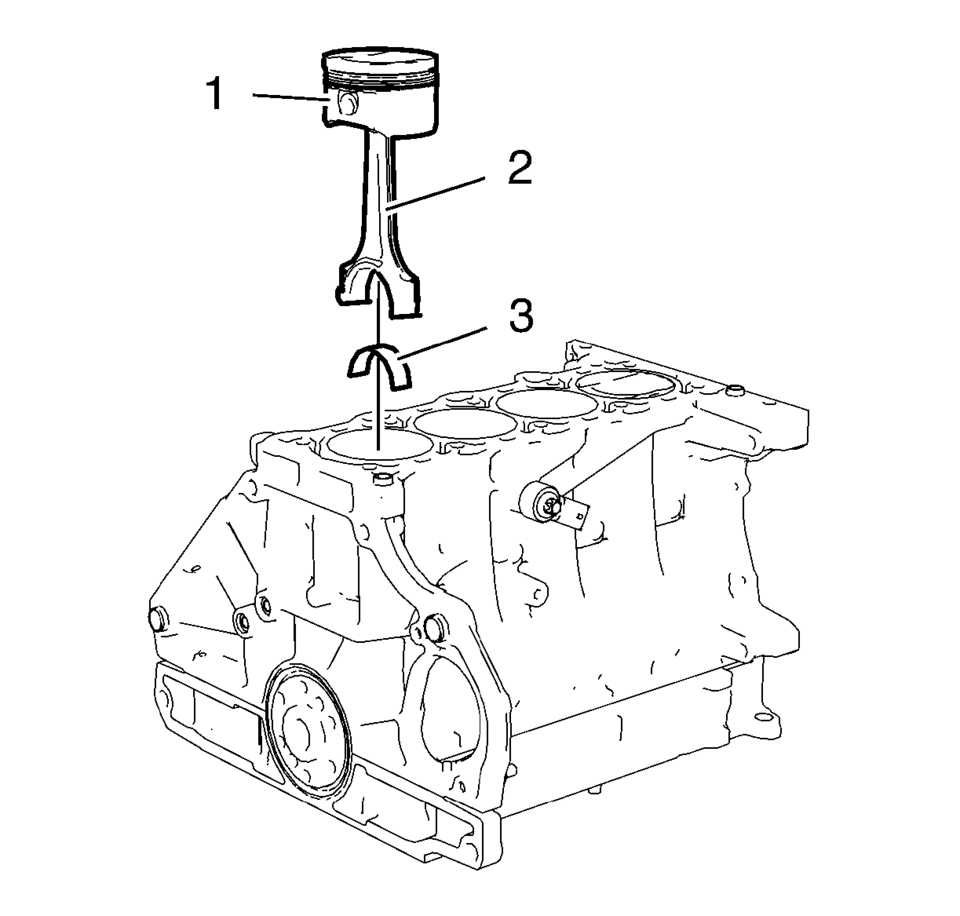
- Install a piston ring compressor to compress the piston rings.
- Install the pistons (1) in along with connecting rods (2) and upper connecting rod bearings (3) to the engine block and to the crankshaft.
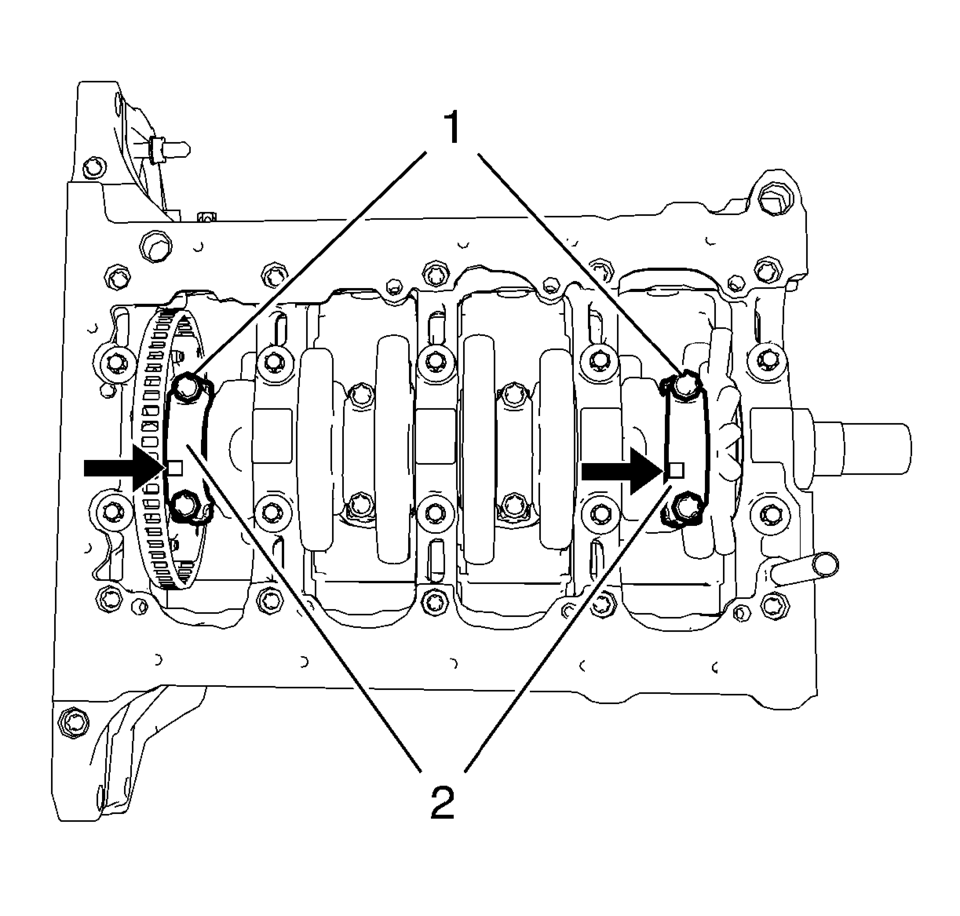
- Install the 2 connecting rod bearings and the 2 connecting rod bearing caps (2) of cylinder 1 and 4.
- Install the 4 NEW connecting rod bearing cap bolts (1) and tighten in the following sequence:
- Tighten the connecting rod bearing cap bolts to 25 Y (18 lb ft)
.
- Tighten the connecting rod bearing cap bolts an additional 45 degrees. Use EN-470 B wrench.
- Rotate the crankshaft 180 degrees.
- Install the 2 connecting rod bearings and the 2 connecting rod bearing caps (2) of cylinder 3 and 2.
- Install the 4 NEW connecting rod bearing cap bolts (1) and tighten in the following sequence:
- Tighten the connecting rod bearing cap bolts to 25 Y (18 lb ft)
.
- Tighten the connecting rod bearing cap bolts an additional 45 degrees. Use EN-470–B wrench.
Note:
The flarings (arrows) on the connecting rod bearing caps must point to the transmission side. The connecting rod bearing caps must be installed in their original position.
Caution:
Refer to Fastener Caution.
Caution:
Refer to Torque-to-Yield Fastener Caution.
Note:
Do not reuse the old bolts.

Note:
The flarings (arrows) on the connecting rod bearing caps must point to the transmission side. The connecting rod bearing caps must be installed in their original position.
Note:
Do not reuse the old bolts.
 Piston, Connecting Rod, and Bearing Cleaning and Inspection
Special Tools
EN-470-B Angular Torque Wrench
For equivalent regional tools, refer to Special Tools.
Visual Inspection And Cleaning Procedure
Connecting Rod
Warning: Wear safety gla ...
 Piston, Connecting Rod, and Bearing Removal
Install the crankshaft balancer bolt.
Set the pistons 1 and 4 to TDC in direction of engine rotation.
Note: Note cylinder sequence.
Mark the connecting rod with the ...
Other materials:
Headlining Trim Panel Replacement (Sedan with Sunroof)
Headlining Trim Panel Replacement
Callout
Component Name
Warning: Do not attempt to repair or alter the head impact
energy-absorbing material glued to the headliner or to the garnish trims.
If the material is damaged ...
Torque Converter Housing with Fluid Pump Assembly Installation (6T40/45/50 Non
Hybrid)
Torque Converter Housing with Fluid Pump Assembly Installation
Callout
Component Name
1
Fluid Pump Seal Assembly
2
Torque Converter Housing Gasket
3
Torque Converte ...
Inside mirror
Basic information
In the Nissan Armada, adjust the inside mirror by carefully setting both its
height and angle to achieve optimal rearward visibility and driving comfort.
Manual anti-glare type (if so equipped)
The Nissan Armada manual anti-glare inside mirror can be adjusted to reduce ...

0.0055