
Chevrolet Sonic Repair Manual: Rear Wheel Bearing and Hub Replacement (Disc Brake)
Special Tools
EN–45059 Angle Meter
For equivalent regional tools, refer to Special Tools.
- Removal Procedure
-
- Raise and suitably support the vehicle. Refer to Lifting and Jacking the Vehicle.
- Remove the tire and wheel assembly. Refer to Tire and Wheel Removal
and Installation.
Caution:
Support the brake caliper with heavy mechanic wire, or equivalent, whenever it is separated from its mount and the hydraulic flexible brake hose is still connected. Failure to support the caliper in this manner will cause the flexible brake hose to bear the weight of the caliper, which may cause damage to the brake hose and in turn may cause a brake fluid leak.
- Without disconnecting the hydraulic brake flex hose, remove and support the rear brake caliper and bracket as an assembly. Refer to Rear Brake Caliper Replacement.
- Remove the rear brake rotor. Refer to Rear Brake Rotor Replacement.
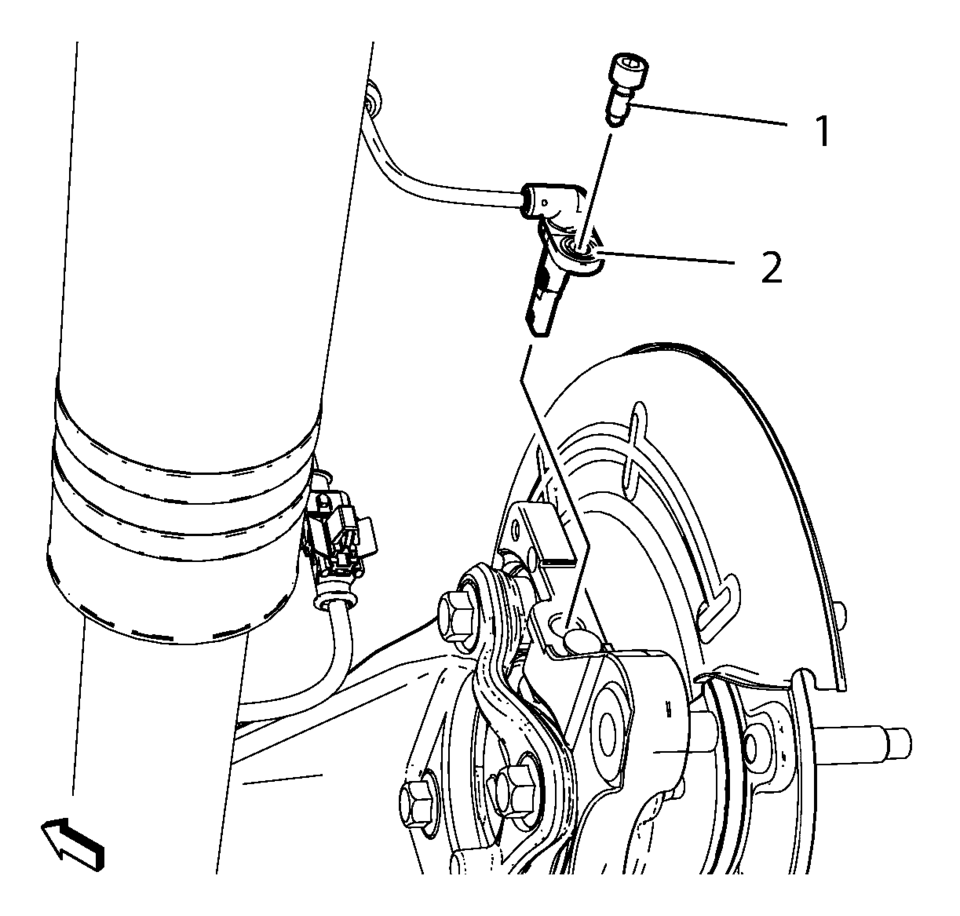
- Remove the wheel speed sensor bolt (1).
- Remove the wheel speed sensor (2).
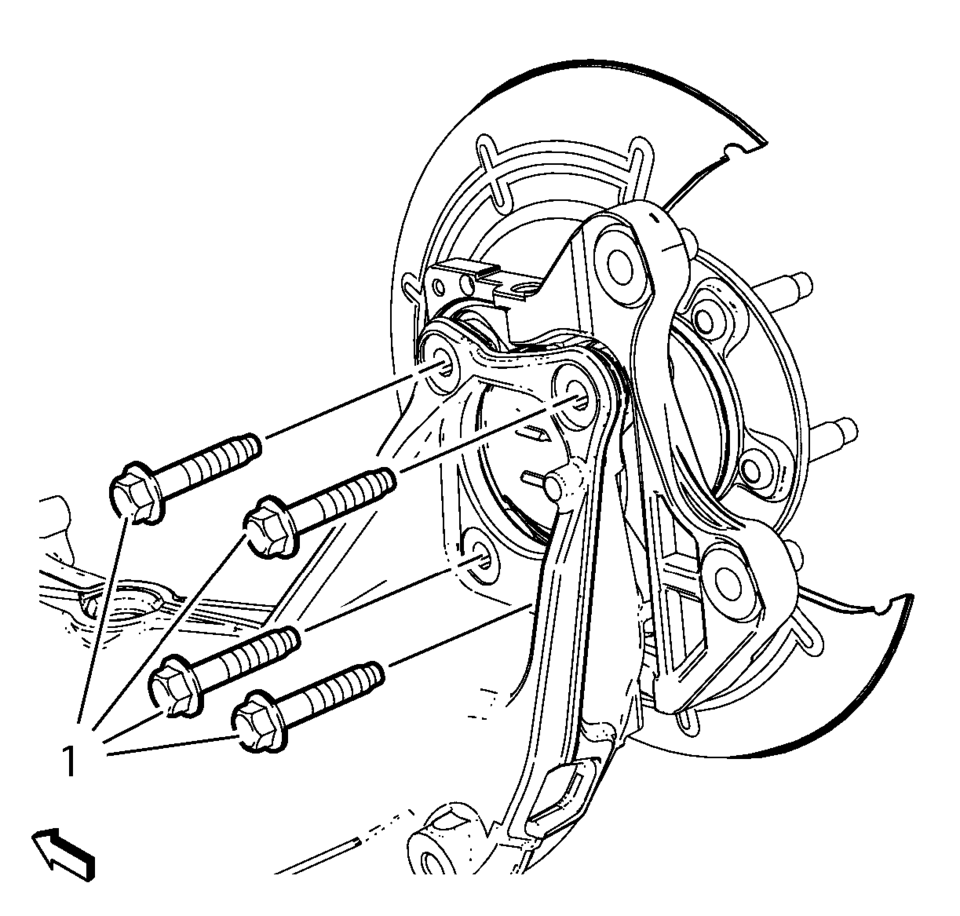
- Remove and DISCARD the 4 wheel bearing/hub mounting bolts (1).
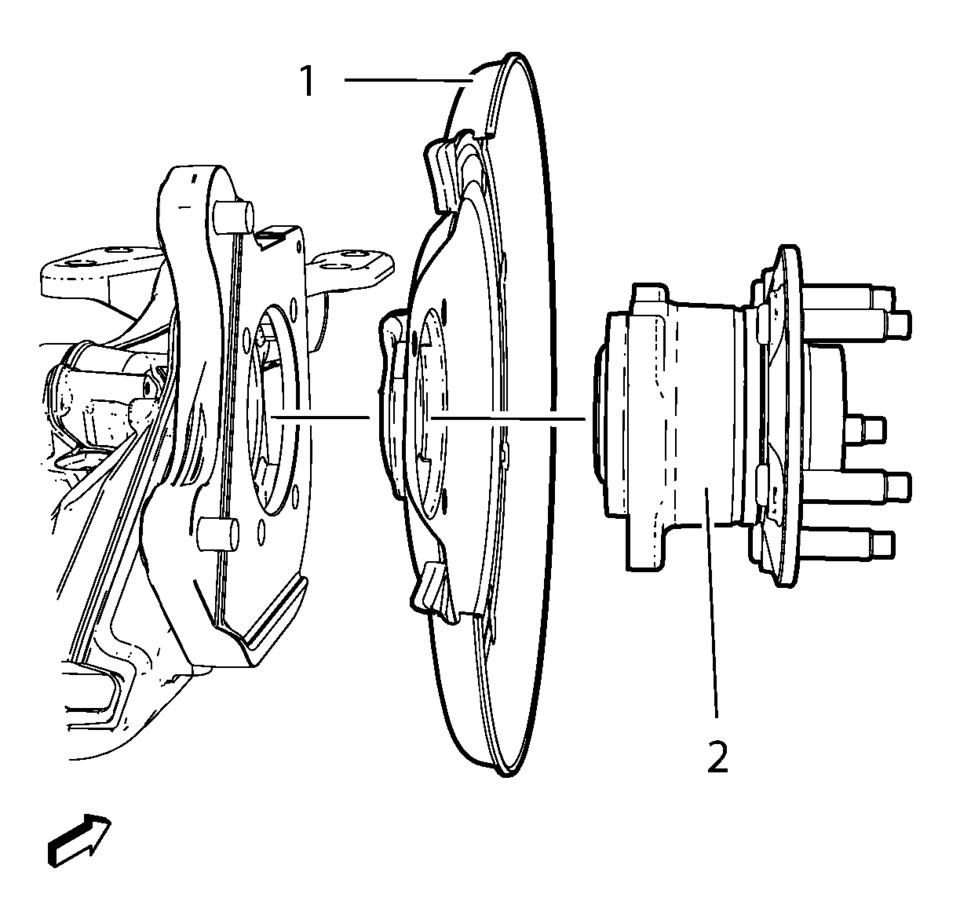
- Remove the wheel bearing/hub assembly (2) and rear brake shield (1) from the rear axle.
- Installation Procedure
-
- Position the rear brake shield (1) and wheel bearing/hub assembly (2) in the rear axle.
- Install the 4 NEW wheel bearing/hub mounting bolts (1) and tighten a
first pass to 58 Y (43 lb ft)
. Tighten the bolts evenly, in a cross-pattern.
- Install the wheel speed sensor (2).
- Install the wheel speed sensor bolt (1) and tighten to 6 Y (53 lb in)
.
- Install the brake rotor. Refer to Rear Brake Rotor Replacement.
- Install the brake caliper and bracket as an assembly. Refer to Rear Brake Caliper Replacement.
- Install the tire and wheel assembly. Refer to Tire and Wheel Removal and Installation.
- Lower the vehicle.
Caution:
Refer to Fastener Caution.
 Front Wheel Bearing and Hub Replacement
Special Tools
CH-50559 Wheel Hub/Bearing Remover Kit
For equivalent regional tools, refer to Special Tools.
Removal Procedure
Raise and support the vehicle. Refer to Lifting and Jac ...
 Rear Wheel Bearing and Hub Replacement (Drum Brake)
Rear Wheel Bearing and Hub Replacement
Callout
Component Name
Preliminary Procedures
Raise and support the vehicle. Refer to Liftin ...
Other materials:
Hood Replacement
Hood Replacement
Callout
Component Name
Preliminary Procedure
Disconnect the windshield washer nozzle hose.
1
Hood Hinge Nut (Qty:?€‰4)
Caution: Refer to Fastener Caution.
Procedu ...
2-6 Clutch Piston Removal
2-6 Clutch Piston Removal
Callout
Component Name
1
2? Clutch Spring Retainer
Special Tool
DT-28585 Snap Ring Remover or equivalent
For equivalent regional tools, refer to Special
Tools.
2 ...
Control Solenoid Valve and Transmission Control Module Assembly Installation
Control Solenoid Valve and Transmission Control Module Assembly Installation
Callout
Component Name
1
Control Solenoid Valve Assembly Filter Plate
Caution: Use care when removing or installing the filter plate
...

0.0055