Chevrolet Sonic Repair Manual: Steering Gear Boot Replacement
Special Tools
CH-804 Tensioner
For equivalent regional tools, refer to Special Tools.
- Removal Procedure
-
- Raise and support the vehicle. Refer to Lifting and Jacking the Vehicle.
- Remove the steering linkage outer tie rod. Refer to Steering Linkage Outer Tie Rod Replacement.
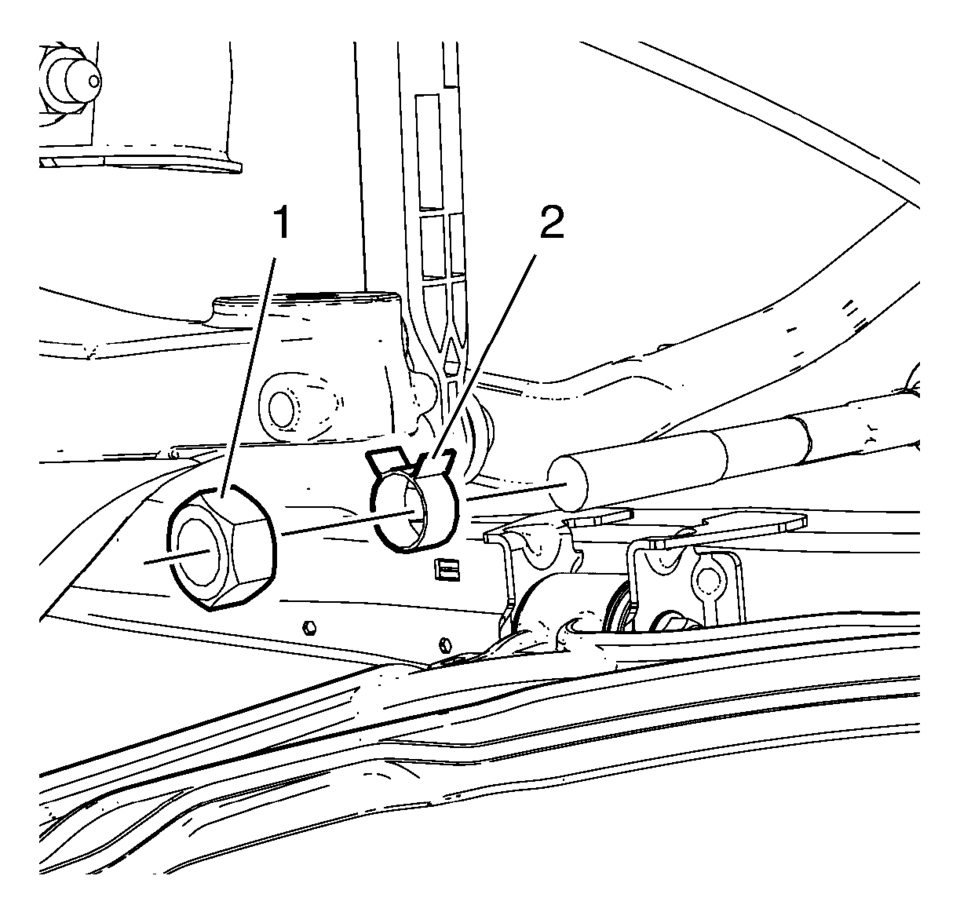
- Remove the steering linkage inner tie rod nut (1).
- Remove the steering gear boot outer clamp (2).
- Remove the steering gear boot inner clamp (3). Discard the clamp.
- Remove the steering gear boot (2).
- Clean the steering linkage inner tie rod and the steering gear boot contact area of any lubricant or debris.
Note:
Place match marks on the steering linkage inner tie rod nut and the steering linkage inner tie rod before removing. During installation of the nut, align the match marks.
- Installation Procedure
-
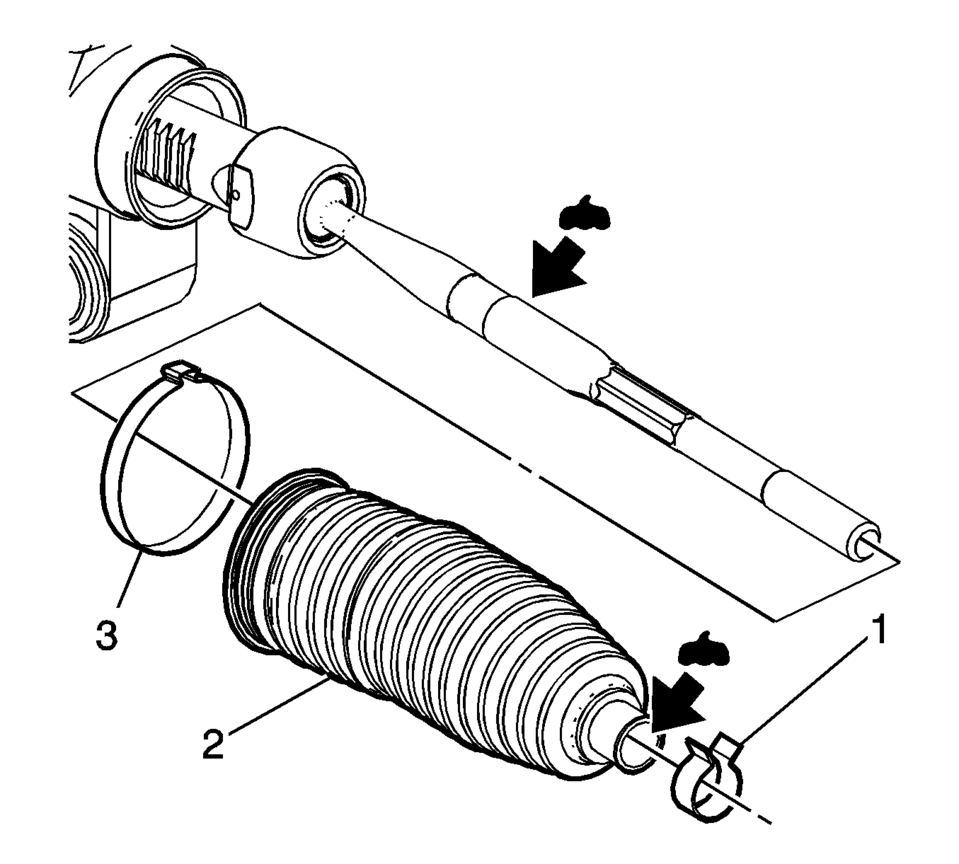
- Install a new steering gear boot inner clamp (3) loosely on the steering gear boot (2).
- Apply the lubricant from the service kit to the steering linkage inner tie rod and to the steering gear boot (2).
- Install the steering gear boot (2) over the steering linkage inner tie rod and onto the steering gear.
- Use the CH-804 tensioner in order to crimp the inner steering gear boot clamp (1).
- Install the steering gear outer boot clamp (2).
- Install the steering linkage inner tie rod nut (1).
- Install the steering linkage outer tie rod. Refer to Steering Linkage Outer Tie Rod Replacement.
- After installation is complete, measure and adjust the front toe. Refer to Wheel Alignment - Steering Wheel Angle and/or Front Toe Adjustment.
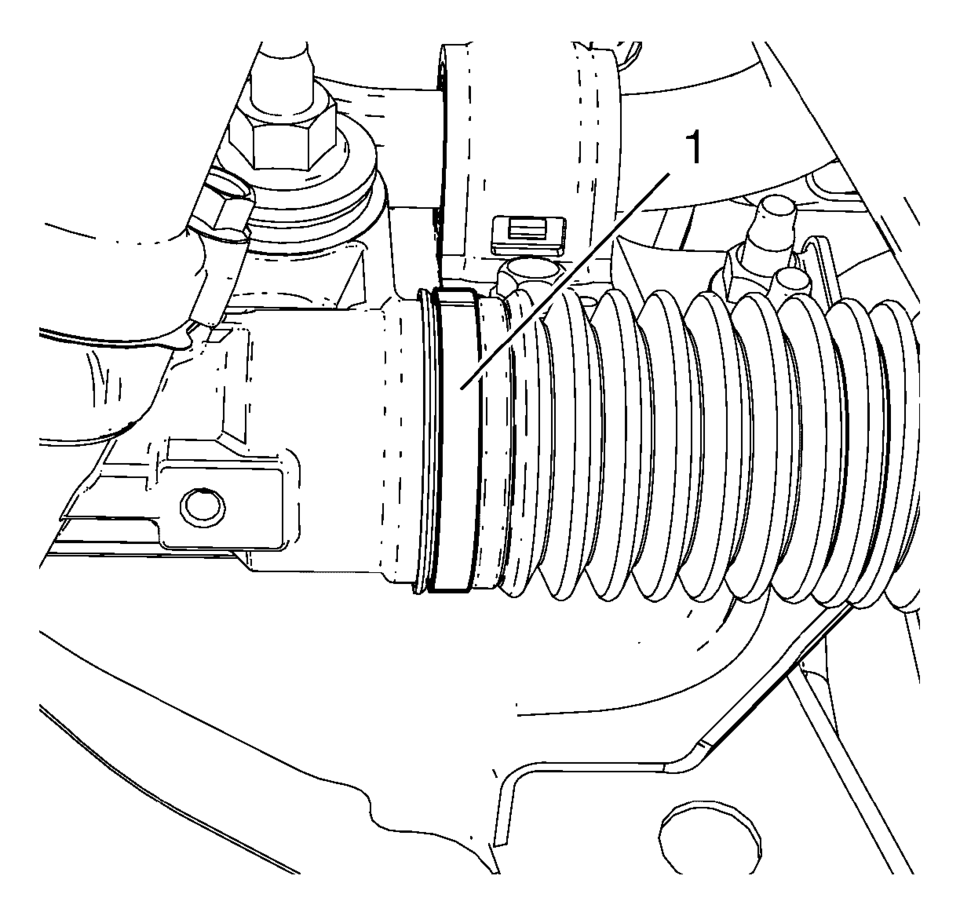
Note:
The steering gear boot must seat in the appropriate groove on the steering gear.

 Steering Gear Replacement
Steering Gear Replacement
Callout
Component Name
Caution: With wheels of the vehicle facing straight ahead,
secure the st ...
Other materials:
Drunk Driving
Death and injury associated with drinking and driving is a global tragedy.
Warning
Drinking and then driving is very dangerous. Your reflexes, perceptions, attentiveness,
and judgment can be affected by even a small amount of alcohol. You can have a serious
— or even fatal — collision if y ...
Outside Rearview Mirror Housing Rear Cover Replacement
Outside Rearview Mirror Housing Rear Cover Replacement
Callout
Component Name
Preliminary Procedures
Remove the outside rearview mirror glass. Refer to Outside Rearview Mirror
Glass Replacement.
1
...
Steering Wheel Airbag Coil Replacement
Steering Wheel Airbag Coil Replacement
Callout
Component Name
Preliminary Procedures
Remove the steering wheel. Refer to Steering Wheel Replacement.
Remove the steering column upper trim cover. Refer to Steering Column
...

0.0051