Chevrolet Sonic Repair Manual: 2-6 Clutch Piston Installation (6T30)
|
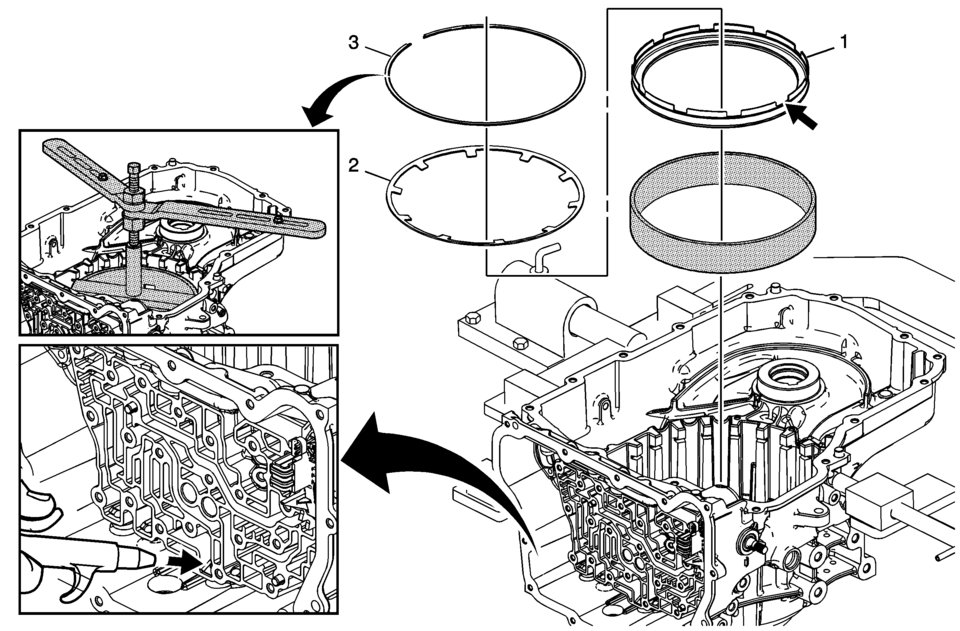
Callout |
Component Name |
|---|---|
|
1 |
2? Clutch Piston Assembly Note:
Special Tool
DT-48271 Seal Protector For equivalent regional tools, refer to Special Tools. |
|
2 |
2? Clutch Spring |
|
3 |
2? Clutch Spring Retainer Caution: Regulate the air pressure to 276 kPa (40 psi) maximum. High pressure could cause the piston to over travel and damage the piston seals. Note:
For equivalent regional tools, refer to Special Tools. |
 General
...
 2-6 Clutch Piston Installation (6T40/45/50)
2-6 Clutch Piston Installation
Callout
Component Name
1
2? Clutch Piston Assembly
Note:
Position the ...
Other materials:
Battery Charging
Special Tools
EL 50313 Battery Tester
For equivalent regional tools, refer to Special Tools.
Diagnostic Aids
For best results, use an automatic taper-rate battery charger with a
voltage capability of 16 V.
The charging area should be well ventilated.
Do not charge a bat ...
Air Conditioning Refrigerant Service Valve Core Replacement
Special Tools
GE-39400-A Halogen Leak Detector
GE-46246 Valve Core Removal Tool
For equivalent regional tools, refer to Special Tools.
Removal Procedure
Recover the refrigerant. Refer to Refrigerant Recovery and Recharging.
Remove the service port valve cor ...
Brake assist
Brake assist
The Brake Assist system in the Nissan Armada is designed to enhance braking performance
during emergency situations. When the system detects that the driver is applying
the brake pedal with significant force, it automatically increases braking pressure
beyond what a conventional ...

0.0054