Chevrolet Sonic Repair Manual: Battery Current Sensor Replacement
- Removal Procedure
-
- Disconnect the negative battery cable. Refer to Battery Negative Cable Disconnection and Connection.
- Disconnect the battery current sensor from the body harness connector.
- Unclip the battery current sensor from the battery tray.
- Remove the battery tray. Refer to Battery Tray Replacement.
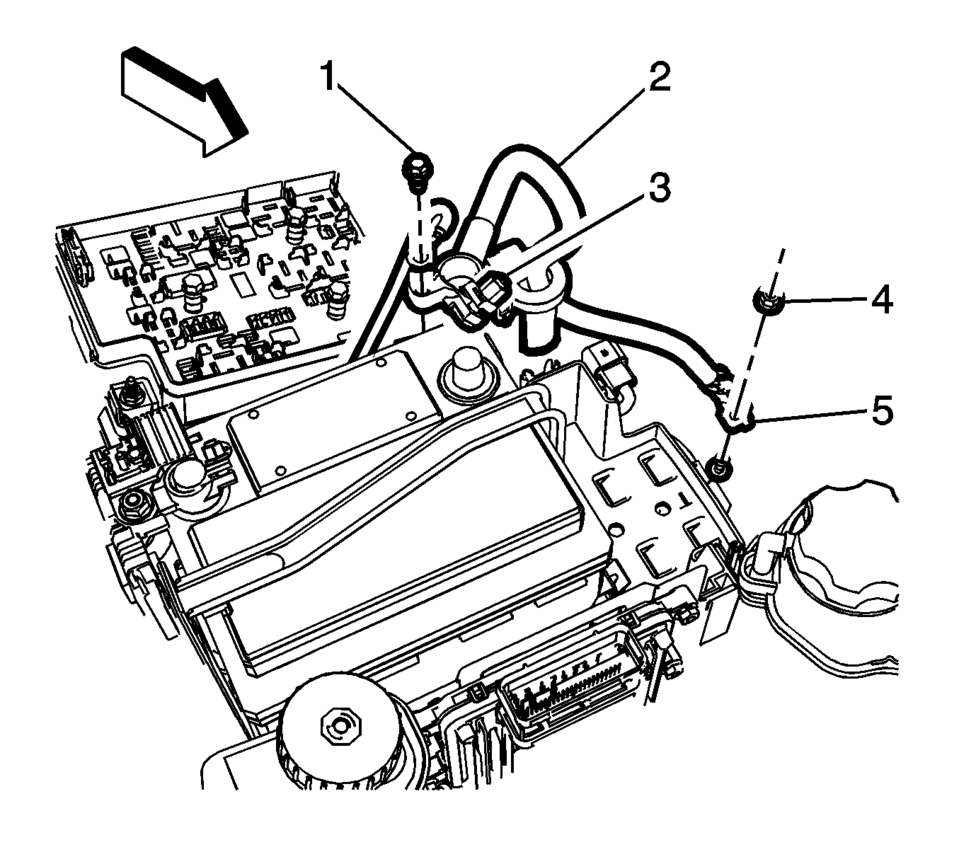
- Remove the battery negative cable frame ground nut (4) and terminal (5).
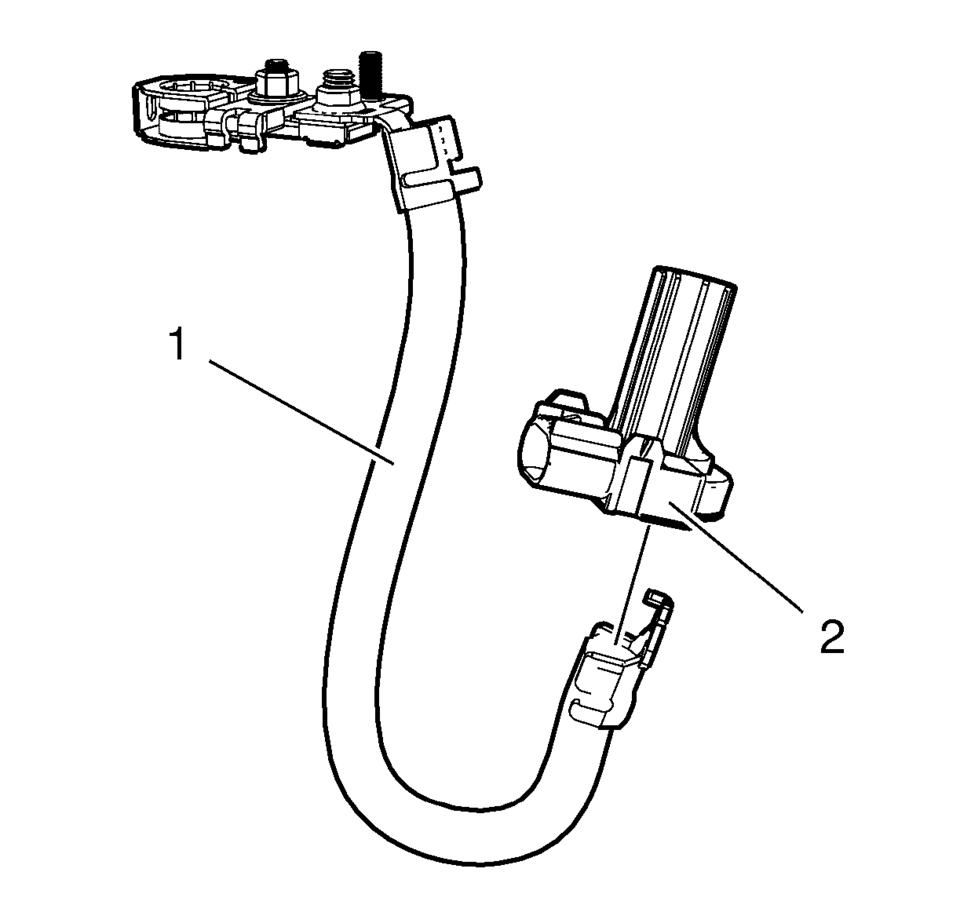
- Slide the battery current sensor (2) off the battery negative cable (1).


Note:
Observe the position of the battery current sensor when removing.
- Installation Procedure
-
- Install the battery current sensor (2) onto the battery negative cable (1).
- Install the battery negative cable frame ground terminal (5) and bolt (4).
Tighten to 22 Y (16 lb ft)
.
- Install the battery tray. Refer to Battery Tray Replacement.
- Clip the battery current sensor onto the battery tray.
- Connect the battery current sensor to the body harness connector.
- Connect the negative battery cable. Refer to Battery Negative Cable Disconnection and Connection.


Caution:
Refer to Fastener Caution.
 Battery Charging
Special Tools
EL 50313 Battery Tester
For equivalent regional tools, refer to Special Tools.
Diagnostic Aids
For best results, use an automatic taper-rate battery charger with a
...
 Battery Description and Operation
Warning: Batteries produce explosive gases, contain corrosive acid,
and supply levels of electrical current high enough to cause burns. Therefore,
to reduce the risk of personal injury when w ...
Other materials:
Filling the Tank
Warning
Fuel vapors and fuel fires burn violently and can cause injury or death.
. To help avoid injuries to you and others, read and follow all the instructions
on the fuel pump island.
. Turn off the engine when refueling.
. Keep sparks, flames, and smoking materials away from fuel.
...
Front End Upper Tie Bar Replacement
Removal Procedure
Warning: Refer to Approved Equipment for Collision Repair
Warning.
Warning: Refer to Glass and Sheet Metal Handling Warning.
Disable the SIR System. Refer to SIR Disabling and Enabling.
Disconnect the negative battery cable. Refer ...
Antilock Brake System Automated Bleed
Warning: Refer to Brake Fluid Irritant Warning.
Caution: Refer to Brake Fluid Effects on Paint and Electrical Components
Caution.
Note: Before performing the Antilock Brake System (ABS) Automated
Bleed Procedure, first perform a pressure bleed of the base brake system. Refer
...
0.0071
