Chevrolet Sonic Repair Manual: Cylinder Head Assemble
Special Tools
- EN-958 Valve Stem Seal Installer
- EN-8062 Valve Spring Compressor
- EN-8062-5 Adapter
- EN-50717-2 Compressor Assembly of EN-50717 Kit
For equivalent regional tools, refer to Special Tools.
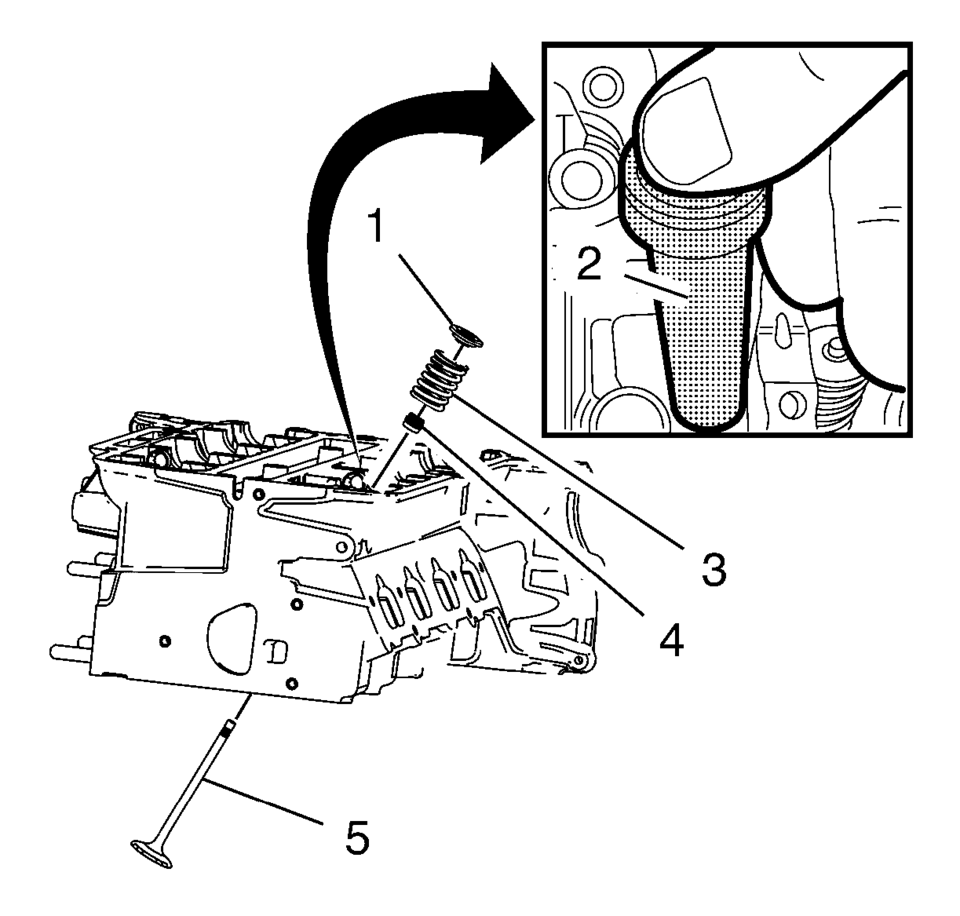
- Lubricate the valve stem and the valve guide with clean engine oil.
- Install the valve (5).
- Install the NEW valve stem oil seal (4), using the EN-958 installer (2).
- Loosely install the valve spring (3) and the valve spring retainer (1).
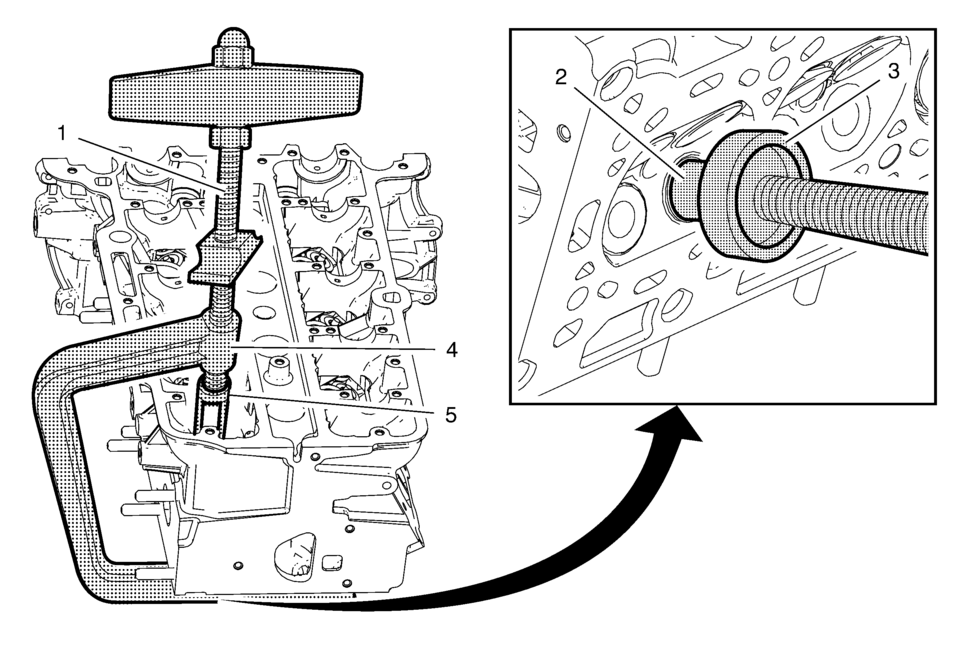
- Install the EN-50717?E assembly (1) to the EN-8062 compressor (4).
- Install the EN-8062?E adapter (3) to the EN-8062 compressor .
- Install the compressor assembly to the cylinder head, so that the adapter (5) of the EN-50717?E assembly (1) contacts the valve spring retainer properly and the EN-8062?E adapter (3) contacts the valve disc (2). Prefix the EN-8062 compressor (4).
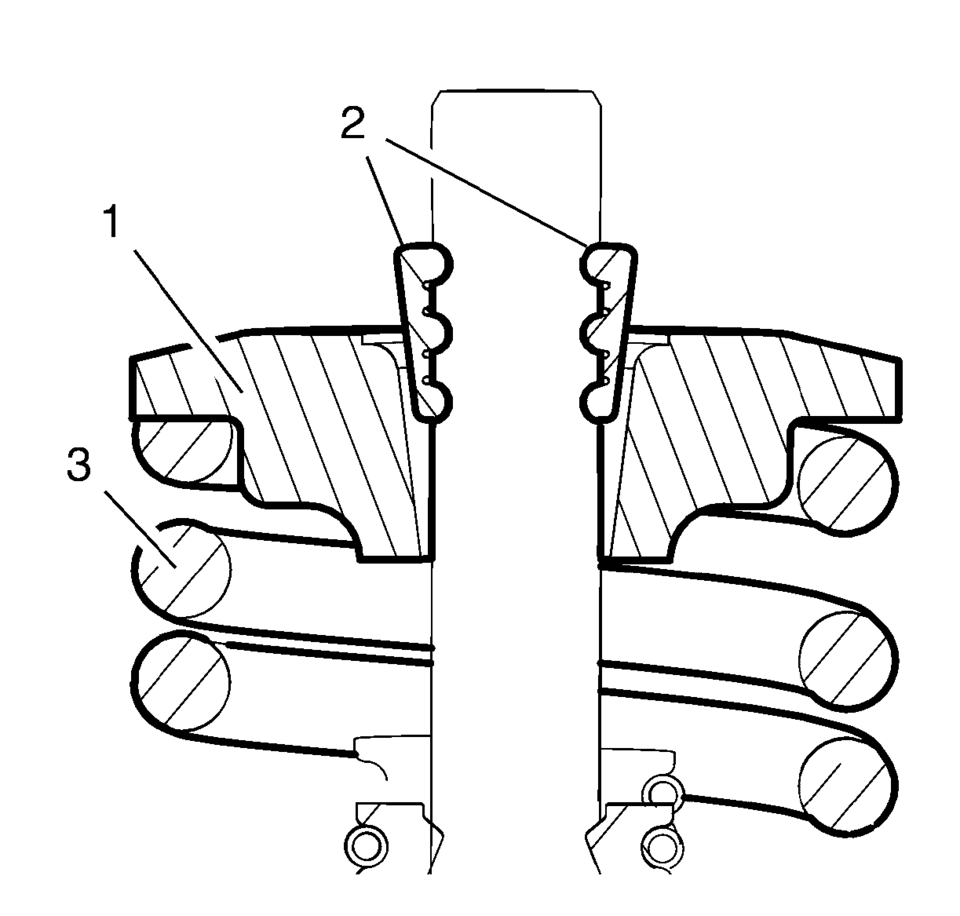
- Apply pressure to the EN-50717?E assembly to push down the vale spring retainer (1) and compress the valve spring (3) until the valve keys (2) can be inserted. Carefully insert the valve keys then, so that they are proper installed to the valve stem grooves.
- Carefully release the tension from the EN-50717?E assembly .
- Inspect the valve keys and valve spring retainers for proper seat.
- Remove the compressor assembly from the cylinder head.
- Repeat the procedure with the remaining valves.
Note:
Ensure all valve train components will be installed in their original position.
Caution:
The valve stem keys must correctly seat in the valve spring cap. Engine damage may occur by not installing properly.
 Cylinder Head
...
 Cylinder Head Cleaning and Inspection
Valve Cleaning and Inspection
Warning: Bodily injury may occur if the cleaning solvent is
inhaled or exposed to the skin.
Note: Do not scratch the valve ste ...
Other materials:
Bluetooth Controls
Use the buttons located on the infotainment system and the steering wheel to
operate the Bluetooth system.
Steering Wheel Controls
(Push to Talk): Press to answer
incoming calls, confirm system information, and start voice recognition.
(Mute/End Call): Press to end a
call, reject a call, ...
Checking Coolant
The vehicle must be on a level surface when checking the coolant level.
It is normal to see coolant moving in the upper coolant hose return line when
the engine is running.
Check to see if coolant is visible in the coolant surge tank. If the coolant
inside the coolant surge tank is boiling, do ...
Driver or Passenger Seat Shoulder Belt Replacement (without A69)
Driver or Passenger Seat Shoulder Belt Replacement
Callout
Component Name
Warning: Refer to SIR Warning.
Warning: Refer to SIR Seatbelt Pretensioner Handling Warning.
Warning: In order to prevent ...

0.0086