Nissan Armada 2025-2026 Owner's Manual: Forward-facing child restraint installation using the seat belts
WARNING
- When installing a forward-facing child restraint in the Nissan Armada,
the three-point seat belt must be placed into Automatic Locking Retractor (ALR)
mode.
If ALR mode is not activated, the child restraint may not be securely fastened. This can cause the seat to shift or tip during sudden braking or a collision, increasing the risk of injury. Improper installation may also affect the operation of the front passenger air bag system in the Nissan Armada.
- When installing a child restraint in the 3rd row center seating position of the Nissan Armada, both the center seat belt connector tongue and the buckle tongue must be properly secured to ensure correct operation.
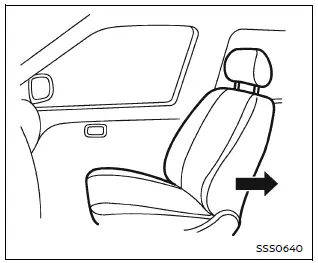
Forward-facing (front passenger seat) - step 1
Before installing a child restraint in the Nissan Armada, review all safety instructions in the "Child safety" and "Child restraints" sections to ensure proper handling and installation.
Do not use the LATCH lower anchors if the combined weight of the child and the child restraint exceeds 65 lbs (29.5 kg). In such cases, the child restraint must be secured using the vehicle’s seat belt system. Always follow the child restraint manufacturer’s instructions carefully.
Follow these steps to install a forward-facing child restraint using the seat belts in the Nissan Armada:
1. If installation in the front passenger seat is necessary, position the child restraint in a forward-facing direction only and move the seat as far back as possible.
Rear-facing child restraints must never be used in the front seat of the Nissan Armada under any circumstances.
2. Place the child restraint securely on the seat.
Always follow the manufacturer’s instructions for positioning and installation in the Nissan Armada.
The back of the child restraint should rest firmly against the seatback.
If needed, adjust or temporarily remove the head restraint to achieve proper fit. Store the head restraint securely and reinstall it after removing the child restraint.
If the seating position does not allow correct installation due to head restraint interference, consider using a different seating position or a compatible child restraint model.
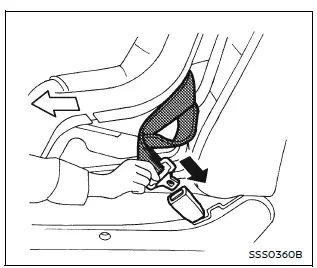
Forward-facing - step 3
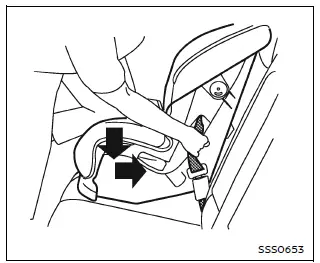
3. Route the seat belt through the appropriate belt path in the child restraint and insert the tongue into the buckle until it clicks securely into place.
Ensure that the belt routing follows the child restraint manufacturer’s instructions exactly.
If equipped, route the top tether strap and secure it to the designated anchor point (for rear seat installation only).
Never install a child restraint requiring a top tether strap in a seating position that does not have a tether anchor in the Nissan Armada.
Forward-facing - step 4
4. Pull the shoulder belt completely out until it is fully extended. This activates the Automatic Locking Retractor (ALR) mode in the Nissan Armada.
The system will return to Emergency Locking Retractor (ELR) mode once the belt is fully retracted after removal.
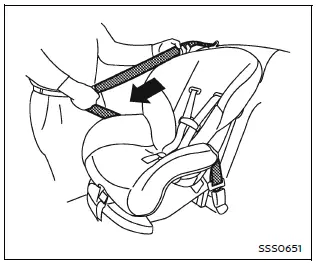
Forward-facing - step 5
5. Allow the belt to retract while guiding it back and removing slack. Apply firm pressure on the child restraint to ensure a tight and secure fit against the seat.
Proper installation in the Nissan Armada ensures that the child restraint remains stable and provides maximum protection during travel.
This method of installation using seat belts in the Nissan Armada offers flexibility while maintaining a high level of safety when LATCH anchors cannot be used.
5. Allow the seat belt in the Nissan Armada to retract smoothly. As it retracts, pull upward on the shoulder portion of the belt to eliminate any remaining slack and ensure a snug fit around the child restraint.
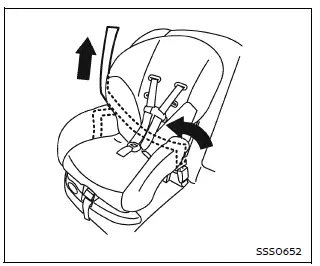
Forward-facing - step 6
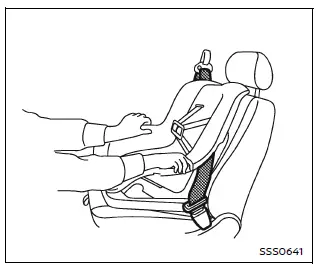
6. Remove any additional looseness from the system by applying firm downward and rearward pressure on the center of the child restraint in the Nissan Armada. Using your knee can help compress the seat cushion and seatback while simultaneously pulling up on the seat belt to achieve a tight and secure installation.
7. Tighten the top tether strap according to the manufacturer’s instructions until all slack is removed. This step is essential in the Nissan Armada to improve stability and reduce forward movement of the child restraint during sudden stops or collisions.
Forward-facing - step 8
8. After securing the child restraint, always perform a stability check before placing the child inside. Hold the restraint near the seat belt path and attempt to move it from side to side.
The child restraint in the Nissan Armada should not shift more than 1 inch (25 mm). Additionally, pull it forward to verify that the seat belt is holding it firmly in position. If movement exceeds this limit, tighten the belt further or reposition the restraint. In some cases, trying a different seating position or a different child restraint model may be necessary, as compatibility can vary.
9. Before every trip in the Nissan Armada, confirm that the child restraint is securely installed. If the seat belt is not properly locked or the seat feels loose, repeat steps 2 through 8 to ensure maximum safety.
Forward-facing - step 10
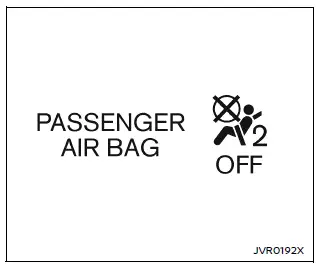
10. If the child restraint is installed in the front passenger seat of the Nissan
Armada, turn the ignition switch to the ON position and check the front passenger
air bag status light
 .
The indicator should illuminate to confirm correct system status.
.
The indicator should illuminate to confirm correct system status.
If the light does not illuminate, refer to the "Front passenger air bag and status light" section. Move the child restraint to another seating position and have the system inspected. It is recommended to visit an authorized NISSAN dealer to ensure proper operation.
Once the child restraint is removed and the seat belt is fully retracted, the ALR (child restraint) mode in the Nissan Armada is automatically canceled and the belt returns to normal operation.
Installing top tether strap
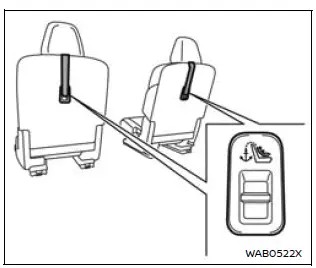
2nd row captain's seat
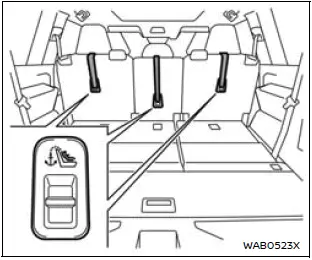
2nd row bench seat
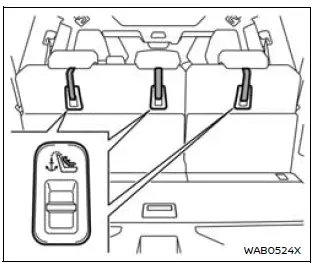
3rd row seat
Before attaching the top tether strap in the Nissan Armada, ensure that the child restraint is already securely installed using either the LATCH lower anchors (for supported seating positions) or the vehicle’s seat belt.
1. If necessary, raise or temporarily remove the head restraint or headrest to properly route the top tether strap over the top of the seatback. Store the removed head restraint in a safe location and reinstall it once the child restraint is removed.
2. Attach the tether strap securely to the designated tether anchor point located on the back of the seat in the Nissan Armada.
3. Tighten the tether strap according to the manufacturer’s instructions until all slack is removed. Ensure that the head restraint or headrest does not interfere with or press against the tether strap.
If you have any questions about installing a top tether strap in the Nissan Armada, it is recommended to consult an authorized NISSAN dealer for professional assistance.
Proper use of the seat belt system and top tether anchors in the Nissan Armada significantly enhances child safety, ensuring a secure and stable installation for every journey.
 Forward-facing child restraint installation using LATCH
Before installing a forward-facing child restraint in the Nissan Armada, carefully
review all Warnings and Cautions provided in the "Child safety" and "Child restraints"
sectio ...
 Booster seats
Precautions on booster seats
WARNING
Improper use of a booster seat and seat belt in the Nissan Armada significantly
increases the risk of serious injury or fatal consequences for a child in the e ...
Other materials:
Rear Side Door Window Rear Guide Replacement
Rear Side Door Window Rear Guide Replacement
Callout
Component Name
Preliminary Procedure
Remove the rear side door trim panel. Refer to Rear Side Door Trim Replacement.
1
Rear Side Door Window R ...
Roof Rail Front Assist Handle Replacement
Roof Rail Front Assist Handle Replacement
Callout
Component Name
1
Roof Rail Front Assist Handle Fastener (Qty:?€‰2)
Caution: Refer to Fastener Caution.
Procedure
Fold the assist handle downward ...
Evaporative Emission Canister Replacement (Steel Tank)
Removal Procedure
Remove the evaporative emission canister bracket fasteners (1).
Disconnect the purge solenoid valve electrical connector (1).
Disconnect the evaporative emission canister vent hose (2).
Disconnect the evaporative emission c ...

0.0056