Nissan Armada 2025-2026 Owner's Manual: Booster seats
Precautions on booster seats
WARNING
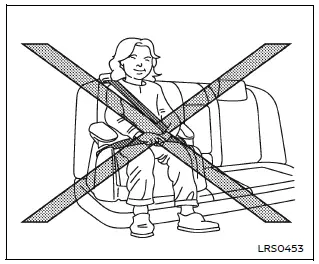
Improper use of a booster seat and seat belt in the Nissan Armada significantly increases the risk of serious injury or fatal consequences for a child in the event of a sudden stop or collision.
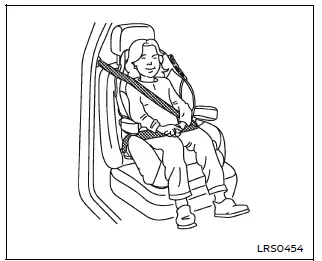
- Ensure that the shoulder belt in the Nissan Armada is correctly positioned across the child’s chest and shoulder, avoiding contact with the face or neck. The lap belt must sit low across the hips and never across the abdomen.
- Never allow the shoulder belt to be placed behind the child’s back or under the arm, as this greatly reduces the effectiveness of the restraint system in the Nissan Armada.
- A booster seat must only be used in seating positions equipped with a three-point lap/shoulder belt in the Nissan Armada.
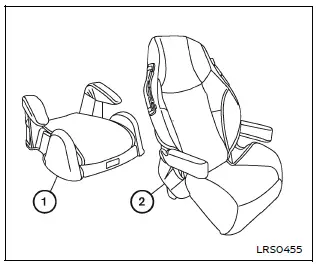
Booster seats are available in a variety of sizes and designs from multiple manufacturers. When selecting a booster seat for use in the Nissan Armada, consider the following key points to ensure safety and compatibility:
- Choose only a booster seat that is certified to comply with Federal Motor Vehicle Safety Standard 213 or Canadian Motor Vehicle Safety Standard 213.
- Test the booster seat inside the Nissan Armada to confirm compatibility with the vehicle’s seat design and seat belt system.
- Ensure that the child’s head is properly supported by either the booster seat or the vehicle seatback. In the Nissan Armada, the seatback should reach at least the center of the child’s ears. If not, a high-back booster seat should be used instead of a low-back version.
- After placing the child in the booster seat, adjust all components to confirm that the seat is properly fitted to both the child and the Nissan Armada seating position.
Always follow all recommended safety procedures and manufacturer instructions when using a booster seat in the Nissan Armada.
All U.S. states and Canadian provinces or territories require that infants and small children be properly secured in an approved child restraint system at all times while the Nissan Armada is in operation.
The guidelines in this section apply to booster seat installation in both the rear seats and the front passenger seat of the Nissan Armada, depending on necessity and proper configuration.
Booster seat installation
WARNING
To prevent injury, do not activate the Automatic Locking Retractor (ALR) mode when using a booster seat with the seat belts in the Nissan Armada. Booster seats are designed to work with the standard Emergency Locking Retractor (ELR) mode.
Before installing a booster seat in the Nissan Armada, review all safety instructions provided in the "Child safety", "Child restraints" and "Booster seats" sections.
Follow these steps to properly install a booster seat:
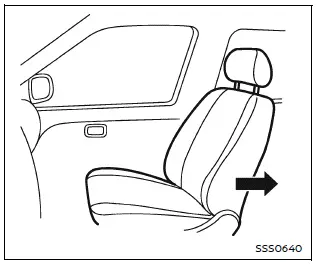
1. If installation in the front passenger seat is necessary, move the seat to its rearmost position to maximize safety in the Nissan Armada.
2. Place the booster seat firmly on the vehicle seat, ensuring it is positioned in a forward-facing direction only.
Always follow the booster seat manufacturer’s instructions for proper placement and usage in the Nissan Armada.
Front passenger position
3. Ensure that the booster seat is stable and properly aligned on the vehicle seat.
If necessary, adjust or temporarily remove the head restraint to improve fit. Store the removed head restraint safely and reinstall it after removing the booster seat.
If the seating position does not allow correct installation due to interference, consider using another seating position or a different booster seat compatible with the Nissan Armada.
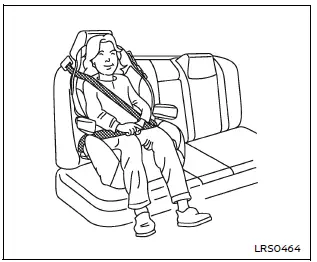
4. Position the lap portion of the seat belt low and snug across the child’s hips, following the booster seat manufacturer’s guidelines.
5. Pull the shoulder belt toward the retractor to remove slack and ensure it lies across the middle of the child’s shoulder and chest.
Proper belt positioning is essential for safety in the Nissan Armada and should always follow manufacturer recommendations.
6. Follow all instructions related to proper seat belt fastening as described in the "Seat belts" section.
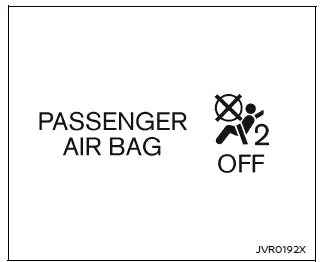
7. If the booster seat is installed in the front passenger seat of the Nissan
Armada, turn the ignition to the ON position and observe the front passenger air
bag status light
 .
The light may or may not illuminate depending on the child’s size and the type of
booster seat used.
.
The light may or may not illuminate depending on the child’s size and the type of
booster seat used.
Always verify correct system behavior and reposition the booster seat if necessary to ensure maximum safety for the child in the Nissan Armada.
Using a properly selected and correctly installed booster seat in the Nissan Armada ensures optimal protection, comfort, and compliance with modern safety standards.
 Forward-facing child restraint installation using the seat belts
WARNING
When installing a forward-facing child restraint in the Nissan Armada,
the three-point seat belt must be placed into Automatic Locking Retractor (ALR)
mode.
If ALR mode is not a ...

Other materials:
When the System Does Not Seem To Work Properly
If the LDW symbol does not appear:
The lane markings on the road may not be seen.
The camera sensor may be blocked by dirt, snow or ice.
The windshield may be damaged.
The weather may be limiting visibility.
This is normal operation; the vehicle does not need service. Clean the windshie ...
Audio Disc Player and USB Receptacle Replacement
Audio Disc Player and USB Receptacle Replacement
Callout
Component Name
1
Audio Disc Player and USB Receptacle
Procedure
Open the instrument panel compartment door and
using a small flat bladed tool, release ...
Airbag Steering Wheel Module Coil Centering
Note: If a double wire harness strap is installed onto the wire
harness assembly and steering column, the original holder for the wire strap(s)
MUST be reused during installation.
Remove the wire harness strap(s) where necessary.
Caution: The new SIR coil assembly will ...

0.007