Chevrolet Sonic Repair Manual: Front Bumper Fascia Replacement
|
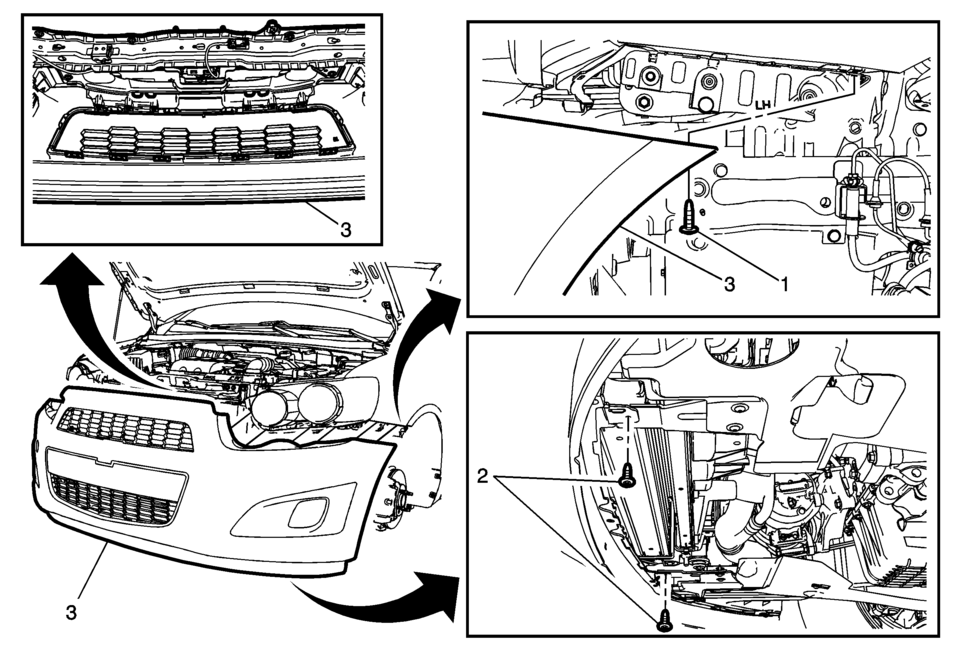
Callout |
Component Name |
|---|---|
Preliminary Procedures
|
|
|
1 |
Front Bumper Fascia Screw (Qty:?‚ā¨‚Äį2) Caution: Refer to Fastener Caution.
6?‚ā¨‚ÄįY (53?‚ā¨‚Äįlb?‚ā¨‚Äįin) |
|
2 |
Front Bumper Fascia Lower Screw (Qty:?‚ā¨‚Äį2) Tighten
6?‚ā¨‚ÄįY (53?‚ā¨‚Äįlb?‚ā¨‚Äįin) |
|
3 |
Front Bumper Fascia Procedure
|
 Front Bumper Fascia Opening Lower Cover Replacement
Front Bumper Fascia Opening Lower Cover Replacement
Callout
Component Name
1
Front Bumper Fascia Opening Lower Cover Pus ...
 Front Bumper Fascia Tow Eye Access Hole Cover Replacement
Front Bumper Fascia Tow Eye Access Hole Cover Replacement
Callout
Component Name
1
Front Bumper Fascia Front Tow Eye Acc ...
Other materials:
Remote Keyless Entry (RKE) System Operation
The RKE transmitter may work up to 60m (195 ft) away from the vehicle.
Other conditions can affect the performance of the transmitter. See Remote Keyless
Entry (RKE) System.
The RKE transmitter can have one of the two symbols for the remote trunk release.
With Remote Start Shown
The follow ...
Ball Joint Inspection
Caution: Refer to Vehicle Lifting and Jacking Caution.
Raise the front of the vehicle to allow the front suspension to hang free.
Grasp the tire at the top and the bottom.
Move the top of the tire in an in-and-out motion.
Look for any horizontal movement of the knuckle relativ ...
Evaporator Air Temperature Sensor Replacement (LHD)
Evaporator Air Temperature Sensor Replacement
Callout
Component Name
1
Evaporator Air Refrigerant Temperature Sensor
Procedures
Disconnect the refrigerant temperature sensor
electrical connector.
Twist a ...

0.0065