Chevrolet Sonic Repair Manual: Front Side Door Weatherstrip Replacement - Door Side
|
Callout |
Component Name |
|---|---|
|
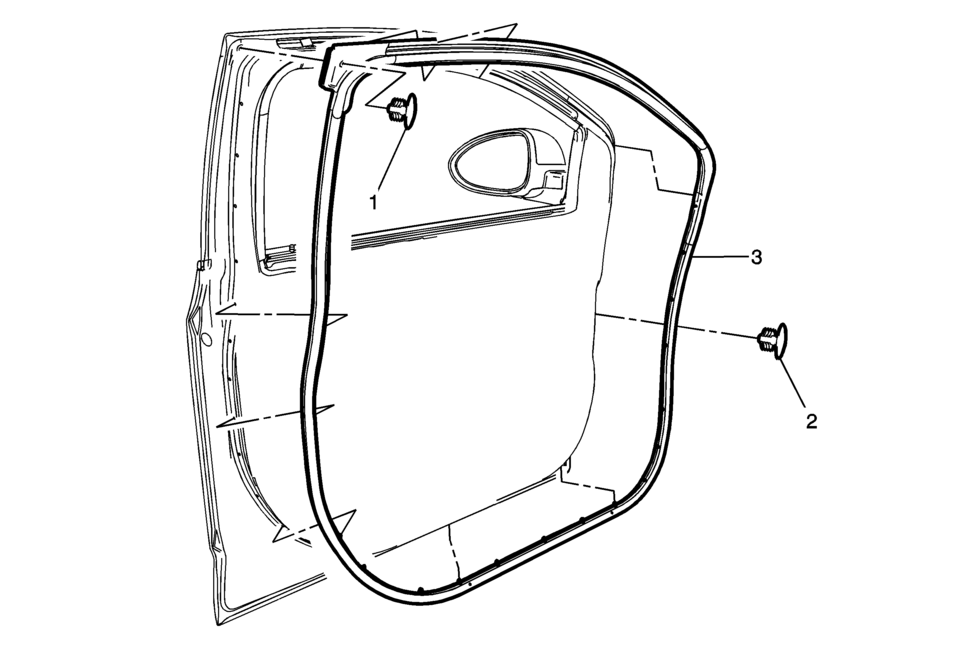
1 |
Front Side Door Weatherstrip Upper Retainer Procedure
|
|
2 |
Front Side Door Weatherstrip Retainers (Qty?€‰:21) |
|
3 |
Front Side Door Weatherstrip Procedure
|
 Front Side Door Weatherstrip Replacement - Body Side
Front Side Door Weatherstrip Replacement - Body Side
Callout
Component Name
Preliminary Procedures
Remove the upper center pillar t ...
 Front Side Door Window Outer Sealing Strip Replacement
Front Side Door Window Outer Sealing Strip Replacement
Callout
Component Name
1
Front Side Door Window Outer Sealing Str ...
Other materials:
Brake System Warning Light
The vehicle brake system consists of two hydraulic circuits. If one circuit is
not working, the remaining circuit can still work to stop the vehicle. For normal
braking performance, both circuits need to be working
If the warning light comes on, there is a brake problem. Have the brake system
...
Torque Steer Description
A vehicle pulls or leads in one direction during hard acceleration. A vehicle
pulls or leads in the other direction during deceleration.
The following factors may cause torque steer to be more apparent on a particular
vehicle:
A slightly smaller diameter tire on the right front increa ...
Cylinder Head Installation
Special Tools
EN-45059 Torque Angle Sensor Kit
For equivalent regional tools, refer to Special Tools.
Clean the sealing surfaces.
Inspect for plane surface.
Cylinder block, cylinder head
Straight-edge, feeler gauge
Install the cylinder head gasket.
Install the cylinder head. ...

0.0051