Chevrolet Sonic Repair Manual: Rear Brake Rotor Replacement
Special Tools
- CH-41013 Rotor Resurfacing Kit
- CH-42450-A Wheel Hub Resurfacing Kit
For equivalent regional tools, refer to Special Tools.
- Removal Procedure
-
Warning:
Refer to Brake Dust Warning.
- Raise and support the vehicle. Refer to Lifting and Jacking the Vehicle.
- Remove the tire and wheel assembly. Refer to Tire and Wheel Removal and Installation.
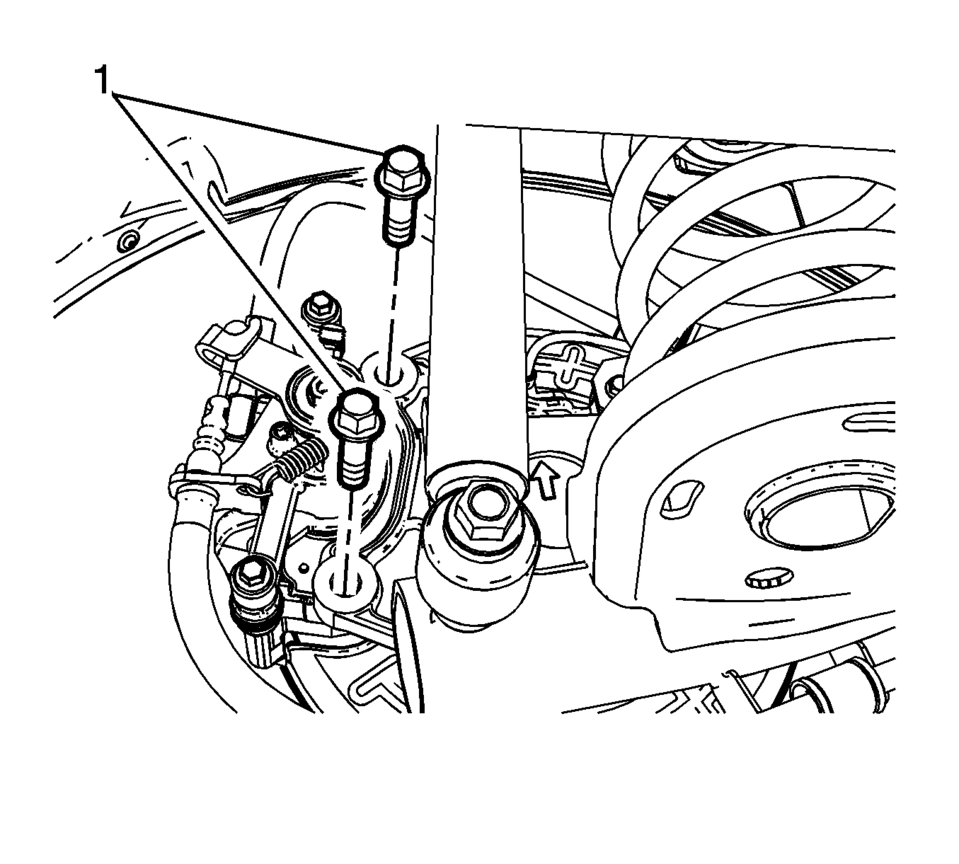
- Remove and discard the brake caliper bracket bolts (1).
- Remove the brake caliper and bracket as an assembly and support with heavy mechanics wire.
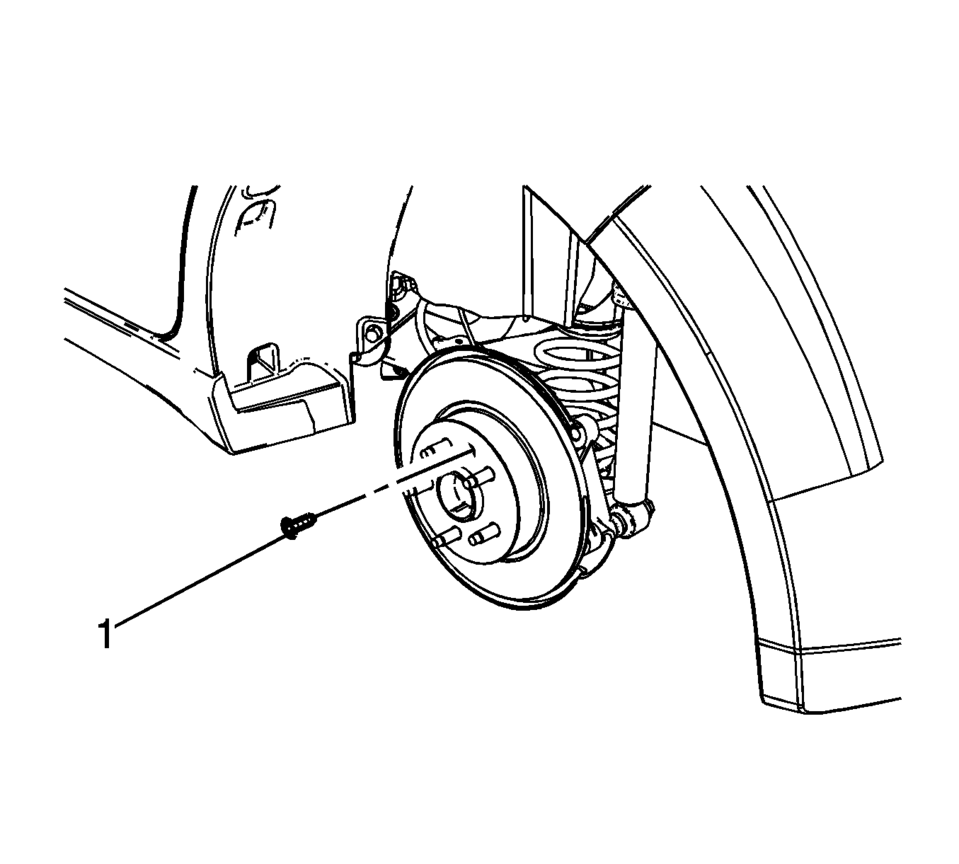
- Remove the brake rotor bolt (1).
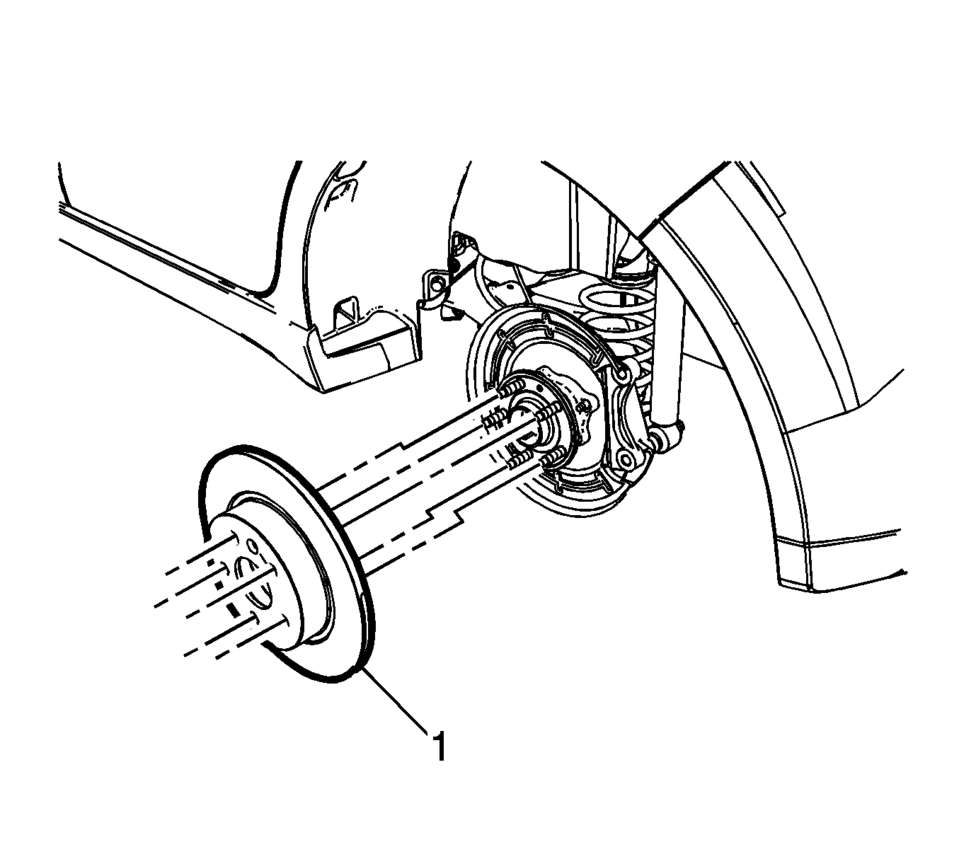
- Remove the brake rotor (1).
Note:
Do not reuse the brake caliper bracket bolts.
Caution:
Support the brake caliper with heavy mechanic wire, or equivalent, whenever it is separated from its mount and the hydraulic flexible brake hose is still connected. Failure to support the caliper in this manner will cause the flexible brake hose to bear the weight of the caliper, which may cause damage to the brake hose and in turn may cause a brake fluid leak.
- Installation Procedure
-
- If installing a new brake rotor, clean the friction surfaces of the brake rotor with denatured alcohol.
- Using the CH-42450-A Wheel Hub Resurfacing Kit, thoroughly clean any rust or corrosion from the mating surface of the hub/axle flange.
- Using the CH-41013 Rotor Resurfacing Kit, thoroughly clean any rust or corrosion from the mating surface of the rotor to the hub/axle flange.
- Install the brake rotor (1).
- Install the brake rotor bolt (1) and tighten to 9 Y (80 lb in)
.
- Position the brake caliper and bracket assembly over the brake rotor and to the suspension knuckle.
- Install new brake caliper bracket bolts (1) and tighten to 100 Y
(74 lb ft)
.
- Install the tire and wheel assembly. Refer to Tire and Wheel Removal and Installation.
- Burnish the brake pads and rotors. Refer to Brake Pad and Rotor Burnishing.
Caution:
Refer to Fastener Caution.
 Rear Brake Hose Replacement (Body to Axle - Disc Brake)
Removal Procedure
Warning: Refer to Brake Dust Warning.
Warning: Refer to Brake Fluid Irritant Warning.
Raise and support the vehicle. Refer to Lifting and Jacking the ...
 Rear Brake Shield Replacement
Removal Procedure
Warning: Refer to Brake Dust Warning.
Raise and support the vehicle. Refer to Lifting and Jacking the Vehicle.
Remove the rear tire and wheel assembl ...
Other materials:
Instrument Panel Airbag Arming Status Display Replacement
Instrument Panel Airbag Arming Status Display Replacement
Callout
Component Name
Preliminary Procedure
Remove the heater and air conditioning control. Refer to Heater and Air
Conditioning Control Replacement.
...
Rear Door Alert
In the Nissan Armada, the Rear Door Alert system is designed as a helpful reminder
feature that alerts the driver when there may be an item or passenger left in the
rear seats. Always check the rear seating area before exiting the Nissan Armada
to ensure safety.
The Rear Door Alert system in ...
Basic information
WARNING
Failure to strictly follow all safety warnings and operating instructions
related to the Intelligent Driver Alertness system in the Nissan Armada may result
in serious injury or fatal accidents.
The Nissan Armada I-DA system is designed –∏—Å–∫–ª—é—á–∏—Ç–µ–ª—å–Ω–æ as a driver assista ...

0.0064