Chevrolet Sonic Repair Manual: Rear Brake Shield Replacement
- Removal Procedure
-
- Raise and support the vehicle. Refer to Lifting and Jacking the Vehicle.
- Remove the rear tire and wheel assembly. Refer to Tire and Wheel Removal and Installation.
- Remove the rear brake rotor. Refer to Rear Brake Rotor Replacement.
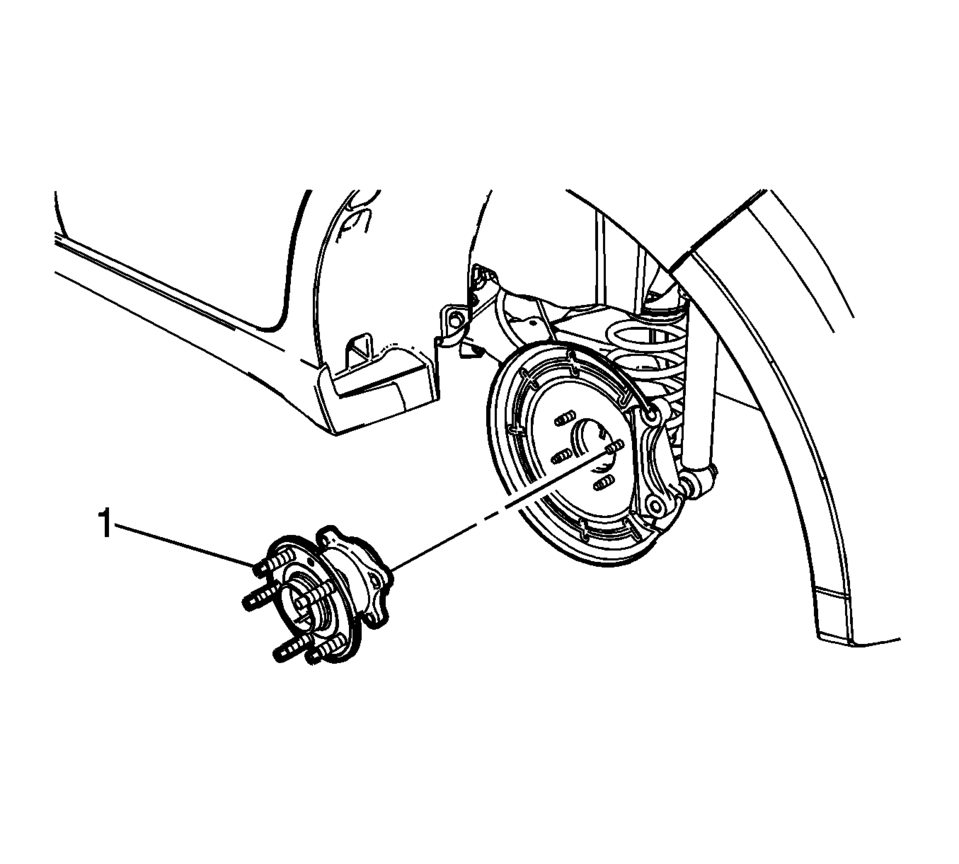
- Remove the rear wheel bearing and hub assembly (1). Refer to Rear Wheel Bearing and Hub Replacement.
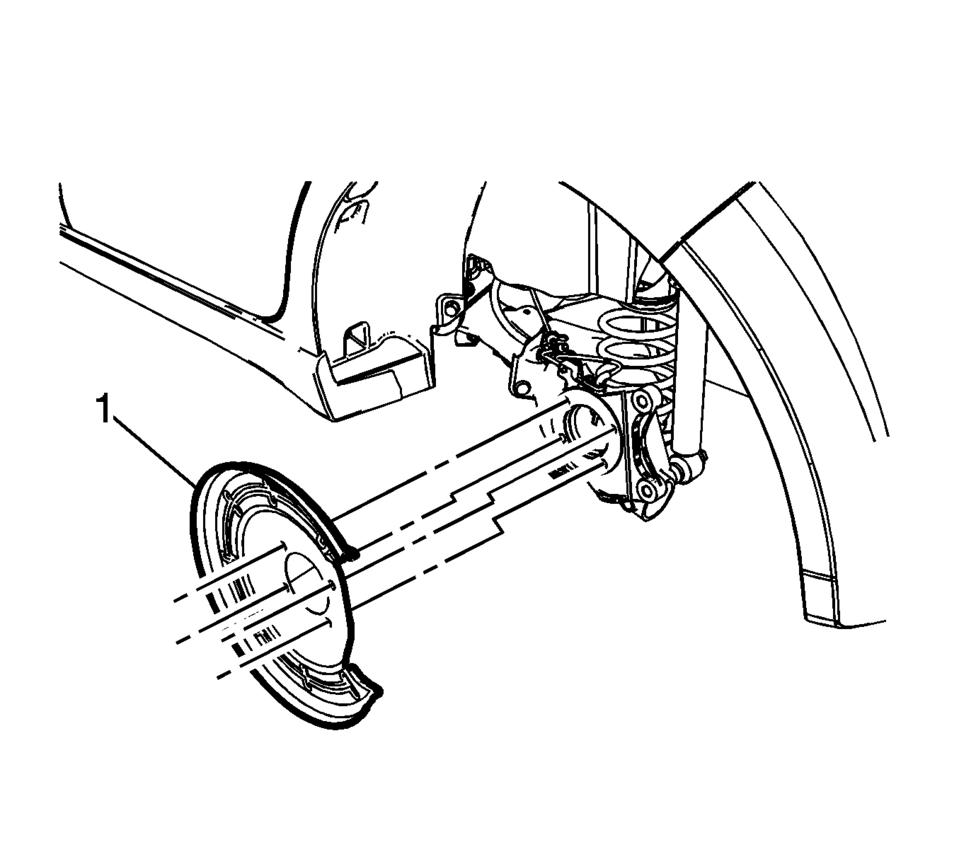
- Remove the rear brake shield (1).
Warning:
Refer to Brake Dust Warning.


- Installation Procedure
-
- Install the rear brake shield (1).
- Install the rear wheel bearing and hub assembly (1). Refer to Rear Wheel Bearing and Hub Replacement.
- Install the rear brake rotor. Refer to Rear Brake Rotor Replacement.
- Install the rear tire and wheel assembly. Refer to Tire and Wheel Removal and Installation.


 Rear Brake Rotor Replacement
Special Tools
CH-41013 Rotor Resurfacing Kit
CH-42450-A Wheel Hub Resurfacing Kit
For equivalent regional tools, refer to Special Tools.
Removal Procedure
Warning: Refer to Bra ...
 Rear Disc Brake Mounting and Hardware Inspection
Warning: Refer to Brake Dust Warning.
Caution: Support the brake caliper with heavy mechanic wire, or
equivalent, whenever it is separated from its mount and the hydraulic flexible
...
Other materials:
Hood Primary Latch Release Cable Replacement
iv
Hood Primary Latch Release Cable Replacement
Callout
Component Name
Preliminary Procedures
Remove the radiator opening upper cover. Refer to Front Opening
Upper Cover Replacement.
Remove the air inlet grille. Refer to A ...
Cooling Fan Description and Operation (LUV)
The engine cooling fan system is composed of one cooling fan, a series of 5 relays,
the engine control module (ECM), and the associated wiring. The cooling fan assembly
includes two resistors. This combination of components enables the ECM to operate
the cooling fan at 3 speeds usi ...
Spark Plug Inspection
Spark Plug Usage
Ensure that the correct spark plug is installed. An
incorrect spark plug causes driveability conditions.
Ensure that the spark plug has the correct heat range.
An incorrect heat range causes the following conditions:
Spark plug fouling?older plug
...
0.007
