Chevrolet Sonic Repair Manual: Headlining Trim Panel Replacement (Hatchback with Sunroof)
|
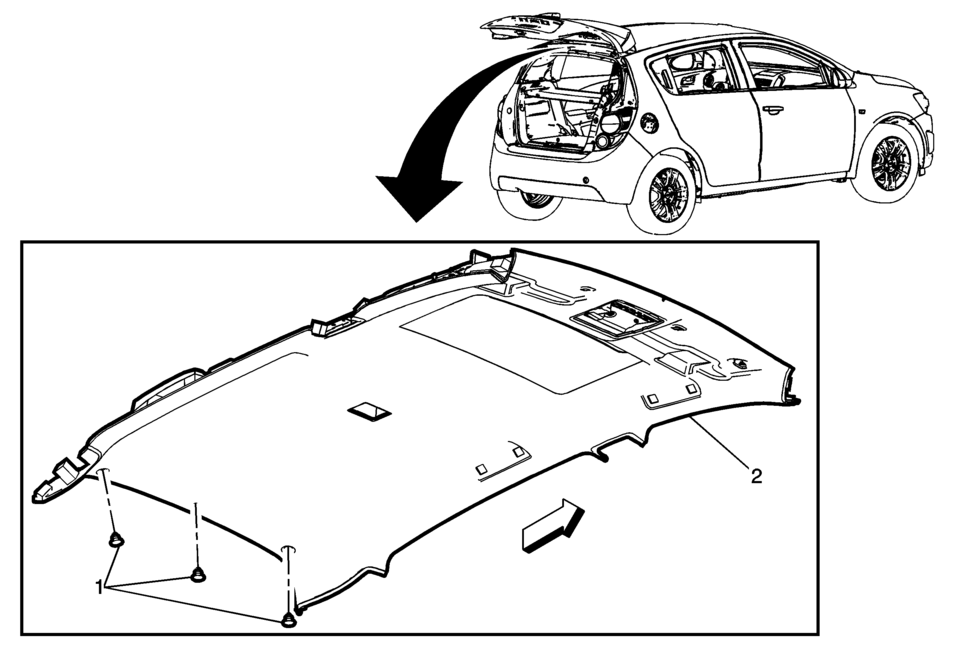
Callout |
Component Name |
|---|---|
|
Warning: Do not attempt to repair or alter the head impact energy-absorbing material glued to the headliner or to the garnish trims. If the material is damaged, replace the headliner and/or the garnish trim. Failure to do so could result in personal injury. Caution: If a vehicle is equipped with a head curtain inflator module ensure that the inflator module and tether are undamaged. If tether or curtain airbag are damaged in any way, they must be replaced. Caution: Use care when working around the head curtain inflator module. Sharp tools may puncture the curtain airbag. If the head curtain inflator module is damaged in any way, it must be replaced.
|
|
|
1 |
Headliner Trim Panel Retainer (Qty:?€‰3) |
|
2 |
Headliner Trim Panel Assembly Procedure
Disconnect the electrical connectors. Note: When installing a new headliner, tape any unused connector to the headliner with a high adhesive tape. |
 Headlining
...
 Headlining Trim Panel Replacement (Hatchback without Sunroof)
Headlining Trim Panel Replacement
Callout
Component Name
Warning: Do not attempt to repair or alter the head impact
energ ...
Other materials:
Plastic Collar Quick Connect Fitting Service
Removal Procedure
Warning: Refer to Gasoline/Gasoline Vapors Warning.
Note: There are several types of Plastic Collar Fuel and Evaporative
Emission Quick Connect Fittings used on this vehicle.
Bartholomew?€‰(1)
Q Release?€‰(2)
...
Engine Front Cover and Oil Pump Installation
Special Tools
EN-952 Fixing Pin
EN-953-A Fixing Tool
EN-49977-100 Transmitter Disc Fixation
EN-49977-200 Fixing Tool
For equivalent regional tools, refer to Special Tools.
Note: Mind the guide sleeves when installing engine front cover.
Install the engine front ...
Cleaning exterior
Basic information
Maintaining the exterior of your Nissan Armada is essential not only for preserving
its visual appeal but also for protecting the paintwork and body components over
time.
To keep the Nissan Armada in optimal condition, wash the vehicle promptly under
the following circumsta ...

0.0054