
Chevrolet Sonic Repair Manual: Home Page (Radio with Touchscreen)
- Touchscreen Buttons
-
Touchscreen buttons show on the screen when available. When a function is unavailable, the button may gray out. When a function is selected, the button may highlight.
- Home Page Features
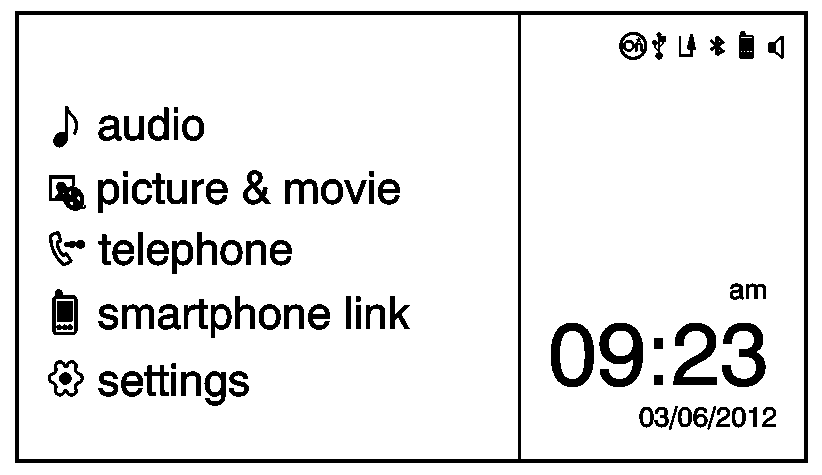
audio picture movie telephone el smartphone link settings 03/06/2012
Press F to go to the Home Page.
- e audio
-
Press to select AM, FM, SiriusXM (if equipped), USB/iPod/Bluetooth Audio, or AUX.
- G picture & movie
-
Press to view a picture, movie, or auxiliary video.
- 7 telephone
-
Press to activate the phone features (if equipped). See Bluetooth.
- ^ smartphone link
-
Press to listen to Pandora® (if equipped), Stitcher™, or available application. See Smartphone Link.
- 8 settings
-
Press to access the Personalization menu. See Vehicle Personalization.
 Communication Interface Module Replacement
Communication Interface Module Replacement
Callout
Component Name
Preliminary Procedure
Remove the instrument panel lower compartme ...
 Infotainment
Determine which radio the vehicle has and read the following pages to become
familiar with its features.
Warning: Taking your eyes off the road for extended periods could
cause a crash resul ...
Other materials:
Secondary Air Injection Pump Removal
Disconnect the secondary air injection pump pipe (3). Refer to Plastic Collar
Quick Connect Fitting Service.
Remove the secondary air injection pump nut (2) and the 2 secondary air
injection pump bolts (4).
Remove the secondary air injection pump (1 ...
Front Differential Carrier Installation (6T40/45/50)
Front Differential Carrier Installation
Callout
Component Name
1
Final Drive Sun Gear
2
Differential Carrier Assembly
3
Front Differential Carrier Bearing Asembly
...
Torque Converter Fluid Seal Replacement
Torque Converter Fluid Seal Replacement
Callout
Component Name
1
Torque Converter Fluid Seal Retainer
2
Torque Converter Fluid Seal
Special Tools
DT-47791-A Seal Installer
DT-6125- ...

0.0073