Chevrolet Sonic Repair Manual: Hood Primary Latch Release Cable Replacement
|
Callout |
Component Name |
|---|---|
Preliminary Procedures
|
|
|
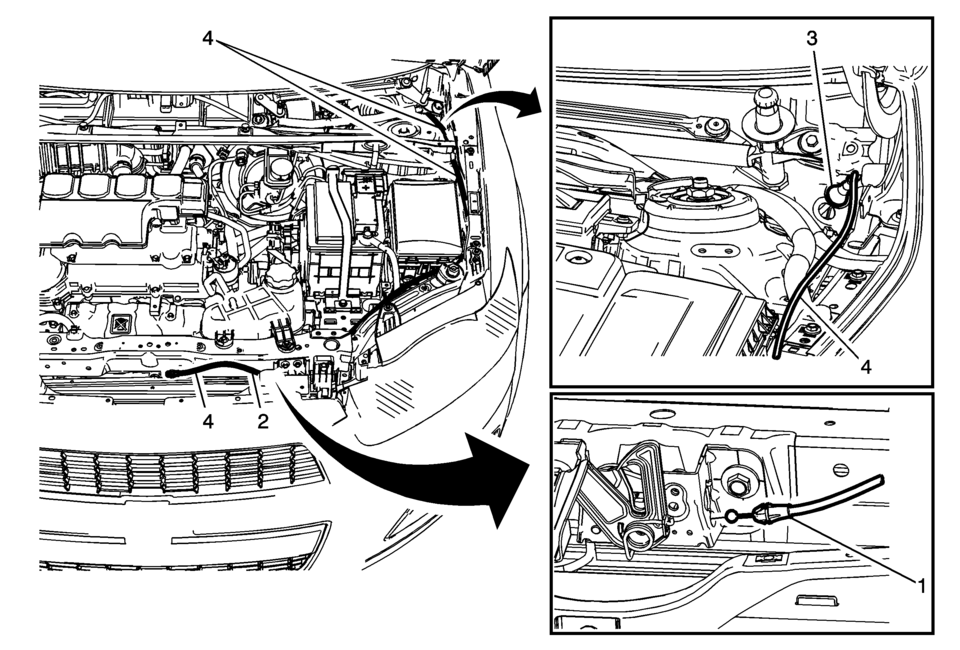
1 |
Hood Primary Latch Cable Procedure
Disconnect the hood primary latch release cable from the primary hood latch. |
|
2 |
Hood Primary Latch Release Cable Retainer Procedure
Disconnect the hood release cable retainers from the hood release cable. |
|
3 |
Hood Primary Latch Release Cable Grommet |
|
4 |
Hood Primary Latch Release Cable Procedure
Disconnect the hood primary latch release cable handle from the hood latch cable. Refer to Hood Primary Latch Release Cable Handle Replacement. |
 Hood Primary Latch Release Cable Handle Replacement
Hood Primary Latch Release Cable Handle Replacement
Callout
Component Name
Preliminary Procedure
Remove the front side door ope ...
 Hood Primary and Secondary Latch Replacement
Hood Primary and Secondary Latch Replacement
Callout
Component Name
1
Hood Primary and Secondary Latch Bolt (Qty:?Ōé¼ŌĆ░ ...
Other materials:
Passenger Sensing System
United States
Canada
The passenger sensing system turns off the front outboard passenger frontal airbag
and knee airbag (if equipped) under certain conditions. No other airbag is affected
by the passenger sensing system. See Passenger Sensing System for important
information.
The ...
Engine Cover Replacement
Engine Cover Replacement
Callout
Component Name
1
Engine Cover
Procedure
Use a suitable tool to first unclip the front of the cover, then rotate
the cover backward and pull upward to remove.
...
Engine Oil Cooler Pipe Replacement (LUW)
Engine Oil Cooler Pipe Replacement
Callout
Component Name
Preliminary Procedures
Drain the cooling system. Refer to Cooling System Draining and Filling.
Remove the exhaust manifold with catalytic converter. Refer to Exhaus ...

0.0066