
Chevrolet Sonic Repair Manual: Instrument Panel Assembly Replacement
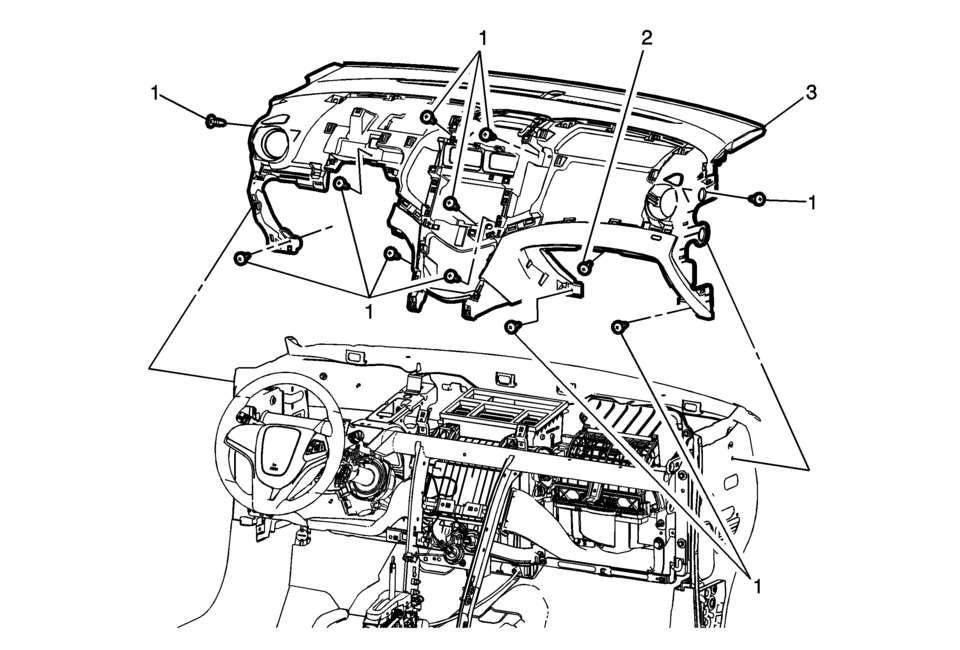
|
Callout |
Component Name |
|---|---|
Preliminary Procedure
|
|
|
1 |
Instrument Panel Fastener (Qty:?€‰11) Caution: Refer to Fastener Caution. |
|
2 |
Instrument Panel Compartment Door Latch Striker bolt Tighten
9?€‰Y (80?€‰lb?€‰in) |
|
3 |
Instrument Panel Assembly Procedures
|
 Instrument Panel Accessory Upper Trim Plate Replacement
Instrument Panel Accessory Upper Trim Plate Replacement
Callout
Component Name
Preliminary Procedure
Remove the instrument pane ...
 Instrument Panel Center Molding Replacement (With U58)
Instrument Panel Center Molding Replacement
Callout
Component Name
1
Instrument Panel Center Molding Assembly
Procedu ...
Other materials:
Heater Core Inlet Tube Replacement
Heater Core Inlet Tube Replacement
Callout
Component Name
Preliminary Procedures
Remove the Heater and Air Conditioning Evaporator and Blower Module.
Refer to Heater and Air Conditioning Evaporator and Blower Module Removal
...
Fuel Tank Fuel Pump Module Replacement (Steel Tank)
Special Tools
EN-48279 Fuel Sender Lock Ring Wrench
For equivalent regional tools, refer to Special Tools.
Removal Procedure
Relieve the fuel system pressure. Refer to Fuel Pressure Relief.
Remove the fuel tank. Refer to Fuel Tank Replacement.
Disconnect the ...
Transmission Fluid Cooler Flushing and Flow Test
GM studies indicate that plugged or restricted transmission oil coolers and pipes
cause insufficient transmission lubrication and elevated operating temperatures
which can lead to premature transmission failure. Many repeat repair cases could
have been prevented by following published procedur ...

0.0059