Chevrolet Sonic Repair Manual: Instrument Panel Assembly Replacement
|
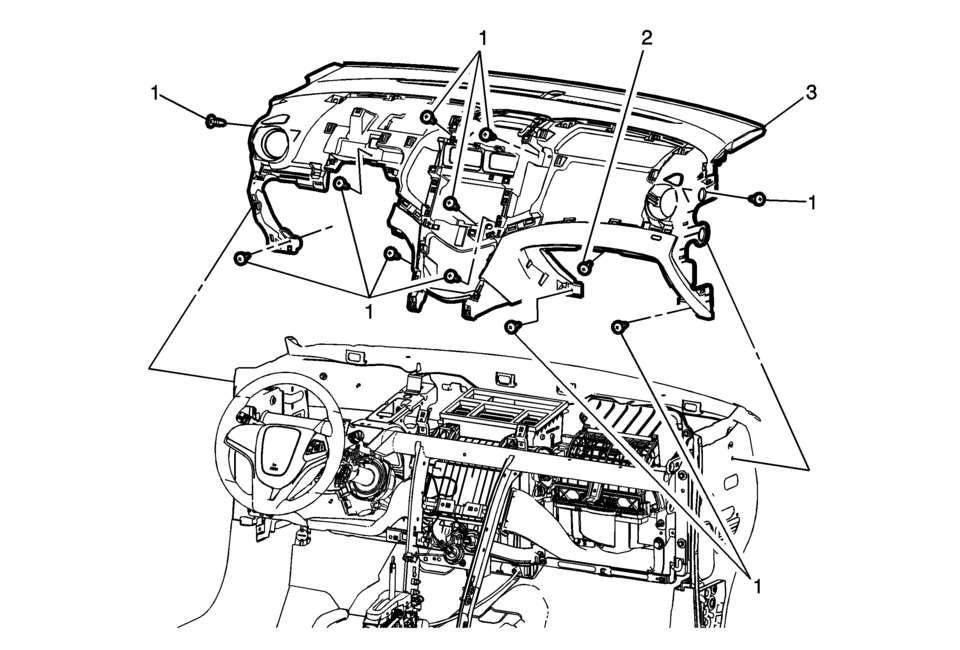
Callout |
Component Name |
|---|---|
Preliminary Procedure
|
|
|
1 |
Instrument Panel Fastener (Qty:?€‰11) Caution: Refer to Fastener Caution. |
|
2 |
Instrument Panel Compartment Door Latch Striker bolt Tighten
9?€‰Y (80?€‰lb?€‰in) |
|
3 |
Instrument Panel Assembly Procedures
|
 Instrument Panel Airbag Arming Status Display Replacement
Instrument Panel Airbag Arming Status Display Replacement
Callout
Component Name
Preliminary Procedure
Remove the heater and ai ...
 Instrument Panel Center Air Outlet Replacement
Instrument Panel Center Air Outlet Replacement
Callout
Component Name
Preliminary Procedure
Remove the instrument panel center ...
Other materials:
Heating and Air Conditioning System Description and Operation
Engine Coolant
Engine coolant is the key element of the heating system. The engine thermostat
controls the normal engine operating coolant temperature. Coolant pumped out
of the engine enters the heater core through the inlet heater hose. The air
flowing through the HVAC module abs ...
Engine Coolant Fan Shroud Replacement (LUV)
Engine Coolant Fan Shroud Replacement
Callout
Component Name
Preliminary Procedures
Drain the engine coolant. Refer to Cooling System Draining and Filling.
Remove the radiator surge tank. Refer to
Remove the radiator s ...
Air Cleaner Element Replacement
Removal Procedure
Disconnect mass air flow sensor wiring harness plug (2) from mass air
flow sensor (3).
Unclip mass air flow sensor wiring harness retainer clip from air cleaner
housing (1).
Remove the air cleaner outlet duct clamp̴ ...

0.0484