Chevrolet Sonic Repair Manual: Instrument Panel Lower Airbag Replacement - Driver Side
|
Callout |
Component Name |
|---|---|
|
Warning: Refer to SIR Inflator Module Handling and Storage Warning. Warning: Refer to SIR Warning.
|
|
|
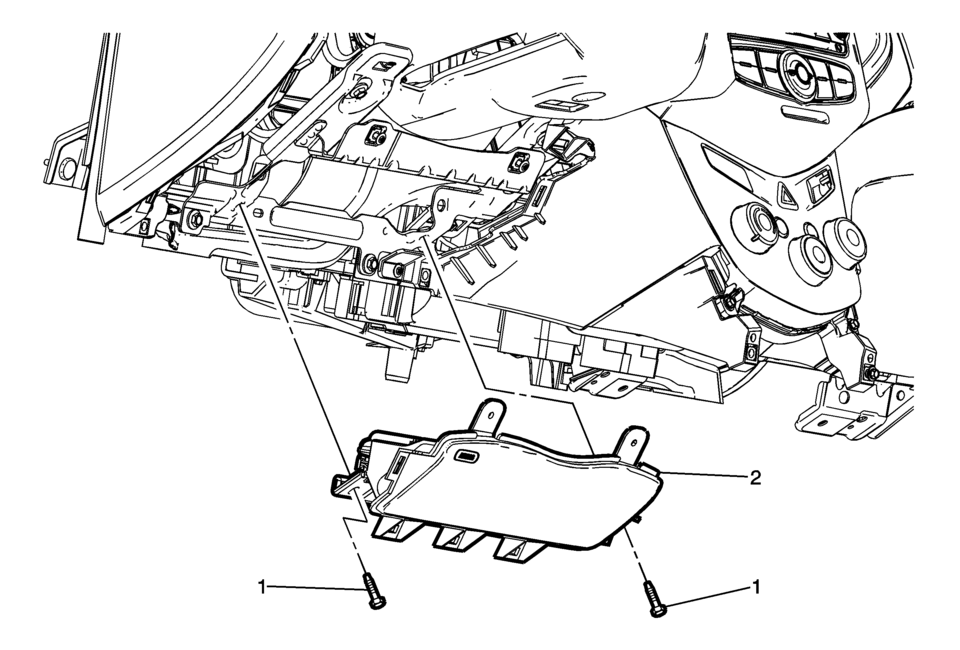
1 |
Instrument Panel Lower Airbag Fastener (Qty:?€‰2) Caution: Refer to Fastener Caution.
9?€‰Y?€‰(80?€‰lb?€‰in) |
|
2 |
Inflatable Restraint Instrument Panel Lower Module Assembly ?€“ Driver Side Procedure
|
 Instrument Panel Insulator Replacement
Instrument Panel Insulator Replacement
Callout
Component Name
Preliminary Procedures
Disable the SIR system. Refer to SIR Disabling ...
 Instrument Panel Lower Airbag Replacement - Passenger Side
Instrument Panel Lower Airbag Replacement - Passenger Side
Callout
Component Name
Warning: Refer to SIR Inflator Module Handli ...
Other materials:
Cooling System Description and Operation
Cooling System
The cooling system maintains the engine operating temperature at the efficient
level under any speed and operating condition. When the engine is cold, the
cooling system cools the engine slowly or not at all. The slow cooling of the
engine allows the engine to warm u ...
Fuel Tank Filler Pipe Replacement (Steel Tank)
Removal Procedure
Remove the fuel filler door housing. Refer to
Fuel Tank Filler Door Latch Housing Replacement.
Remove the bracket fastener (1).
Lift and support the vehicle. Refer to
Lifting and Jacking the Vehicle.
Remove the fuel tank fille ...
Sun visors
To reduce glare from the front, pull down the main Nissan Armada sun visor
1.
To block sunlight from the side, detach the sun visor from the center mount
and rotate it sideways 2.
Extend or retract the Nissan Armada sun visor extension 3 as needed for
additional coverage.
CAUT ...

0.0085