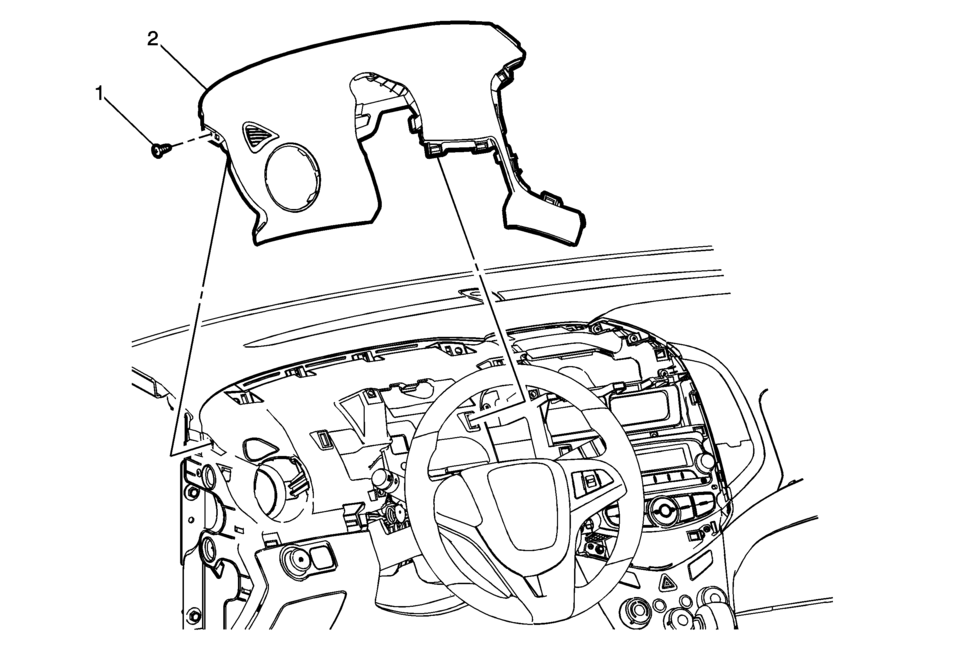
Chevrolet Sonic Repair Manual: Instrument Panel Upper Trim Panel Replacement - Left Side
|
Callout |
Component Name |
|---|---|
Preliminary Procedure
|
|
|
1 |
Instrument Panel Upper Trim Panel Fastener Caution: Refer to Fastener Caution. |
|
2 |
Instrument Panel Upper Trim Panel Procedures
|
 Instrument Panel Upper Compartment Door Latch Replacement
Instrument Panel Upper Compartment Door Latch Replacement
Callout
Component Name
1
Instrument Panel Upper Compartment Do ...
 Instrument Panel Upper Trim Panel Replacement - Right Side
Instrument Panel Upper Trim Panel Replacement - Right Side
Callout
Component Name
Preliminary Procedure
Disable the SIR system. Ref ...
Other materials:
Headlining Trim Panel Replacement (Hatchback without Sunroof)
Headlining Trim Panel Replacement
Callout
Component Name
Warning: Do not attempt to repair or alter the head impact
energy-absorbing material glued to the headliner or to the garnish trims.
If the material is damaged ...
Front Wheel Drive Shaft Inner Joint and Boot Replacement
Special Tools
DT-35910 Drive Axle Boot Clamp Pliers
For equivalent regional tools, refer to Special Tools.
Disassemble Procedure
Note: There are types of inner joints available. If the inner
joint is connected with the CV style joint, the inner joint is not serviced
separa ...
Neutral - Engine Running (Gen 2)
When the gear selector is moved to the Neutral (N) position, the hydraulic and
electrical system operation is identical to Park (P) range. However, if Neutral
is selected after the vehicle was operating in Reverse (R), the normally-low 35R
pressure control solenoid is commanded OFF and the fol ...

0.0061