
Chevrolet Sonic Repair Manual: Master Cylinder Reservoir Replacement
- Removal Procedure
-
Warning:
Refer to Brake Fluid Irritant Warning.
Caution:
Refer to Brake Fluid Effects on Paint and Electrical Components Caution.
- Remove the brake master cylinder. Refer to Master Cylinder Replacement.
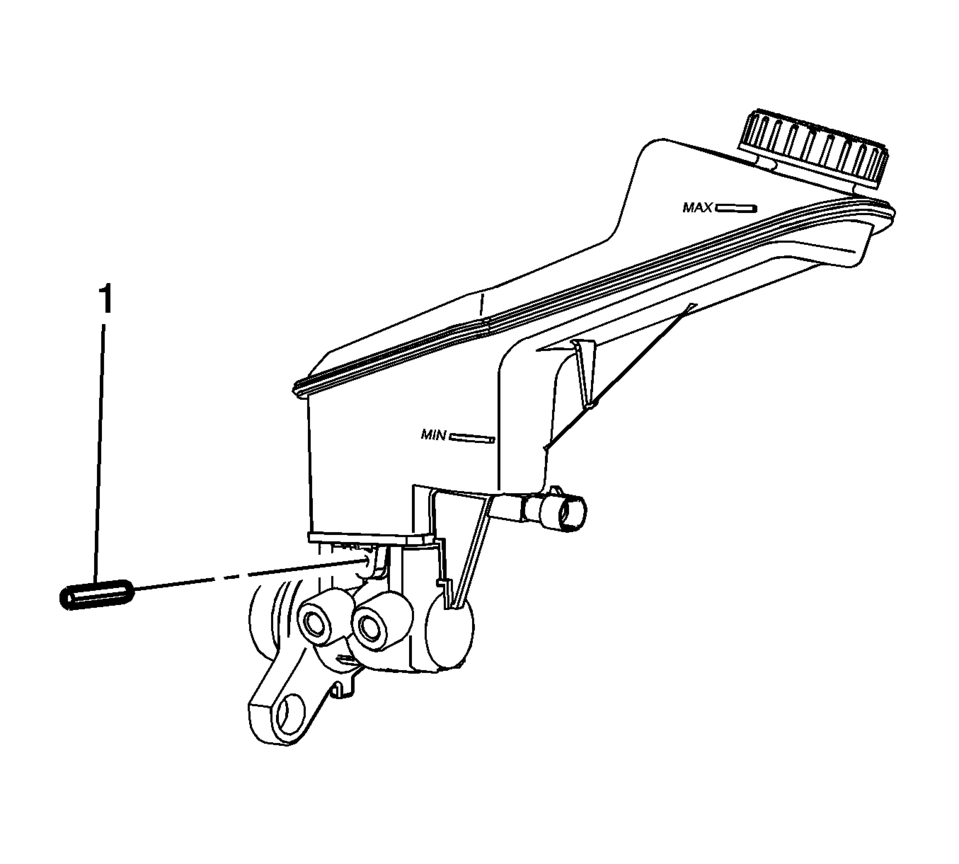
- Remove and discard the brake master cylinder reservoir roll pin (1).
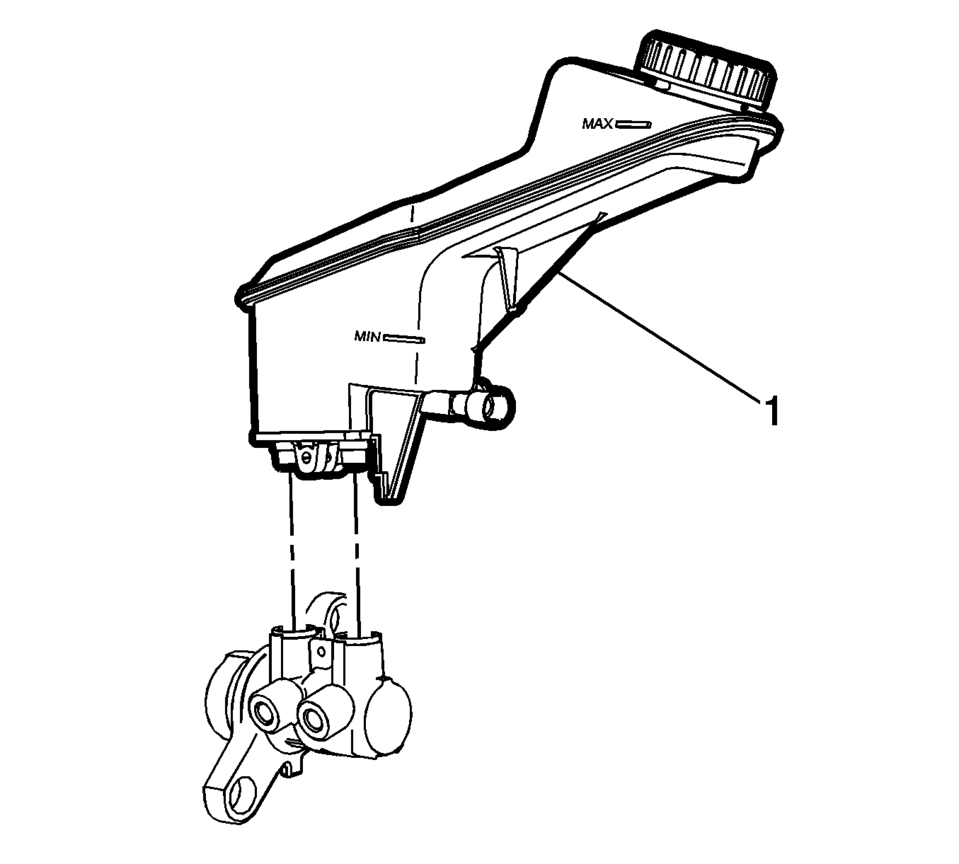
- Remove the master cylinder reservoir (1) by carefully pulling straight upward.
- Remove the brake fluid level indicator switch, if necessary. Refer to Brake Fluid Level Indicator Switch Replacement.
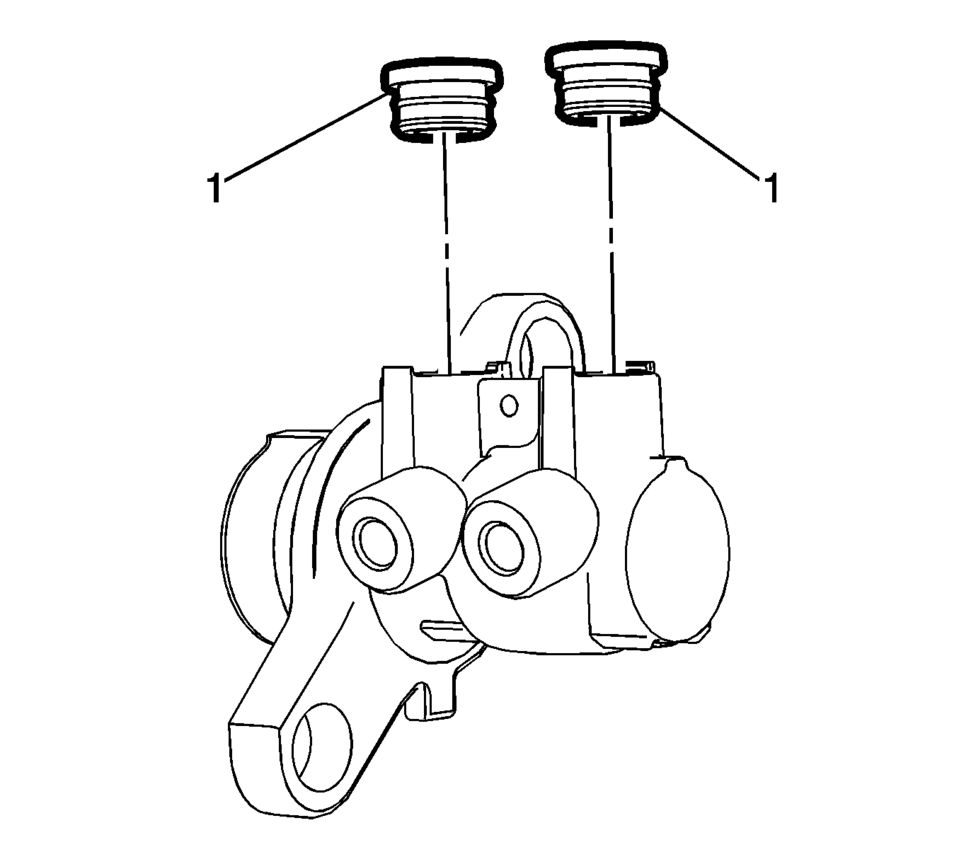
- Remove the brake master cylinder reservoir seals (1).
- If replacing the master cylinder reservoir, discard the reservoir seals.
- Installation Procedure
-
- Lightly lubricate the brake master cylinder reservoir seals (1) with GM approved brake fluid from a clean, sealed, brake fluid container.
- Install the lubricated brake master cylinder reservoir seals to the brake master cylinder.
- Install the master cylinder reservoir (1) by firmly pressing straight downward.
- Install the brake fluid level indicator switch, if removed. Refer to Brake Fluid Level Indicator Switch Replacement.
- Install a new brake master cylinder reservoir roll pin (1).
- Install the brake master cylinder. Refer to Master Cylinder Replacement.
 Master Cylinder Reservoir Filling
Warning: Refer to Brake Fluid Irritant Warning.
Caution: Refer to Brake Fluid Effects on Paint and Electrical Components
Caution.
Visually inspect the brake fluid level through the ...
 Front Brake Hose Replacement
Removal Procedure
Warning: Refer to Brake Dust Warning.
Warning: Refer to Brake Fluid Irritant Warning.
Danger: Do not use a service jack to lift this vehicle. Li ...
Other materials:
License Plate Lamp
Lamp Assembly
Bulb Assembly
1. Bulb Socket
2. Bulb
3. Lamp Assembly
To replace one of these bulbs:
1. Push the left end of the lamp assembly toward the right.
2. Turn the lamp assembly down to remove it.
3. Turn the bulb socket (1) counterclockwise to remove it from the lamp assembly
( ...
Operation
Radio Controls without Touchscreen
The infotainment system is operated by using the pushbuttons, multifunction
knobs, menus shown on the display, and steering wheel controls, if equipped.
Turning the System On or Off
O /VOL (Power/Volume)
Press to turn t ...
Low and Reverse and 1-2-3-4 Clutch Housing Assemble (6T40/45/50)
Table 1:
1??? Clutch Piston Installation
Table 2:
Low and Reverse Clutch Piston Installation
1??? Clutch Piston Installation
1??? Clutch Piston Installation
Callout
Component Name
...

0.0054