Chevrolet Sonic Repair Manual: Oil Pan Replacement
Special Tools
EN-49980 Guidance Pins
For equivalent regional tools, refer to Special Tools.
- Removal Procedure
-
- Remove the right front wheelhouse liner extension. Refer to Front Wheelhouse Liner Inner Front Extension Replacement.
- Remove the oil filter and drain the engine oil. Refer to Engine Oil and Oil Filter Replacement.
- Remove the front insulator cover. Refer to Front Compartment Front Insulator Cover Replacement.
- Remove the front exhaust pipe. Refer to Exhaust Front Pipe Replacement.
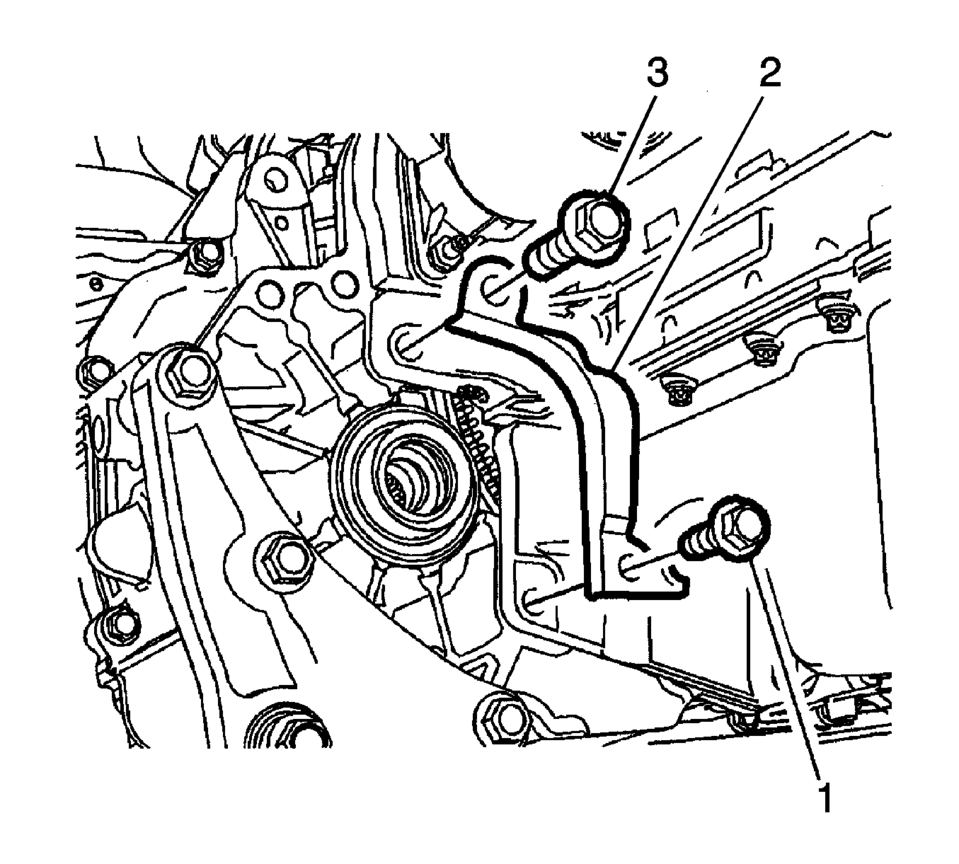
- If equipped with an automatic transmission, remove the oil pan to automatic transmission bolts (1, 3) and automatic transmission converter cover (2).
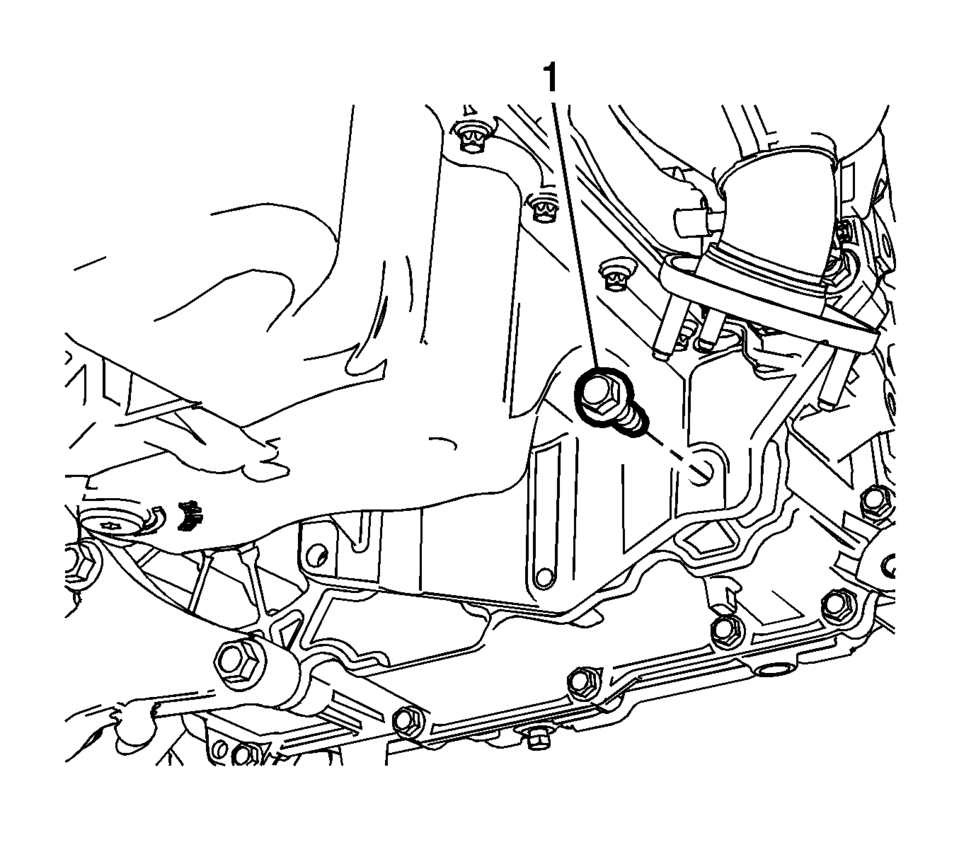
- Remove the oil pan to automatic transmission bolts (1) .
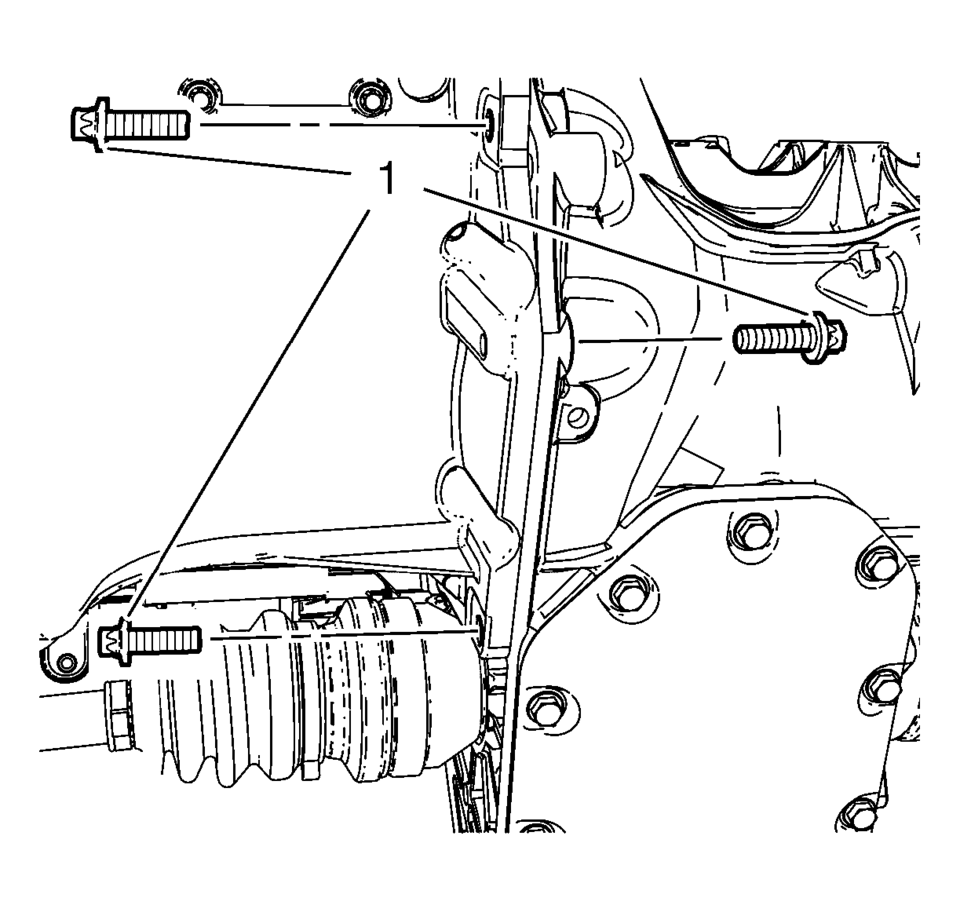
- If equipped with manual transmission, remove the 3 manual transmission to oil pan bolts (1).
- Remove the oil pan bolts (1) and oil pan.
Note:
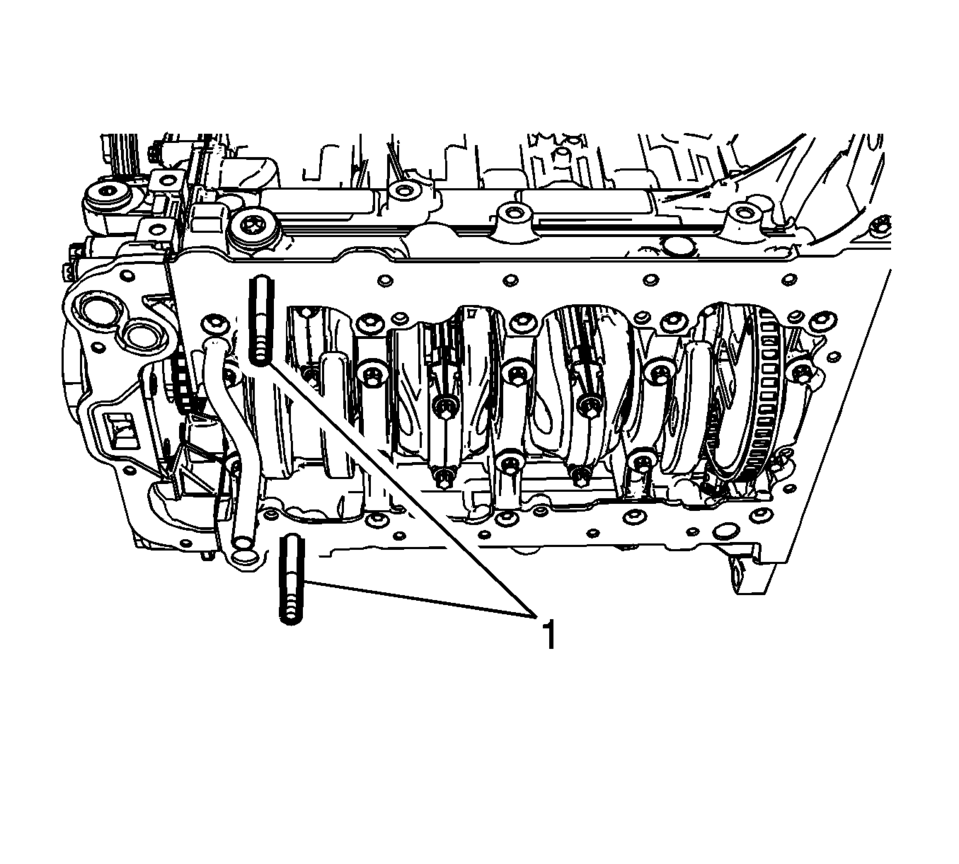
The intermediate shaft is shown removed for visual purposes only.

- Installation Procedure
-
- Clean the sealing surface of crankshaft bearing cap tie plate and the groove in the engine front cover from old gasket material, oil, dirt and grease.
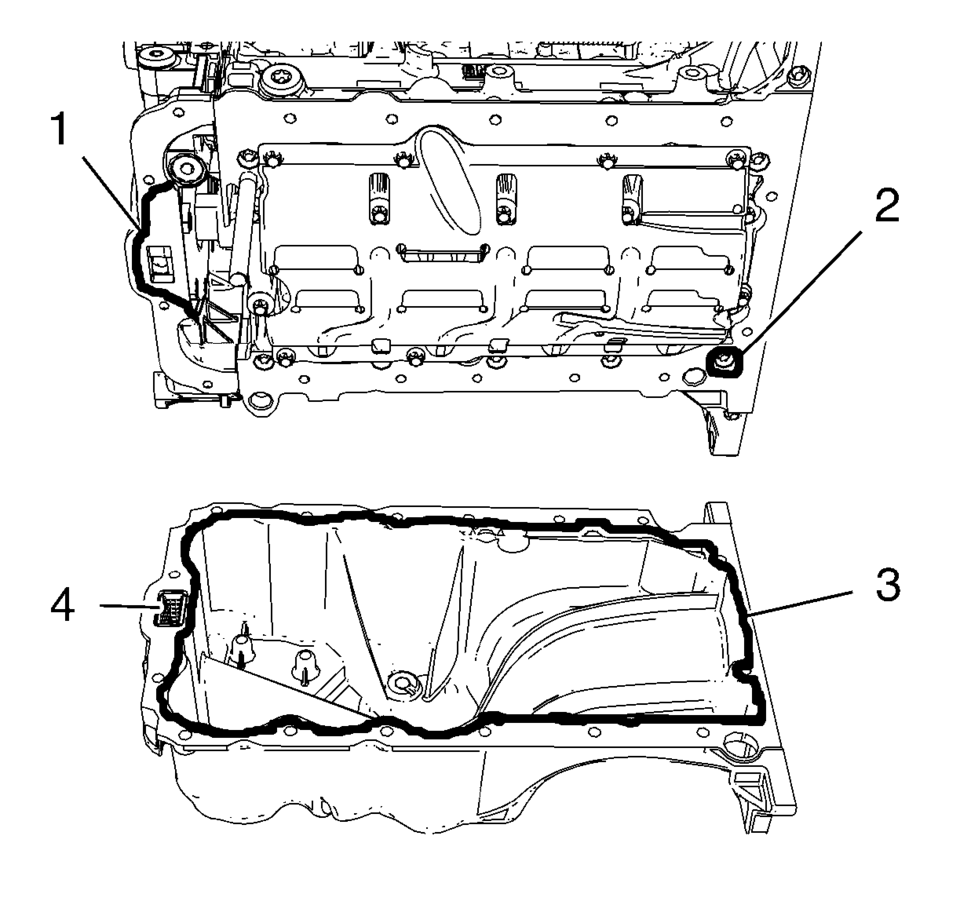
- Install the 2 EN-49980 guidance pins (1) to the shown oil pan screw bores.
- Apply 2 mm (0.0787 in)
thickness of sealing compound (3, 2, 1).
- Loosely install the oil pan bolts (1) in all but the guidance pin locations.
- Remove the EN-49980 guidance pins and install the remaining oil pan bolts.
- Tighten the oil pan bolts to 10 Y (89 lb in)
.
- If equipped with manual transmission, install the 3 manual transmission
to oil pan bolts (1) and tighten to 40 Y (30 lb ft)
.
- If equipped with an automatic transmission, install and the automatic
transmission converter cover (2) and tighten the cover to automatic transmission
bolt (1) to 40 Y (30 lb ft)
and automatic transmission bolt (3) to 60 Y (44 lb ft)
.
- Install the oil pan to automatic transmission bolts (1), and tighten
to 40 Y (30 lb ft)
.
- Install a NEW oil filter and fill the engine with oil. Refer to Engine Oil and Oil Filter Replacement.
- Install the exhaust pipe. Refer to Exhaust Front Pipe Replacement.
- Install the front insulator cover. Refer to Front Compartment Front Insulator Cover Replacement.
- Install the right front wheelhouse liner extension. Refer to Front Wheelhouse Liner Inner Front Extension Replacement.
Note:
The sealing bead should be applied close to the inner edge of the oil pan. Take care that the oil suction gallery (4) will not get contaminated with sealing compound or dirt.
Caution:
Refer to Fastener Caution.
Note:
The complete installation procedure of the oil pan should be done in 10 minutes.
 Oil Pan Removal
Remove the 16 oil pan bolts (1).
Caution: Pry the oil pan carefully in order to prevent damage
to the transaxle case or the oil pan sealing surfaces.
Place a ...

Other materials:
Safety System Check
Now and then, check that the safety belt reminder light, safety belts, buckles,
latch plates, retractors, and anchorages are all working properly. Look for any
other loose or damaged safety belt system parts that might keep a safety belt system
from doing its job. See your dealer to have it re ...
Engine Front Cover with Oil Pump Replacement
Removal Procedure
Disconnect the battery negative cable. Refer to Battery Negative Cable
Disconnection and Connection.
Set the engine to TDC. Refer to Camshaft Timing Chain Inspection.
Raise and support the vehicle. Refer to Lifting and Jacking the Vehicle.
Remove ...
Heated steering wheel
Example
Example
The Nissan Armada heated steering wheel can be controlled either via the touch
screen display or by using the dedicated switch on the instrument panel.
1. Start the engine of the Nissan Armada.
2. Touch the
key A or press the heated steering wheel switch to turn the ...

0.0045