Chevrolet Sonic Repair Manual: Overview (AM-FM Radio)
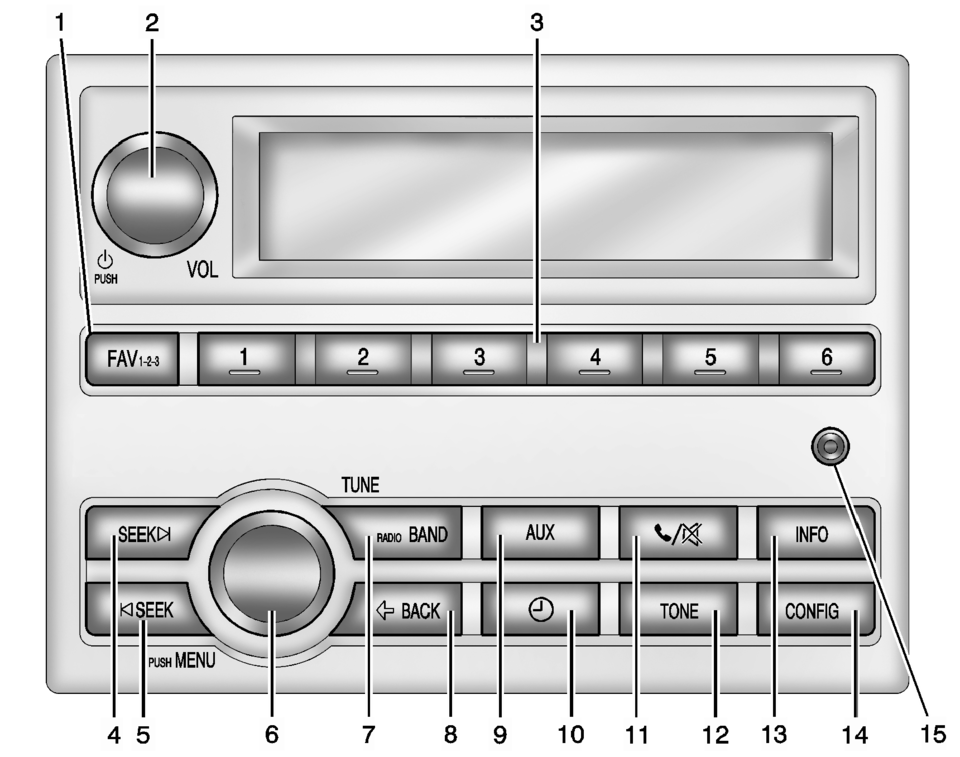
- FAV 1-2-3 (Favorites)
- Radio: Opens the favorites list.
- Turns the system on or off and adjusts the volume.
- Radio: Saves and selects favorite stations.
- Radio: Seeks the next station.
- CD: Selects the next track or fast forwards within a track.
- Radio: Seeks the previous station.
- CD: Selects the previous track or rewinds within a track.
- Radio: Manually selects radio stations.
- CD: Selects tracks.
- Changes the band while listening to the radio.
- Selects the radio when listening to a different audio source.
- Menu: Moves one level back.
- Character Input: Deletes the last character.
- Selects external audio source.
- Opens the Clock menu.
- Mutes the audio system.
- Opens the Tone menu.
- Radio: Shows available information about the current station.
- CD: Shows available information about the current track.
- Opens the Configuration menu.
- 3.5 mm (1/8 in) connection for external devices.
 Home Page (Radio with Touchscreen)
Touchscreen Buttons
Touchscreen buttons show on the screen when available. When a function is
unavailable, the button may gray out. When a function is selected, the button
may highlight ...
 Overview (Radio with CD/USB)
91011121314151617
O /VOL (Power/Volume)
Turns the system on or off and adjusts the volume.
Z (Eject)
Removes a disc from the CD slot.
Buttons 1−6
Radio: Saves a ...
Other materials:
Steering Wheel Horn Contact Replacement
Steering Wheel Horn Contact Replacement
Callout
Component Name
Preliminary Procedure
Remove the steering wheel inflatable restraint module. Refer to Airbag
Steering Wheel Module Replacement.
1
S ...
Front Side Door Window Switch Replacement (Left Side)
Front Side Door Window Switch Replacement
Callout
Component Name
Preliminary Procedure
Remove the front side door window switch bezel. Refer to Front Side Door
Window Switch Bezel Replacement.
1
...
Engine Replacement
Special Tools
EN-48244 Engine Assembly Remove/Install Pallet Supporter
Removal Procedure
Remove the battery and battery tray. Refer to Battery Tray Replacement.
Relieve the fuel system pressure. Refer to Fuel Pressure Relief.
Recover the refrigerant. Refer to Refrigera ...

0.0049