Chevrolet Sonic manuals

Chevrolet Sonic Repair Manual: Parking Brake Adjustment (Drum Brake)

Chevrolet Sonic Repair Manual / Chassis / Brakes / Drum Brakes / Parking Brake Adjustment (Drum Brake)

Note:

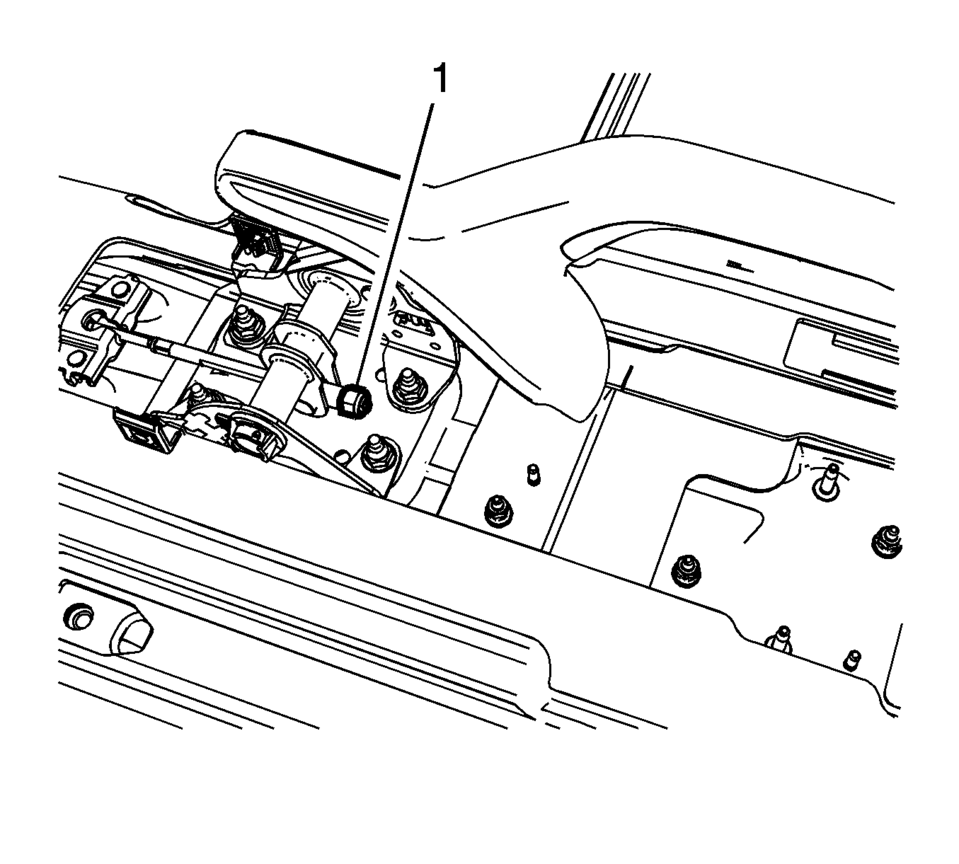
The park brake cable adjusting nut is a nylon lock type. Use ONLY HAND TOOLS whenever tightening or loosening the adjusting nut.

  1. Apply and fully release the park brake several times. Verify that the park brake lever releases completely.
  2. Turn ON the ignition. Verify the red BRAKE warning lamp is not illuminated.
  3. If the red BRAKE warning lamp is illuminated, verify the following:
  • If the red BRAKE warning lamp remained illuminated and there were no other visible causes, refer to Symptoms - Hydraulic Brakes.
  • Turn OFF the ignition.
  • Remove the front floor console. Refer to Front Floor Console Replacement.


  • With the park brake lever in the released position, loosen the adjusting nut (1) enough to completely relieve tension on the front cable.
  • Raise and support the vehicle. Raise the vehicle just enough to allow rear tire and wheel assembly removal and rear drum adjustment. Refer to Lifting and Jacking the Vehicle.
  • Remove the rear tire and wheel assemblies. Refer to Tire and Wheel Removal and Installation.
  • Adjust the rear drum brakes. Refer to Drum Brake Adjustment.
  • Ensure there is no brake shoe drag after adjustment by rotating the brake drums. If drag exists, re-center the brake shoes and perform the brake shoe adjustment again.
  • Install 2 wheel nuts to the wheel studs and firmly hand tighten in order to retain the brake drums.
  • Fully release the park brake lever.
  • Tighten the park brake cable adjusting nut (1) until the threaded portion of the front park brake cable extends beyond the adjusting nut approximately 27 mm (1.06 in).
  • Apply the park brake lever.
  • Attempt to rotate the rear brake drums. There should be no rotation forward or rearward.
  • Fully release the park brake lever.
  • Verify the park brake is released by rotating the rear brake drums. The drums should rotate freely and exhibit no brake shoe drag.
  • If the drums do not rotate freely, repeat the park brake cable adjustment procedure.
  • Raise the park brake lever 3 detent positions and attempt to rotate the rear brake drums:
  • Raise the park brake lever one additional detent position and attempt to rotate the rear brake drums.
  • Verify that the left and right brake drums cannot be rotated.
  • Remove the wheel nuts retaining the brake drums.
  • Install the rear tire and wheel assemblies. Refer to Tire and Wheel Removal and Installation.
  • Lower the vehicle.
  • Install the front floor console. Refer to Front Floor Console Replacement.
  • Release the park brake lever.
  • Drum Brake System Description and Operation
    System Component Description The drum brake system consists of the following: Drum Brake Shoes Applies mechanical output force, from hydraulic brake wheel cylinders, to frict ...

    Parking Brake Cable Replacement (Drum Brake)
    Removal Procedure Remove the front floor console. Refer to Front Floor Console Replacement. Ensure that the parking brake lever is in the fully released position. Us ...

    Other materials:

    Brake Pedal Position Sensor Replacement
    Removal Procedure Remove the instrument panel lower trim pad cover. Refer to Instrument Panel Lower Trim Pad Cover Replacement. Disconnect the brake pedal position sensor electrical connector. Remove the brake pedal position sensor bolt (1). Remove t ...

    Rear Compartment Lid Hinge Torque Rod Replacement
    Rear Compartment Lid Hinge Torque Rod Replacement Callout Component Name Warning: Refer to Hood Hold-Open Device Warning. Preliminary Procedure Open and support the rear compartment lid. Special Tools BO-125 ...

    Cooling System Draining and Filling
    Draining Procedure Warning: To avoid being burned, do not remove the radiator cap or surge tank cap while the engine is hot. The cooling system will release scalding fluid and steam under pressure if radiator cap or surge tank cap is removed while the engine and radi ...

    В© 2014-2024 Copyright www.csmans.com
     
    0.0093