Chevrolet Sonic Repair Manual: Front Differential Carrier Cleaning and Inspection
|
Callout |
Component Name |
|---|---|
|
Caution: After cleaning the transmission components, allow to air dry. Do not use cloth or paper towels in order to dry any transmission components. Lint from the towels can cause component failure. Caution: Do not reuse cleaning solvents. Previously used solvents may deposit sediment which may damage the component. Caution: Keep thrust washers with the gear it was matched to. The thrust washers are selective sizes and it is difficult to identify the proper washer thickness. Improper assembly can cause premature failure of the differential assembly.
|
|
|
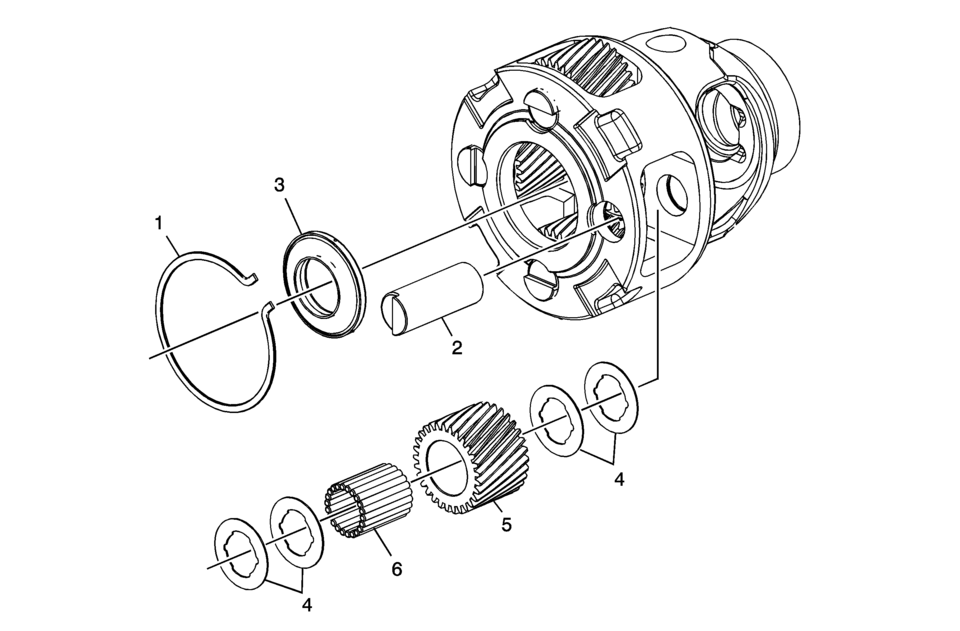
1 |
Front Differential Pinion Gear Shaft Retainer |
|
2 |
Front Differential Pinion Gear Pin |
|
3 |
Sun Gear to Differential Housing Bearing Assembly |
|
4 |
Front Differential Pinion Gear Washer |
|
5 |
Front Differential Pinion Gear |
|
6 |
Front Differential Planetary Pinion Gear Bearing Roller |
 Differential Carrier Removal (6T40/45/50)
Differential Carrier Removal
Callout
Component Name
1
Front Differential Carrier Bearing Assembly
2
...
 Front Differential Carrier Installation (6T30)
Front Differential Carrier Installation
Callout
Component Name
1
Final Drive Sun Gear
2
Diff ...
Other materials:
Front Side Door Window Switch Bezel Replacement (Right Side)
Front Side Door Window Switch Bezel Replacement
Callout
Component Name
Preliminary Procedure
Remove the front side door trim. Refer to Front Side Door Trim Replacement.
1
Front Side Door Window S ...
Front Wheel Drive Shaft Replacement
Special Tools
J-45859 Axle Remover
For regional equivalent tools, refer to Special Tools.
Removal Procedure
Raise and support the vehicle. Refer to Lifting and Jacking the Vehicle.
Remove the front suspension skid plate bolts (1) and the front suspen ...
Engine Front Cover with Oil Pump Replacement
Removal Procedure
Disconnect the battery negative cable. Refer to Battery Negative Cable
Disconnection and Connection.
Set the engine to TDC. Refer to Camshaft Timing Chain Inspection.
Raise and support the vehicle. Refer to Lifting and Jacking the Vehicle.
Remove ...

0.0058